After running in Audit Mode for some period of time, it is easier to then have a better
understanding of the surfing behavior of different user groups and also to better understand the
potential impact of turning on the WCF feature.
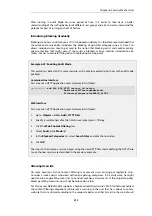
Introducing Blocking Gradually
Blocking websites can disturb users if it is introduced suddenly. It is therefore recommended that
the administrator gradually introduces the blocking of particular categories one at a time. This
allows individual users time to get used to the notion that blocking exists and could avoid any
adverse reaction that might occur if too much is blocked at once. Gradual introduction also
makes it easier to evaluate if the goals of site blocking are being met.
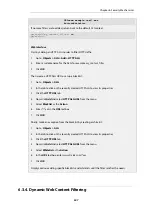
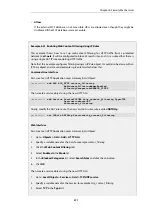
Example 6.22. Enabling Audit Mode
This example is based on the same scenario as the previous example, but now with audit mode
enabled.
Command-Line Interface
First, create an HTTP Application Layer Gateway (ALG) Object:
gw-world:/> add ALG ALG_HTTP content_filtering
WebContentFilteringMode=Audit
FilteringCategories=SEARCH_SITES
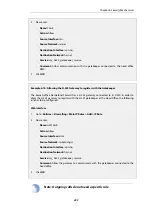
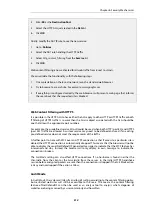
Web Interface
First, create an HTTP Application Layer Gateway (ALG) Object:
1.
Go to: Objects > ALG > Add > HTTP ALG
2.
Specify a suitable name for the ALG, for example
content_filtering
3.
Click the Web Content Filtering tab
4.
Select Audit in the Mode list
5.
In the Blocked Categories list, select Search Sites and click the >> button
6.
Click OK
The steps to then create a service object using the new HTTP ALG and modifying the
NAT
IP rule
to use the new service, are described in the previous example.
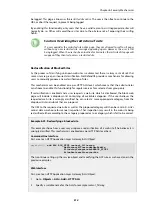
Allowing Override
On some occasions, Active Content Filtering may prevent users carrying out legitimate tasks.
Consider a stock analyst who deals with online gaming companies. In his daily work, he might
need to browse gambling web sites to conduct company assessments. If the corporate policy
blocks gambling web-sites, he will not be able to do his job.
For this reason, NetDefendOS supports a feature called
Allow Override
. With this feature enabled,
the content filtering component will present a warning to the user that he is about to enter a
web site that is restricted according to the corporate policy, and that his visit to the web site will
Chapter 6: Security Mechanisms
513
Содержание NetDefendOS
Страница 30: ...Figure 1 3 Packet Flow Schematic Part III Chapter 1 NetDefendOS Overview 30 ...
Страница 32: ...Chapter 1 NetDefendOS Overview 32 ...
Страница 144: ...Chapter 2 Management and Maintenance 144 ...
Страница 220: ... Enable DHCP passthrough Enable L2 passthrough for non IP protocols 4 Click OK Chapter 3 Fundamentals 220 ...
Страница 267: ... SourceNetwork lannet DestinationInterface any DestinationNetwork all nets 4 Click OK Chapter 3 Fundamentals 267 ...
Страница 284: ...Chapter 3 Fundamentals 284 ...
Страница 360: ...The ospf command options are fully described in the separate NetDefendOS CLI Reference Guide Chapter 4 Routing 360 ...
Страница 392: ...Chapter 4 Routing 392 ...
Страница 396: ...Web Interface 1 Go to Network Ethernet If1 2 Select Enable DHCP 3 Click OK Chapter 5 DHCP Services 396 ...
Страница 419: ... Host 2001 DB8 1 MAC 00 90 12 13 14 15 5 Click OK Chapter 5 DHCP Services 419 ...
Страница 420: ...Chapter 5 DHCP Services 420 ...
Страница 424: ...2 Now enter Name lan_Access Action Expect Interface lan Network lannet 3 Click OK Chapter 6 Security Mechanisms 424 ...
Страница 573: ...Chapter 6 Security Mechanisms 573 ...
Страница 575: ...This section describes and provides examples of configuring NAT and SAT rules Chapter 7 Address Translation 575 ...
Страница 607: ...Chapter 7 Address Translation 607 ...
Страница 666: ...Chapter 8 User Authentication 666 ...
Страница 775: ...Chapter 9 VPN 775 ...
Страница 819: ...Chapter 10 Traffic Management 819 ...
Страница 842: ...Chapter 11 High Availability 842 ...
Страница 866: ...Default Enabled Chapter 13 Advanced Settings 866 ...
Страница 879: ...Chapter 13 Advanced Settings 879 ...

