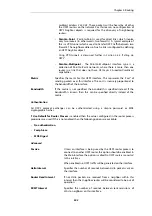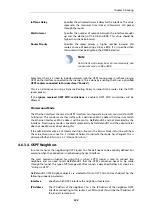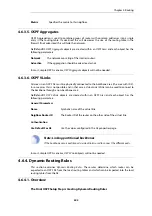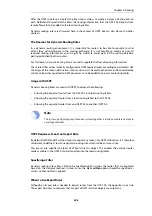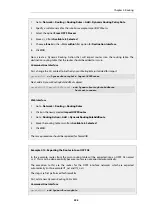
OSPFProcess=as_0
Name=ExportDefRoute
DestinationNetworkIn=all-nets
DestinationInterface=If3
From=RTable
RoutingTable=main
Web Interface
1.
Go to: Network > Routing > Routing Rules > Add > Dynamic Routing Policy Rule
2.
Specify a name for the rule. In this case,
ExportAllNets
3.
Select the option From Routing Table
4.
Move the routing table
main
to the Selected list
5.
Choose all-nets in the ...Or is within filter for Destination Interface
6.
Click OK
Next, create an OSPF Action that will export the filtered route to the specified OSPF AS:
Command-Line Interface
First, change the CLI context to be the
DynamicRoutingRule
just added for export:
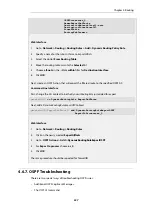
gw-world:/> cc DynamicRoutingRule ExportDefRoute
Next, add a
DynamicRoutingRuleExportOSPF
object:
gw-world:/2(ExportDefRoute)> add DynamicRoutingRuleExportOSPF
ExportToProcess=as_0
Web Interface
1.
Go to: Network > Routing > Routing Rules
2.
Click on the newly created ExportAllNets
3.
Go to: OSPF Actions > Add > DynamicRoutingRuleExportOSPF
4.
For Export to process choose as_0
5.
Click OK
The same procedure should be repeated for firewall B.
4.6.7. OSPF Troubleshooting
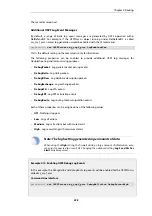
There are two special ways of troubleshooting OSPF issues:
•
Additional OSPF Log Event Messages.
•
The
OSPF
CLI command.
Chapter 4: Routing
357
Содержание NetDefendOS
Страница 30: ...Figure 1 3 Packet Flow Schematic Part III Chapter 1 NetDefendOS Overview 30 ...
Страница 32: ...Chapter 1 NetDefendOS Overview 32 ...
Страница 144: ...Chapter 2 Management and Maintenance 144 ...
Страница 220: ... Enable DHCP passthrough Enable L2 passthrough for non IP protocols 4 Click OK Chapter 3 Fundamentals 220 ...
Страница 267: ... SourceNetwork lannet DestinationInterface any DestinationNetwork all nets 4 Click OK Chapter 3 Fundamentals 267 ...
Страница 284: ...Chapter 3 Fundamentals 284 ...
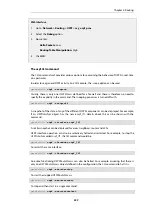
Страница 360: ...The ospf command options are fully described in the separate NetDefendOS CLI Reference Guide Chapter 4 Routing 360 ...
Страница 392: ...Chapter 4 Routing 392 ...
Страница 396: ...Web Interface 1 Go to Network Ethernet If1 2 Select Enable DHCP 3 Click OK Chapter 5 DHCP Services 396 ...
Страница 419: ... Host 2001 DB8 1 MAC 00 90 12 13 14 15 5 Click OK Chapter 5 DHCP Services 419 ...
Страница 420: ...Chapter 5 DHCP Services 420 ...
Страница 424: ...2 Now enter Name lan_Access Action Expect Interface lan Network lannet 3 Click OK Chapter 6 Security Mechanisms 424 ...
Страница 573: ...Chapter 6 Security Mechanisms 573 ...
Страница 575: ...This section describes and provides examples of configuring NAT and SAT rules Chapter 7 Address Translation 575 ...
Страница 607: ...Chapter 7 Address Translation 607 ...
Страница 666: ...Chapter 8 User Authentication 666 ...
Страница 775: ...Chapter 9 VPN 775 ...
Страница 819: ...Chapter 10 Traffic Management 819 ...
Страница 842: ...Chapter 11 High Availability 842 ...
Страница 866: ...Default Enabled Chapter 13 Advanced Settings 866 ...
Страница 879: ...Chapter 13 Advanced Settings 879 ...

