•
Disable the option Enable dial-on-demand
•
Under Advanced, if Add route for remote network is enabled then a new route will be
added for the interface
3.
Click OK
3.4.7. GRE Tunnels
Overview
The
Generic Router Encapsulation
(GRE) protocol is a simple, encapsulating protocol that can be
used whenever there is a need to tunnel traffic across networks and/or through network devices.
GRE does not provide any security features but this means that its use has extremely low
overhead.
Using GRE
GRE is typically used to provide a method of connecting two networks together across a third
network such as the Internet. The two networks being connected together communicate with a
common protocol which is tunneled using GRE through the intervening network. Examples of
GRE usage are:
•
Traversing network equipment that blocks a particular protocol.
•
Tunneling IPv6 traffic across an IPv4 network.
•
Where a UDP data stream is to be multicast and it is necessary to transit through a network
device which does not support multicasting. GRE allows tunneling through the network
device.
GRE Security and Performance
A GRE tunnel does not use any encryption for the communication and is therefore not, in itself,
secure. Any security must come from the protocol being tunneled. The advantage of GRE's lack
of encryption is the high performance which is achievable because of the low traffic processing
overhead.
The lack of encryption can be acceptable in some circumstances if the tunneling is done across
an internal network that is not public.
Setting Up GRE
Like other tunnels in NetDefendOS such as an IPsec tunnel, a GRE Tunnel is treated as a logical
interface by NetDefendOS, with the same filtering, traffic shaping and configuration capabilities
as a standard interface. The GRE options are:
•
IP Address
This is the IPv4 address of the inside of the tunnel on the local side. This cannot be left blank
and must be given a value.
Chapter 3: Fundamentals
205
Содержание NetDefendOS
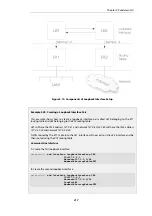
Страница 30: ...Figure 1 3 Packet Flow Schematic Part III Chapter 1 NetDefendOS Overview 30 ...
Страница 32: ...Chapter 1 NetDefendOS Overview 32 ...
Страница 144: ...Chapter 2 Management and Maintenance 144 ...
Страница 220: ... Enable DHCP passthrough Enable L2 passthrough for non IP protocols 4 Click OK Chapter 3 Fundamentals 220 ...
Страница 267: ... SourceNetwork lannet DestinationInterface any DestinationNetwork all nets 4 Click OK Chapter 3 Fundamentals 267 ...
Страница 284: ...Chapter 3 Fundamentals 284 ...
Страница 360: ...The ospf command options are fully described in the separate NetDefendOS CLI Reference Guide Chapter 4 Routing 360 ...
Страница 392: ...Chapter 4 Routing 392 ...
Страница 396: ...Web Interface 1 Go to Network Ethernet If1 2 Select Enable DHCP 3 Click OK Chapter 5 DHCP Services 396 ...
Страница 419: ... Host 2001 DB8 1 MAC 00 90 12 13 14 15 5 Click OK Chapter 5 DHCP Services 419 ...
Страница 420: ...Chapter 5 DHCP Services 420 ...
Страница 424: ...2 Now enter Name lan_Access Action Expect Interface lan Network lannet 3 Click OK Chapter 6 Security Mechanisms 424 ...
Страница 573: ...Chapter 6 Security Mechanisms 573 ...
Страница 575: ...This section describes and provides examples of configuring NAT and SAT rules Chapter 7 Address Translation 575 ...
Страница 607: ...Chapter 7 Address Translation 607 ...
Страница 666: ...Chapter 8 User Authentication 666 ...
Страница 775: ...Chapter 9 VPN 775 ...
Страница 819: ...Chapter 10 Traffic Management 819 ...
Страница 842: ...Chapter 11 High Availability 842 ...
Страница 866: ...Default Enabled Chapter 13 Advanced Settings 866 ...
Страница 879: ...Chapter 13 Advanced Settings 879 ...

