E
N
G
L
IS
H
Quick Installation Guide
DSL-604+
802.11b Wireless ADSL Router
Please refer to the User’s Guide for more detailed information.
Use this guide to install the Router and establish a connection to the Internet. To set up the Router you must have
an Ethernet-enabled computer and a web browser with JavaScript enabled.
For instructions on setting up and using the wireless interface please read the instructions provided in the User’s
Guide.
1
Connect the Cables and Power
A.
B.
C.
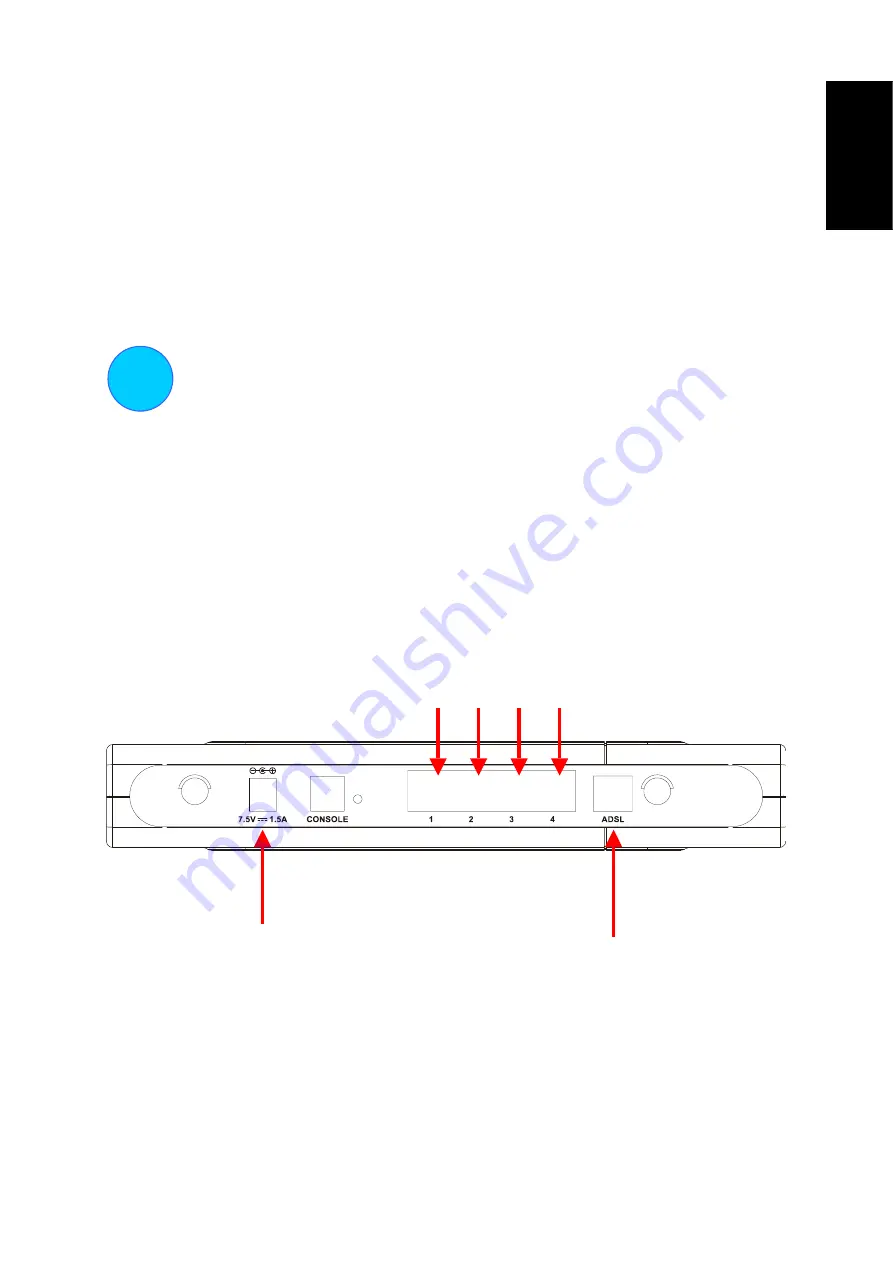
Use the power adapter included with the Router and connect it to a suitable power source. The green
power LED on the front of the device should light up immediately and remain lit. The Status LED will
light also light steady green during the power on self-test.
With the unit powered on, insert one end of the included Ethernet cable into any Ethernet port and the
other end into the Ethernet port on your computer. The LED for that port should light green within a few
seconds. If the Ethernet indicator does not light, check the cable connections to make sure the connectors
are firmly in place.
Now connect the telephone cable to the ADSL port on the back of the device. Connect the other end of
the cable to the telephone wall jack or low pass filter device (microfilter or splitter) as instructed by your
service provider.
B.
Ethernet ports:
use any port to
connect to your
computer
A.
Plug in power adapter here. Plug the
other end into a power strip or wall
socket.
C.
ADSL port:
Plug in ADSL cable here
1


