background image

59

D-Link DAP-1365 User Manual

Appendix A - Wireless Basics

Tips

Here are a few things to keep in mind when you are installing your N300 Wi-Fi Range Extender with Power Passthrough.

Centralize the extender’s location


For best performance, make sure you place the extender in a centralized location within your desired usage area. Try to place the 

extender so that there are minimal obstructions between it and the uplink router. If possible, use an elevated power outlet, so the 

signal can be dispersed more easily. If you have a large home or usage area, you may need several extenders in order to achieve 

optimal coverage. 

Eliminate Interference


Place home appliances such as cordless telephones, microwaves, and televisions as far away as possible from the extender. This can 

significantly reduce any interference that the appliances might cause since they operate on same frequency.

Security


Don’t let your neighbors or intruders connect to your wireless network. Secure your wireless network by utilizing the WPA or WEP 

security feature on the extender and uplink router. Refer to the relevant sections of this manual for further details. 


Содержание DAP-1365

Страница 1: ...DAP 1365 User Manual N300 Wi Fi Range Extender with Power Passthrough Version 1 00 2016 3 1 ...

Страница 2: ...n the U S and other countries App StoreSM is a service mark of Apple Inc Chrome browser Google Play and Android are trademarks of Google Inc Internet Explorer Windows and the Windows logo are trademarks of the Microsoft group of companies Copyright 2016 by D Link Corporation All rights reserved This publication may not be reproduced in whole or in part without prior expressed written permission fr...

Страница 3: ...15 QRS Mobile App Setup 16 Web based Setup 21 Setup Wizard 22 Connecting Your Device via WPS 23 WPS Successful 24 WPS Unsuccessful 24 Extend an Existing Network 25 Add Wireless to Your Wired Network 28 Configure Administrator Password 30 Save Your Configuration 31 Configuration 32 Home 32 Uplink Router 33 DAP 1365 34 Connected Clients 35 Settings 36 Extender Settings 36 Network Settings 37 Autocon...

Страница 4: ...iii D Link DAP 1365 User Manual Table of Contents Windows Vista 53 Troubleshooting 56 Wireless Basics 58 Tips 59 Technical Specifications 60 GPL Code Statement 61 Regulatory Statements 76 ...

Страница 5: ...n 1 Product Overview Package Contents Wi Fi Configuration Note If any of the above items are missing please contact your reseller DAP 1365 N300 Wi Fi Range Extender with Power Passthrough Wi Fi Configuration Card Quick Installation Guide ...

Страница 6: ...es Web based Configuration Utility Requirements A Computer or Mobile Device with the following Windows Apple Mac OS or Linux based operating system Wireless adapter or Wi Fi functionality An Apple iPhone iPod touch iPad or Android mobile device Browser Requirements Internet Explorer 10 or later Firefox 28 or later Safari 6 or later Google Chrome 28 0 or later System Requirements ...

Страница 7: ... connect the DAP 1365 to an uplink router configure the extended wireless network and manage the administrative settings The setup wizard will even guide you through the setup process getting your extended wireless network up and running in no time Alternatively connect an Ethernet cable to your existing network infrastructure to quickly and easily create a wireless network Compatibility The DAP 1...

Страница 8: ... you to reach the farthest corners of your home or office The extended network can simply use the same network credentials as the existing network or you can specify a different network name and password giving you the flexibility to control network access You may also use the DAP 1365 as a wireless access point by connecting an Ethernet cable ExtendYourWirelessNetworkusingWi Fi CreateaWirelessNet...

Страница 9: ...rical devices using this power passthrough outlet 3 Status WPS LED This LED indicates the current status of the DAP 1365 as detailed on the next page 4 Signal Indicator LED The more lit green bars on the Signal Indicator LED the better the wireless signal to the host network A single solid amber LED indicates a weak Wi Fi signal Refer to Wireless Signal Strength Indicator LED on page 8 ...

Страница 10: ...ssing the WPS button for 1 second allows you to connect with Wi Fi clients using Wi Fi Protected Setup Refer to WPS PBC Configuration on page 15 for more information 2 LAN Connect an Ethernet cable if you are adding wireless to an existing wired network 3 Reset Button Use an unfolded paperclip to press and hold the reset button on the bottom of DAP 1365 for 10 seconds ...

Страница 11: ...he DAP 1365 is receiving power and connected to a host network Blinking WPS mode is active Red Solid The DAP 1365 is booting or an error has occurred Amber Blinking The DAP 1365 is not connected to a host network None Off Device is not receiving power Check the power outlet Status WPS LED Indicator Status WPS LED Indicator ...

Страница 12: ...t network If the Signal Indicator LED has a single amber bar after the connection process has finished the DAP 1365 has established a poor quality connection The more lit bars on the Signal Indicator LED the better the wireless signal To improve the connection quality the DAP 1365 should be relocated closer to the source wireless router Poor Ok Good Best Wireless Signal Strength Indicator LED ...

Страница 13: ...r your DAP 1365 This information is printed on the specification sticker on the back of the device You will need this information to connect your computer or mobile device to the default network SSID of your DAP 1365 This information is also provided on theWi Fi configuration card Hardware Overview Back ...

Страница 14: ...eet thick 0 5 meters at a 45 degree angle appears to be almost 3 feet 1 meter thick At a 2 degree angle it looks over 42 feet 14 meters thick Position devices so that the signal will travel straight through a wall or ceiling instead of at an angle for better reception 3 Building materials make a difference A solid metal door or aluminum studs may have a negative effect on range Try to position ext...

Страница 15: ...lectrical outlets that are not controlled by a wall switch to avoid accidentally turning off power to the device 2 To help prevent electrical shock be sure to plug the power cables into properly grounded electrical outlets 3 The Extender is designed to help ensure proper grounding Do not use adapter plugs or remove the grounding prong from the cable 4 Do not exceed the circuit load rating listed o...

Страница 16: ...ean it with liquids or solvents To clean the device disconnect it from the power outlet and use a damp towel 4 Keep the device out of direct sunlight 5 Do not cover or block the vents on the device 6 Make sure that the device has adequate room for ventilation 8 Avoid placing the device near a heater or radiator 9 The device should be located only where sufficient ventilation can be ensured 10 The ...

Страница 17: ...before plugging in the extender Position Antennas Locate your DAP 1365 to an area which you wish to extendWi Fi to Find a location Plug in the DAP 1365 to an outlet or power strip TheWPS Status LED will immediately activate to indicate the device is booting up Plug in Extender Hardware Setup Outlet ...

Страница 18: ...oid device or iPhone iPad or iPod touch to configure your extender Refer to QRS Mobile App Setup on page 16 for setup instructions D Link Setup Wizard This wizard will launch when you log into the Extender s web configuration utility for the first time Refer to Setup Wizard on page 22 for setup instructions Manual Configuration Advanced users who wish to manually setup extender or adjust its setti...

Страница 19: ...wireless router or access point The Status WPS LED on the DAP 1365 will start to blink green Please allow up to two minutes for the process to finish The Status WPS LED will turn solid green once the DAP 1365 has connected successfully to the uplink wireless network The new extension network will be named Source SSID EXT The password be the same as the source network s WPS Button WPS Button Blinki...

Страница 20: ...e Scan for theWi Fi name SSID as listed on the supplied configuration card Select and then enter yourWi Fi password Step 3 Once wirelessly connected to the extender launch the QRS Mobile app from the Home screen of your device Note ThefollowingstepsshowtheiOSinterfaceoftheQRSMobileapp Ifyouare usinganAndroiddevice theappearancemaybedifferenttothatofthescreenshots buttheprocessisthesame Step 1 Sear...

Страница 21: ...17 D Link DAP 1365 User Manual Section 3 Configuration Click Start to continue Click Next to continue ...

Страница 22: ...tion Enter a password for the existingWi Fi network Click Next to continue QRS Mobile will first detect your DAP 1365 then scan for available Wi Fi networks Select the network you wish to extend Tap Rescan if your network doesn t show up the first time ...

Страница 23: ...r Manual Section 3 Configuration Create an admin password for the DAP 1365 s web based configuration utility Click Next to continue Enter a network name SSID and password for the extended Wi Fi network Click Next to continue ...

Страница 24: ... connect to the extended network you can now change your mobile device and laptopWi Fi settings to the wireless network name and password you just created You can also share yourWi Fi information by clicking Share by E mail A summary of your settings will be displayed Click Save to reboot the device and to complete the setup ...

Страница 25: ...on is not supported for Android Devices Please use the QRS Mobile Application to configure your device The default IP address is 192 168 0 50 Once your DAP 1365 connects to the host network it will be assigned a new IP address based on your network s DHCP settings You will need to log in to your router to see what IP address is assigned to your DAP 1365 For multiple DAP 1365s go to http dlinkapxxx...

Страница 26: ...ish to set up your extender using the setup wizard click the Uplink Router icon The setup wizard is designed to guide you through a step by step process to configure your new DAP 1365 N300Wi Fi Range Extender with Power Passthrough to extend your wireless network and connect to the Internet The steps are Step 1 ConnectingYour Device Step 2 ConfiguringYour Settings Step 3 Setting a Password forYour...

Страница 27: ...ce has a physical or virtualWPS button press or enable it within the 120 seconds allotted by the countdown timer If you do not wish to useWPS or your existing networking device does not have a WPS feature select one of the alternative configuration options Extend an existing network see page 25 for more information or Add wireless to your wired network see page 28 for further setup information Con...

Страница 28: ...proceed to Configure Administrator Password refer to page 30 for more information or click Back to return to the previous step Wireless network names and passwords are shown for example only WPS Successful WPS Unsuccessful If theWPS countdown timer expires and no connection to an uplink wireless network could be established you may press the retry button to attempt the process again or if you do n...

Страница 29: ...If the wireless network you wish to extend was detected by the scan click on the network to select it The extender will automatically forward you to the next step If the network you would like to extend was not detected by the scan click the Manual button Note If the wireless network you would like to extend to was not detected by the scan your DAP 1365 might be out of range and you may need to re...

Страница 30: ...continue on to configure your extension network settings or click Back to return to the previous step If you chose Manual enter theWireless Network Name type of Security and Password of the existingWi Fi network you wish to connect to Click Next to continue on to configure your extension network settings or click Back to return to the previous step dlinkrouter ...

Страница 31: ... may now rename the 2 4 GHz network extension network and create a new password if you wish Please be sure to note any changes you make as these credentials will be required for wireless clients wishing to join your network Click Next to proceed to Configure Administrator Password refer to page 30 for more information or click Back to return to the previous step Wireless network names and password...

Страница 32: ...gh adding a wireless network to an existing wired network Click Add wireless to your wired network to proceed Connect an Ethernet cable to your DAP 1365 if you have not already done so After making the connection you will automatically be forwarded to the next step If you haven t connected an Ethernet cable yet but will do so later click skip ...

Страница 33: ...may now rename the 2 4 GHz network extension network and create a new password if you wish Please be sure to note any changes you make as these credentials will be required for wireless clients wishing to join your network Click Next to proceed to Configure Administrator Password refer to page 30 for more information or click Back to return to the previous step Wireless network names and passwords...

Страница 34: ...inistrator Password In order to secure the extender s web configuration utility please enter a new password You will be prompted for this password each time you want to use the extender s web configuration utility Click Next to continue onward to SaveYour Configuration ...

Страница 35: ... information for future reference Click Finish to close the wizard You will be asked if you wish to create a bookmark to the web configuration utility Your changes will be saved and the extender will reboot Devices may be connected to the new wireless extension network s once the extender successfully reboots dlink0692 SecurePassword4WiFi Wireless network names and passwords are shown for example ...

Страница 36: ...ection present or there is a connection error If there s no active uplink connection click on the Uplink Router icon to start the setup wizard This icon shows the status of the connection to the uplink router It is grey if the DAP 1365 is not connected to an uplink router Once connected click on it to see its connection details Click on this icon to see the network and extended Wi Fi details of th...

Страница 37: ...3 D Link DAP 1365 User Manual Section 3 Configuration Upon clicking the Uplink Router icon you will see the connection type network status connection up time network name SSID and password Uplink Router ...

Страница 38: ...endedWi Fi Network settings are displayed at the bottom of the page Your Extender s MAC IPv4 subnet mask default gateway and DNS Server addresses are displayed To change the Network settings refer to page 37 Your Extender s extensionWi Fi network name and password are also displayed To change the extensionWi Fi network settings refer to page 36 DAP 1365 ...

Страница 39: ...Configuration Connected Clients Click on the Connected Clients icon to view details about the extender and its wireless settings On this page you can see all the clients currently connected to the extender along with their IP and MAC addresses ...

Страница 40: ...ernetconnectionunderthis SSID You may also manually set the SSID of the extended network Selectthetypeofwirelesssecurityyouwishtousefortheextendednetwork Choose None or WPA WPA2 Personal Enter the password or network key that you wish to use for the extended network Select Auto or any channel from 1 to 13 for use with this network SelectAuto20 40or20MHzforthebandwidthyouwishthisnetworktouse Enable...

Страница 41: ...gs section of the Network Settings page allows you to configure both IPv4 and IPv6 settings that will be used by the DAP 1365 s extended network My LAN Connection is IP Address Subnet Mask Gateway Address Primary DNS Server Secondary DNS Server Here you can select whether you want the IP to have a Dynamic IP or Static IP address If you select Dynamic IP the options below will not be available Ente...

Страница 42: ...s from the uplink router You can select to obtain IPv6 DNS server information automatically or you can select to configure DNS servers manually by clicking on the radio dial next to the option For manual settings enter the primary IPv6 DNS server address For manual settings enter the secondary IPv6 DNS server address This is optional but will provide backup if the primary server fails IPv6 Device ...

Страница 43: ...o the DAP 1365 Enter the IPv6 address that you want to assign to the extended network AP This address should be outside of the uplink router s DHCP address pool Enter the length of the IPv6 subnet prefix Enter the default gateway Enter the primary IPv6 DNS server address EnterthesecondaryIPv6DNSserveraddress Thisisoptional but will provide backup if the primary server fails Static IPv6 IPv6 Device...

Страница 44: ...ection 3 Configuration My IPv6 Connection is LAN IPv6 Link Local Address Select Link local only to only set an IPv6 address for the local network The link local address of the DAP 1365 Link local Only IPv6 Device Management Interface ...

Страница 45: ...Admin Click Save at any time to save the changes you have made on this page Enter the Admin password Click on the slider to enable graphical authentication or CAPTCHA This provides an extra layer of security by requiring you to enter a code that is displayed on screen This can help prevent unauthorized users from gaining access to your wireless network using automated methods Admin Password Enable...

Страница 46: ... system settings to factory default settings This will erase all currently stored settings Click Reboot to reboot the DAP 1365 Save Settings To Local Hard Drive Load Settings From Local Hard Drive Restore to Factory Default Settings Reboot the Device System This page allows you to save or restore your system configuration reset or reboot the DAP 1365 To access this page click the Management drop d...

Страница 47: ...de Click Save at any time to save the changes you have made on this page Firmware Information Upgrade Manually Click Select File to locate the firmware file on your computer and perform a manual firmware upgrade Upgrade Firmware This section displays the currently installed firmware version as well as the date on which the current firmware version was released Click Check For New Firmware to find ...

Страница 48: ...t Statistics Click Clear to reset the statistics Statistics The Blue line indicates the upload speeds and the red line indicates the download speeds The table displays the following in real time Total Packets Total Byte s Total Kbit s Kbits sec Pressing the Clear button resets the statistics LAN Wi Fi and Extended Wi Fi Click on the various tabs to display the statistics for the various interfaces...

Страница 49: ...to connect to the DAP 1365 Please refer to the user manual for the wireless device you want to connect to make sure you understand how to enableWPS Once you know follow the steps below Step 1 Press theWPS button on the DAP 1365 for about 1 second The Status WPS LED on the DAP 1365 will start blinking green You can also use theWPS option in the setup wizard section of the web interface Step 2 Withi...

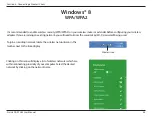
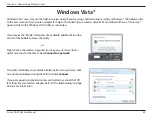
Страница 50: ...can find the default network name and Wi Fi password here Otherwise refer to the product label for the default Wi Fi network SSID and password or enter the Wi Fi credentials set during the product configuration To join an existing network locate the wireless network icon in the taskbar next to the time display and click on it Wireless Icon Clicking on this icon will display a list of wireless netw...

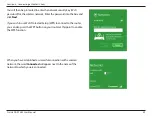
Страница 51: ...check box You will then be prompted to enter theWi Fi password network security key for the wireless network Enter the password into the box and click Next to connect to the network Your computer will now automatically connect to this wireless network when it is detected You can also useWi Fi Protected Setup WPS to connect to the router Press the WPS button on your D Link device and you will be au...

Страница 52: ...eless adapter If you are joining an existing network you will need to know the security key Wi Fi password being used To join an existing network locate the wireless network icon in the taskbar next to the time display Wireless Icon Clicking on this icon will display a list of wireless networks which are within connecting proximity of your computer Select the desired network by clicking on the net...

Страница 53: ...k Enter the password into the box and click Next If you wish to useWi Fi Protected Setup WPS to connect to the router you can also press theWPS button on your router at this point to enable theWPS function When you have established a successful connection with a wireless network the word Connected will appear next to the name of the network to which you are connected ...

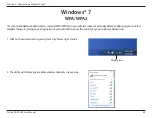
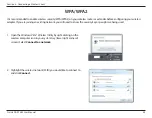
Страница 54: ...your wireless router or extender before configuring your wireless adapter If you are joining an existing network you will need to know the security key or passphrase being used 1 Click on the wireless icon in your system tray lower right corner 2 The utility will display any available wireless networks in your area Wireless Icon WPA WPA2 ...

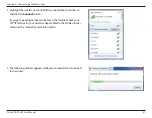
Страница 55: ...ould like to connect to and click the Connect button If you get a good signal but cannot access the Internet check your TCP IP settings for your wireless adapter Refer to theWireless Basics section in this manual for more information 4 The following window appears while your computer tries to connect to the router ...

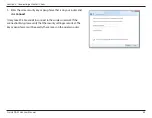
Страница 56: ...same security key or passphrase that is on your router and click Connect It may take 20 30 seconds to connect to the wireless network If the connection fails please verify that the security settings are correct The key or passphrase must be exactly the same as on the wireless router ...

Страница 57: ...owsVista utility as seen below Right click on the wireless computer icon in your system tray lower right corner next to the time Select Connect to a network If you receive the Wireless Networks Are Available bubble click on the center of the bubble to access the utility or The utility will display any available wireless networks in your area Click on a network displayed using the SSID and click Co...

Страница 58: ...Vista Wireless Utility by right clicking on the wireless computer icon in your system tray lower right corner of screen Select Connect to a network It is recommended to enable wireless security WPA WPA2 on your wireless router or extender before configuring your wireless adapter If you are joining an existing network you will need to know the security key or passphrase being used ...

Страница 59: ...same security key or passphrase that is on your router and click Connect It may take 20 30 seconds to connect to the wireless network If the connection fails please verify that the security settings are correct The key or passphrase must be exactly the same as on the wireless router ...

Страница 60: ...evice itself Your computer must be on the same IP subnet to connect to the web based utility Make sure you have an updated Java enabled web browser We recommend the following Internet Explorer 10 or later Firefox 28 or later Safari 6 or later Google Chrome 28 0 or later Make sure that you are connected to the same wireless network which is listed on the base of the DAP 1365 If you have an active w...

Страница 61: ...link router you can try accessing the web interface using the default IP address http 192 168 0 50 If you still cannot access the configuration unplug the extender from the power outlet for at least 10 seconds and plug it back in Wait about 30 seconds and try accessing the configuration If you have multiple computers try connecting using a different computer 2 What can I do if I forgot my password...

Страница 62: ...s LANs are used increasingly in both home and office environments and public areas such as airports coffee shops and universities Innovative ways to utilizeWLAN technology are helping people to work and communicate more efficiently Increased mobility and the absence of cabling and other fixed infrastructure have proven to be beneficial for many users Wireless users can use the same applications th...

Страница 63: ...et so the signal can be dispersed more easily If you have a large home or usage area you may need several extenders in order to achieve optimal coverage Eliminate Interference Place home appliances such as cordless telephones microwaves and televisions as far away as possible from the extender This can significantly reduce any interference that the appliances might cause since they operate on same...

Страница 64: ... Advanced Features QRS Mobile setup app for iOS and Android devices Device Management Web UI Diagnostic LEDs Status WPS 3 Segment Wi Fi Signal Strength Indicator Operating Temperature 0 to 40 C 32 to 104 F Storage Temperature Storage 20 to 65 C 4 to 149 F Operating Humidity 0 to 90 non condensing Storage Humidity 5 to 95 non condensing Power Input AC 100 240 V Maximum Power Consumption 2 8 W Certi...

Страница 65: ...L code and the LGPL code for this product and the terms of the GPL and LGPL WRITTEN OFFER FOR GPL AND LGPL SOURCE CODE Where such specific license terms entitle you to the source code of such software D Link will provide upon written request via email and or traditional paper mail the applicable GPL and LGPLsource code files via CD ROM for a nominal cost to cover shipping and media charges as allo...

Страница 66: ...lities to respect the freedom of others For example if you distribute copies of such a program whether gratis or for a fee you must pass on to the recipients the same freedoms that you received You must make sure that they too receive or can get the source code And you must show them these terms so they know their rights Developers that use the GNU GPL protect your rights with two steps 1 assert c...

Страница 67: ...ulting work is called a modified version of the earlier work or a work based on the earlier work A covered work means either the unmodified Program or a work based on the Program To propagate a work means to do anything with it that without permission would make you directly or secondarily liable for infringement under applicable copyright law except executing it on a computer or modifying a priva...

Страница 68: ...d so on of the specific operating system if any on which the executable work runs or a compiler used to produce the work or an object code interpreter used to run it The Corresponding Source for a work in object code form means all the source code needed to generate install and for an executable work run the object code and to modify the work including scripts to control those activities However i...

Страница 69: ...pyright Those thus making or running the covered works for you must do so exclusively on your behalf under your direction and control on terms that prohibit them from making any copies of your copyrighted material outside their relationship with you Conveying under any other circumstances is permitted solely under the conditions stated below Sublicensing is not allowed section 10 makes it unnecess...

Страница 70: ...r section 7 This requirement modifies the requirement in section 4 to keep intact all notices c You must license the entire work as a whole under this License to anyone who comes into possession of a copy This License will therefore apply along with any applicable section 7 additional terms to the whole of the work and all its parts regardless of how they are packaged This License gives no permiss...

Страница 71: ...copies of the object code with a copy of the written offer to provide the Corresponding Source This alternative is allowed only occasionally and noncommercially and only if you received the object code with such an offer in accord with subsection 6 b d Convey the object code by offering access from a designated place gratis or for a charge and offer equivalent access to the Corresponding Source in...

Страница 72: ...ered with solely because modification has been made If you convey an object code work under this section in or with or specifically for use in a User Product and the conveying occurs as part of a transaction in which the right of possession and use of the User Product is transferred to the recipient in perpetuity or for a fixed term regardless of how the transaction is characterized the Correspond...

Страница 73: ...ight permission Notwithstanding any other provision of this License for material you add to a covered work you may if authorized by the copyright holders of that material supplement the terms of this License with terms a Disclaiming warranty or limiting liability differently from the terms of sections 15 and 16 of this License or b Requiring preservation of specified reasonable legal notices or au...

Страница 74: ...ions the above requirements apply either way 8 Termination You may not propagate or modify a covered work except as expressly provided under this License Any attempt otherwise to propagate or modify it is void and will automatically terminate your rights under this License including any patent licenses granted under the third paragraph of section 11 However if you cease all violation of this Licen...

Страница 75: ...modify and propagate that work subject to this License You are not responsible for enforcing compliance by third parties with this License An entity transaction is a transaction transferring control of an organization or substantially all assets of one or subdividing an organization or merging organizations If propagation of a covered work results from an entity transaction each party to that tran...

Страница 76: ...or covenant not to sue for patent infringement To grant such a patent license to a party means to make such an agreement or commitment not to enforce a patent against the party If you convey a covered work knowingly relying on a patent license and the Corresponding Source of the work is not available for anyone to copy free of charge and under the terms of this License through a publicly available...

Страница 77: ...nfringement that may otherwise be available to you under applicable patent law 12 No Surrender of Others Freedom If conditions are imposed on you whether by court order agreement or otherwise that contradict the conditions of this License they do not excuse you from the conditions of this License If you cannot convey a covered work so as to satisfy simultaneously your obligations under this Licens...

Страница 78: ...tional or different permissions However no additional obligations are imposed on any author or copyright holder as a result of your choosing to follow a later version 15 Disclaimer of Warranty THERE IS NO WARRANTY FOR THE PROGRAM TO THE EXTENT PERMITTED BY APPLICABLE LAW EXCEPT WHEN OTHERWISE STATEDINWRITINGTHECOPYRIGHTHOLDERSAND OROTHERPARTIESPROVIDETHEPROGRAM ASIS WITHOUTWARRANTYOF ANYKIND EITHE...

Страница 79: ...ty and limitation of liability provided above cannot be given local legal effect according to their terms reviewingcourtsshallapplylocallawthatmostcloselyapproximatesanabsolutewaiverofallcivilliabilityinconnection with the Program unless a warranty or assumption of liability accompanies a copy of the Program in return for a fee ...

Страница 80: ...tries except in France where restrictive use applies This device may not be used for setting up outdoor radio links in France and in some areas the RF output power may be limited to 10 mW EIR P in the frequency range of 2454 2483 5 MHz For detailed information the end user should contact the national spectrum authority in France This equipment may be operated in AL AD BE BG DK DE FI FR GR GW IS IT...

Страница 81: ...eloupe Martinique St Pierre et Miquelon Mayotte 2454 2483 5 MHz 100 mW indoor 10 mW outdoor Reunion et Guyane 2400 2483 5 MHz 100 mW Rest of EU community 2420 2483 5 MHz 100 mW R TTE 1999 5 EC WLAN 2 4 2 4835 GHz IEEE 802 11b g n Spectrum Regulation MHz Europa ETSI max EIRP Innenbereich max EIRP Außenbereich Europa 2400 2483 5 MHz 100 mW 100 mW Frankreich 2400 2454 MHz 100 mW 100 mW 2454 2483 5 MH...

Страница 82: ... Spanish Por medio de la presente D Link declara que el DAP 1365 cumple con los requisitos esenciales y cualesquiera otras disposiciones aplicables o exigibles de la Directiva 1999 5 CE Ελληνική Greek ΜΕ ΤΗΝ ΠΑΡΟΥΣΑ D Link ΔΗΛΩΝΕΙ ΟΤΙ DAP 1365 ΣΥΜΜΟΡΦΩΝΕΤΑΙ ΠΡΟΣ ΤΙΣ ΟΥΣΙΩΔΕΙΣ ΑΠΑΙΤΗΣΕΙΣ ΚΑΙ ΤΙΣ ΛΟΙΠΕΣ ΣΧΕΤΙΚΕΣ ΔΙΑΤΑΞΕΙΣ ΤΗΣ ΟΔΗΓΙΑΣ 1999 5 ΕΚ Français French Par la présente D Link déclare que l app...

Страница 83: ... postanowieniami Dyrektywy 1999 5 EC Português Portuguese D Link declara que este DAP 1365 está conforme com os requisitos essenciais e outras disposições da Directiva 1999 5 CE Slovensko Slovenian D Link izjavlja da je ta DAP 1365 v skladu z bistvenimi zahtevami in ostalimi relevantnimi določili direktive 1999 5 ES Slovensky Slovak D Link týmto vyhlasuje že DAP 1365 spĺňa základné požiadavky a vš...

Страница 84: ...tion or other notices including copyright notices and patent markings if any To reduce the risk of bodily injury electrical shock fire and damage to the device and other equipment observe the following precautions Power Sources Observe and follow service markings Do not push any objects into the openings of your device unless consistent with the authorized operation of the device Doing so can caus...

Страница 85: ...e prong plugs to help ensure proper grounding Do not use adapter plugs or remove the grounding prong from a cable If you must use an extension cable use a 3 wire cable with properly grounded plugs Observe extension cable and power strip ratings Ensure that the total ampere rating of all products plugged into the extension cable or power strip does not exceed 80 percent of the ampere ratings limit ...

Страница 86: ...nvironment If the device gets wet see the appropriate section in your troubleshooting guide or contact your trained service provider Use the device only with approved equipment Move products with care ensure that all casters and or stabilizers are firmly connected to the system Avoid sudden stops and uneven surfaces Environment Do not use this device near water e g near a bathtub sink laundry tub ...

Страница 87: ...from its shipping carton do not remove the component from the antistatic packing material until you are ready to install the component in your system Just before unwrapping the antistatic packaging be sure to discharge static electricity from your body 2 When transporting a sensitive component first place it in an antistatic container or packaging 3 Handle all sensitive components in a static safe...

Страница 88: ...ssible by using recyclable low toxic materials in both products and packaging D Link recommends that you always switch off or unplug your D Link products when they are not in use By doing so you will help to save energy and reduce CO2 emissions To learn more about our environmentally responsible products and packaging please visit www dlinkgreen com DEUTSCH DE Dieses Symbol auf dem Produkt oder de...

Страница 89: ...signifie que conformément aux lois et règlementations locales ce produit ne doit pas être éliminé avec les déchets domestiques mais recyclé Veuillez le rapporter à un point de collecte prévu à cet effet par les autorités locales certains accepteront vos produits gratuitement En recyclant le produit et son emballage de cette manière vous aidez à préserver l environnement et à protéger la santé de l...

Страница 90: ...ca sus productos para que sean lo más ecológicos posible utilizando materiales reciclables y de baja toxicidad tanto en los productos como en el embalaje D Link recomienda apagar o desenchufar los productos D Link cuando no se estén utilizando Al hacerlo contribuirá a ahorrar energía y a reducir las emisiones de CO2 Para obtener más información acerca de nuestros productos y embalajes ecológicos v...

Страница 91: ...ke wetgeving niet mag worden weggegooid met het huishoudelijk afval maar voor recyclage moeten worden ingeleverd Zodra het product het einde van de levensduur heeft bereikt dient u het naar een inzamelpunt te brengen dat hiertoe werd aangeduid door uw plaatselijke autoriteiten sommige autoriteiten accepteren producten zonder dat u hiervoor dient te betalen Door het product en de verpakking op deze...

Страница 92: ...W celu zminimalizowania takiego wpływu firma D Link konstruuje i wytwarza swoje produkty w taki sposób aby były one jak najbardziej przyjazne środowisku stosując do tych celów materiały nadające się do powtórnego wykorzystania charakteryzujące się małą toksycznością zarówno w przypadku samych produktów jak i opakowań Firma D Link zaleca aby Państwo zawsze prawidłowo wyłączali z użytku swoje produk...

Страница 93: ...rtási hulladékkal együtt hanem újrahasznosításra kell küldeni Kérjük hogy a termék élettartamának elteltét követően vigye azt a helyi hatóság által kijelölt gyűjtőhelyre A termékek egyes helyeken ingyen elhelyezhetők A termék és a csomagolás újrahasznosításával segíti védeni a környezetet és az emberek egészségét A D Link és a környezet A D Linknél megértjük és elkötelezettek vagyunk a műveleteink...

Страница 94: ...rmasjon angående våre miljøansvarlige produkter og forpakninger kan du gå til www dlinkgreen com DANSK DK Dette symbol på produktet eller emballagen betyder at dette produkt i henhold til lokale love og regler ikke må bortskaffes som husholdningsaffald mens skal sendes til genbrug Indlever produktet til et indsamlingssted som angivet af de lokale myndigheder når det er nået til slutningen af dets ...

Страница 95: ...suunnittelee ja valmistaa tuotteensa mahdollisimman ympäristöystävällisiksi käyttämällä kierrätettäviä alhaisia pitoisuuksia haitallisia aineita sisältäviä materiaaleja sekä tuotteissaan että niiden pakkauksissa Suosittelemme että irrotat D Link tuotteesi virtalähteestä tai sammutat ne aina kun ne eivät ole käytössä Toimimalla näin autat säästämään energiaa ja vähentämään hiilidioksiidipäästöjä Lu...

Страница 96: ... deverá ser eliminado juntamente com o lixo doméstico mas enviado para a reciclagem Transporte o para um ponto de recolha designado pelas suas autoridades locais quando este tiver atingido o fim da sua vida útil alguns destes pontos aceitam produtos gratuitamente Ao reciclar o produto e respectiva embalagem desta forma ajuda a preservar o ambiente e protege a saúde humana A D Link e o ambiente Na ...

Отзывы: