34
D-Link DAP-1665 User Manual
Section 3 - Configuration
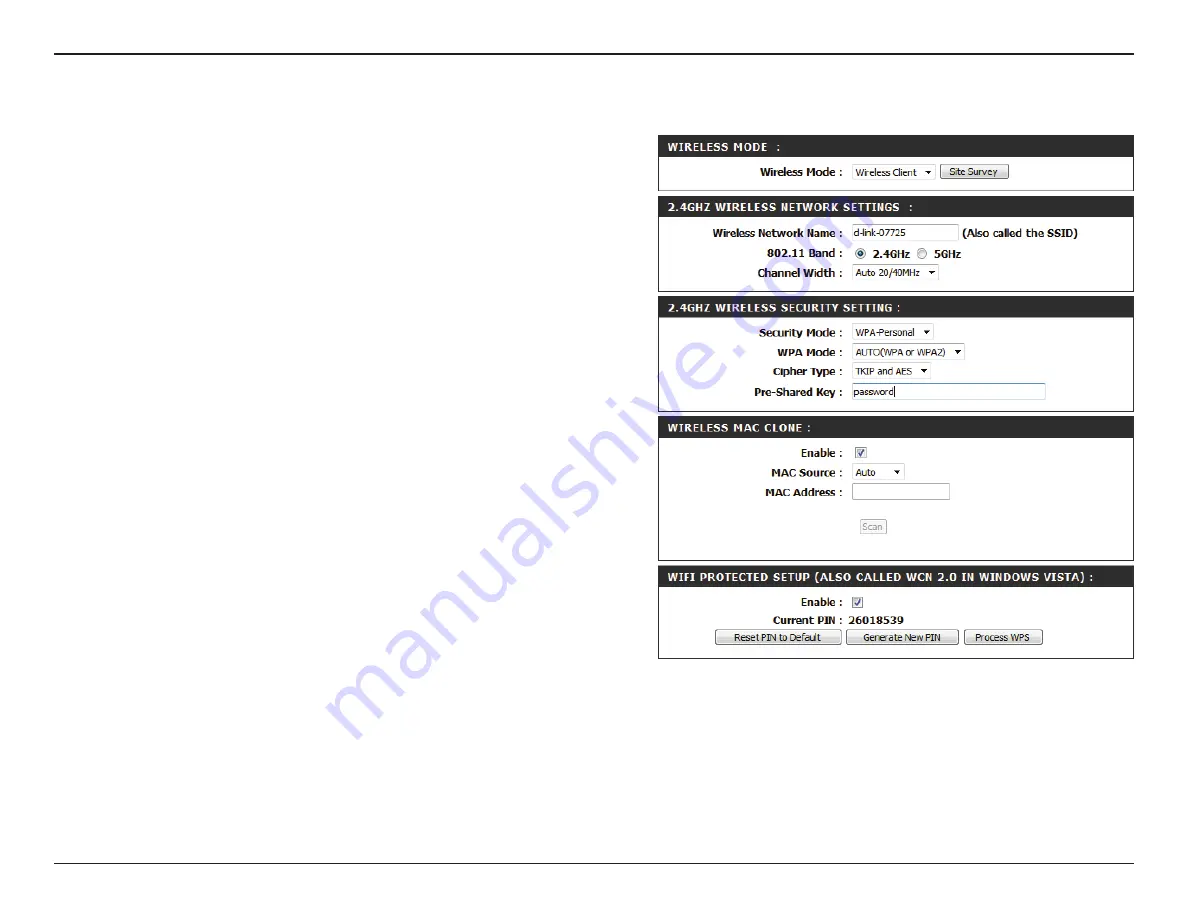
Wireless Mode:
Site Survey:
Wireless Network
Name:
802.11 Band:
Channel Width:
Security
Mode:
Wireless MAC
Clone:
Wi-Fi Protected
Setup:
Current PIN:
Select
Wireless Client Mode
from the drop-down menu.
Click
Site Survey
to display a list of wireless networks in your
area. To select a wireless network, click the radio button in the
far right column of the scan page. Click
Connect
at the bottom
of the scan page to confirm the selection. The wireless network
name will automatically appear in the Wireless Network Name
field below.
Enter the SSID of the wireless network that you wish to connect
to. If you do not know for sure, click
Site Survey
and select it
from the list, if available.
Select the wireless band of the wireless network that you wish
to connect to. You can only be connected to one wireless band
at any one time.
Select the channel width that you wish to use when connecting
to the wireless network.
Select the wireless security mode and relevant settings used
by the network you are connecting to. For more information
regarding wireless security, please refer to “Configuring Wireless
Check
Enable
to enable the cloning of another device’s MAC
address by the DAP-1665.
Check
Enable
if you wish to enable the use of the PIN method
for Wi-Fi Protected Setup (WPS).
Displays the current PIN which can be used to connect to the
router using the WPS-PIN method.
Click
Reset PIN to Default
to reset the PIN number to the factory
default setting. Click
Generate New PIN
to randomly generate
a new PIN for WPS connection. Click
Process WPS
to commence
the WPS Push-Button setup process.
Click
Save Settings
to save the current configuration.
Wireless Client Mode


