Crestron
QM-FTCC-TPS4
FlipTop Touchpanel Computer Center
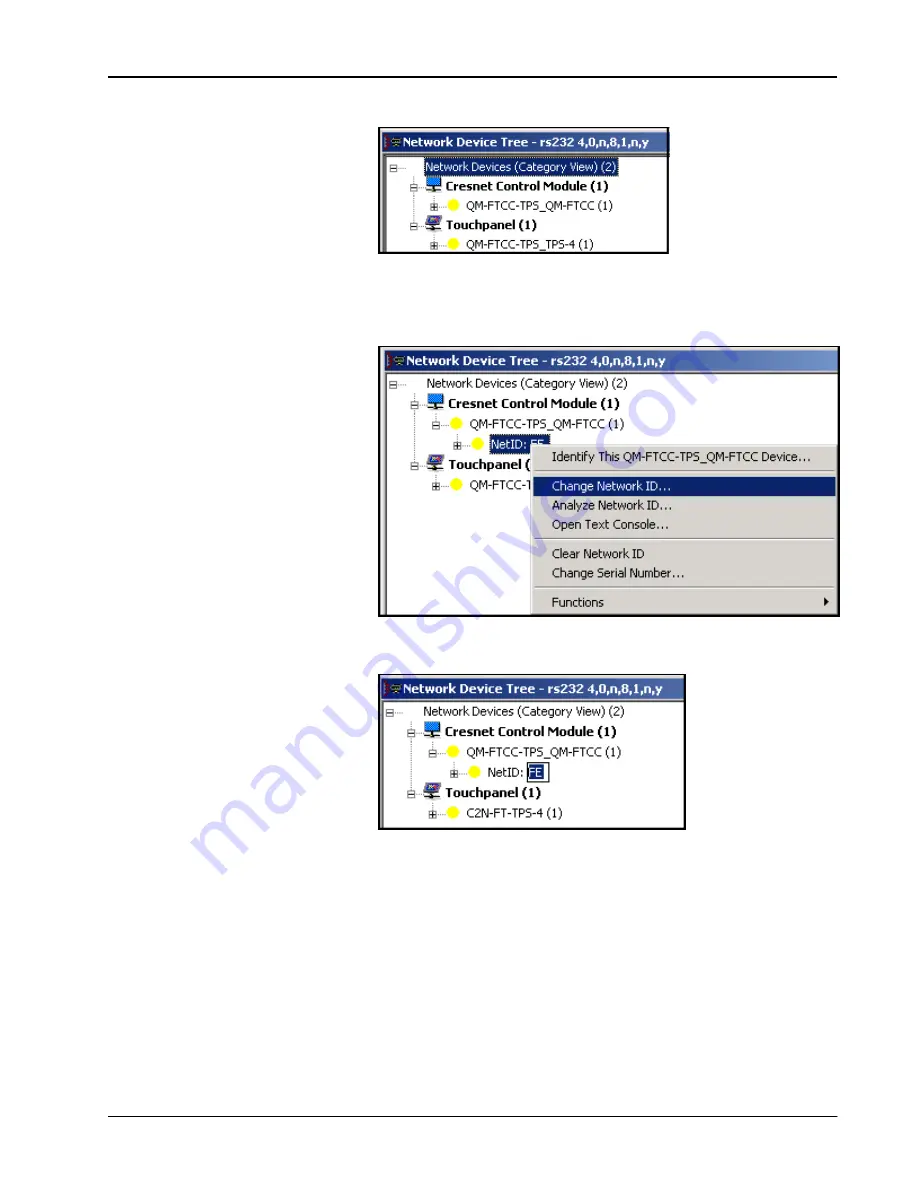
Network Device Tree
4. Click on the ‘
+’
next to the
name of each device to display their current Net
ID setting, and then right-click on the Net ID you wish to change. When the
sub-menu appears, select
Change Network ID
from the sub-menu.
Network Device Tree – Sub-Menu
5. The current Net ID is highlighted. Enter a new Net ID and press
Enter
.
Enter New Net ID
6. An alert message appears to notify you that the change was successful.
7. Repeat this procedure for each network device requiring a Net ID change.
Installation
Physical installation of the QM-FTCC-TPS4 includes installing an engraved
touchpanel bezel, installation of the supplied cable management plate, and mounting
the unit to the desired surface.
Installing Engraved Bezel
Use the Crestron Engraver software package to obtain a custom-engraved bezel for
the QM-FTCC-TPS4. Install the replacement bezel as follows.
Operations & Installation Guide – DOC. 6393
FlipTop Touchpanel Computer Center: QM-FTCC-TPS4
•
15
Содержание QM-FTCC-TPS4
Страница 1: ...Crestron QM FTCC TPS4 FlipTop Touchpanel Computer Center Operations Installation Guide...
Страница 4: ......


