background image

iMedia Receiver/Processor with Video 

  Crestron 

IM-RXV1 & IM-RXV3


Uploading and Upgrading 

Crestron recommends using the latest programming software and that each device 
contains the latest firmware to take advantage of the most recently released features.  
However, before attempting to upload or upgrade, it is necessary to establish 
communication.  

Establishing Communication 

Use Crestron Toolbox for communicating with the IM-RXV1 and IM-RXV3; refer 
to the Crestron Toolbox help file for details. There are two methods of 
communication. 

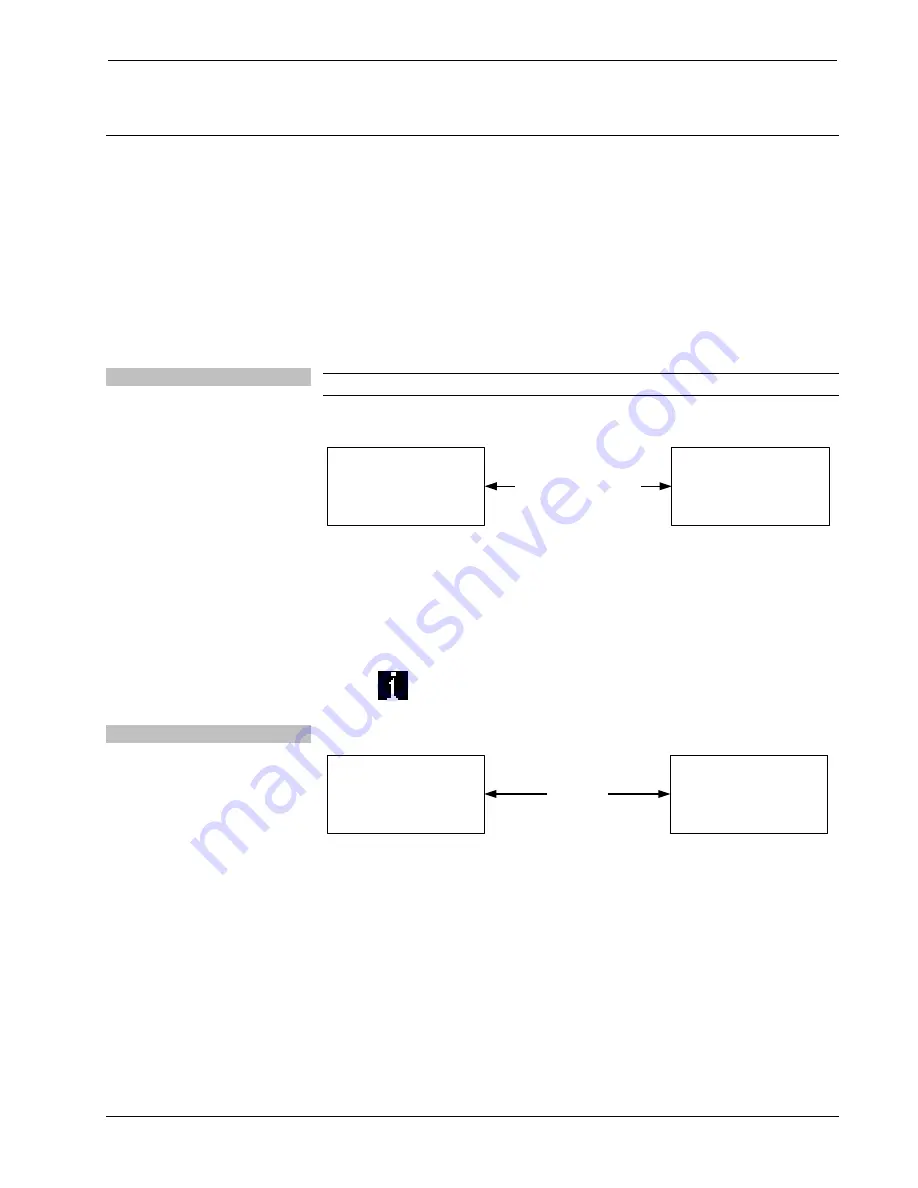
Direct Serial Communication   

NOTE:  

Required for initial setup of Ethernet parameters. 

Direct Serial Communication  

PC RUNNING

CRESTRON TOOLBOX

IM-RXV1 / IM-RXV3

SERIAL VIA CRESTRON

CABLE STCP-502

OR EQUIVALENT


• 

The 

COMPUTER

 port on the IM-RXV1 and IM-RXV3 connects to the 

serial port on the PC via a serial cable (Crestron STCP-502 or equivalent).  

• 

Use the Address Book in Crestron Toolbox to create an entry using the 
expected serial communication protocol (RS232, auto-detect baud rate, no 
parity, 8 data bits, 1 stop bit, XON/XOFF disabled, RTS/CTS enabled). 

• 

Display the IM-RXV1 or IM-RXV3’s “System Info” window (click the 

 icon); communications are confirmed when the device information is 

displayed.   

TCP/IP Communication 


Ethernet Communication 

PC RUNNING

CRESTRON TOOLBOX

ETHERNET

IM-RXV1 / IM-RXV3


• 

Establish direct serial communication between IM-RXV1/IM-RXV3 and 
PC. 

• 

Enter the IP address, IP mask, and default router of the IM-RXV1/ 
IM-RXV3 via the Crestron Toolbox (

Functions | Ethernet Addressing

); 

otherwise enable DHCP.  

• 

Confirm Ethernet connections between IM-RXV1/IM-RXV3 and PC. If 
connecting through a hub or router, use CAT5 straight through cables with 
8-pin RJ-45 connectors. Alternatively, Use a CAT5 crossover cable to 
connect the two 

LAN 

ports directly, without using a hub or router.  

• 

Use the Address Book in the Crestron Toolbox to create an entry for the 
IM-RXV1/IM-RXV3 with the IM-RXV1/IM-RXV3’s TCP/IP 
communication parameters.  

16  

  iMedia Receiver/Processor with Video: IM-RXV1 & IM-RXV3 

Operations & Installation Guide – DOC. 6478 

Содержание iMedia IM-RXV1

Страница 1: ...Crestron IM RXV1 IM RXV3 iMediaReceiver ProcessorwithVideo Operations Installation Guide...

Страница 2: ...by the Technical Documentation department at Crestron Electronics Inc 15 Volvo Drive Rockleigh NJ 07647 1 888 CRESTRON All brand names product names and trademarks are the property of their respectiv...

Страница 3: ...ing 11 IM Wiring 11 Hardware Hookup 13 System Configuration 15 Earliest Version Software Requirements for the PC 15 iMedia Wizard Configuration 15 Uploading and Upgrading 16 Establishing Communication...

Страница 4: ......

Страница 5: ...using iMedia Wizard Software Built in Web server supports e Control 2 and RoomView The iMedia Transport The iMedia transport utilizes a single CAT5e type cable to transmit computer RGB video and ster...

Страница 6: ...l e Control 2 XPanel and RoomView applications delivering the industry s best help desk and resource management solution for any number of rooms equipped with iMedia Fast Easy Setup System setup takes...

Страница 7: ...tron IM RXV1 IM RXV3 iMedia Receiver Processor with Video Typical Two Room Installation for Media Presentation Operations Installation Guide DOC 6478 iMedia Receiver Processor with Video IM RXV1 IM RX...

Страница 8: ...page 12 for other resolutions 0 dB 75 ohm termination 480i NTSC 576i PAL 4 VRMS balanced 2 VRMS unbalanced 200 ohms balanced 100 ohms unbalanced 20 Hz to 20 kHz 0 5 dB 82 dB 20 Hz to 20 kHz A weighte...

Страница 9: ...uirements External Power Supply Included Input 100 240 VAC 50 60 Hz Output 54 Watts 3 Amps 18 Volts DC Environmental Temperature Humidity 41 to 104 F 5 to 40 C 10 to 90 RH non condensing Enclosure Bla...

Страница 10: ...ear R IM RXV1 IM RXV3 Overall Dimensions 7 31 in 18 57 cm 7 69 in 19 53 cm 8 60 in 21 84 cm 8 75 in 22 23 cm 1 30 in 3 31 cm 1 61 in 4 08 cm IM RXV1 IM RXV3 1 14 2 3 4 5 6 9 10 12 13 8 14 15 15 16 16...

Страница 11: ...to 24 VDC max logic output or contact closure from external devices A five pin terminal block interface connector is included 6 INPUT LED Indicates when an input signal is received on any of the four...

Страница 12: ...devices Can also be used for modem communications The following table lists the pin assignments of the serial ports PIN DIRECTION DESCRIPTION 1 To IM RXV1 3 DCD Data Carrier Detect 2 To IM RXV1 3 RXD...

Страница 13: ...the input connection of the iMedia cable It carries audio and video signals over CresCAT IM cable from an iMedia transmitter such as the IM FTCC B IM TCC or IM WCC The peaking control is used during...

Страница 14: ...nst harmful interference in a residential installation This equipment generates uses and can radiate radio frequency energy and if not installed and used in accordance with the instructions may cause...

Страница 15: ...Media signals via CresCAT IM cable Installation of any iMedia device is as simple as installing one iMedia cable from output to input Installations are affordable and fast Quantity and Packaging CRESC...

Страница 16: ...es an input The receiver automatically routes the last activated input to the RGB or composite video output and deactivates any prior selection In addition the display s power and input selection comm...

Страница 17: ...he brackets 1 There are screws that secure each side of the IM RXV1 IM RXV3 top cover Using a 1 Phillips screwdriver remove the screws at each corner of the top cover Refer to the diagram following st...

Страница 18: ...sing CresCAT IM cable available from Crestron Other high quality low skew CAT5e CAT6 wiring may also be used with varying performance Hardware Connections Rear POWER FROM POWER SUPPLY 18 VDC 3 0 A REL...

Страница 19: ...QUIRED SOFTWARE VERSION Simplified configuration with wizards for iMedia systems optional but recommended iMedia Wizard part of Crestron SystemBuilder version 3 0 or later with SystemBuilder Templates...

Страница 20: ...an entry using the expected serial communication protocol RS232 auto detect baud rate no parity 8 data bits 1 stop bit XON XOFF disabled RTS CTS enabled Display the IM RXV1 or IM RXV3 s System Info w...

Страница 21: ...the IM RXV1 and IM RXV3 firmware via Crestron Toolbox Establish communications with the IM RXV1 or IM RXV3 and display the System Info window Select Functions Firmware to upgrade the firmware For det...

Страница 22: ...y maximum iMedia cable length Video from source is garbled or no output Peak adjustment incorrect Readjust peak control Not controlling the display device Incorrect wiring Check wiring and connectors...

Страница 23: ...available features Future Updates As Crestron improves functions adds new features and extends the capabilities of the IM RXV1 and IM RXV3 additional information may be made available as manual update...

Страница 24: ...0 days batteries and incandescent lamps are not covered This warranty extends to products purchased directly from CRESTRON or an authorized CRESTRON dealer Purchasers should inquire of the dealer rega...

Страница 25: ...Crestron IM RXV1 IM RXV3 iMedia Receiver Processor with Video Operations Installation Guide DOC 6478 iMedia Receiver Processor with Video IM RXV1 IM RXV3 21 This page intentionally left blank...

Страница 26: ...iMedia Receiver Processor with Video Crestron IM RXV1 IM RXV3 22 iMedia Receiver Processor with Video IM RXV1 IM RXV3 Operations Installation Guide DOC 6478 This page intentionally left blank...

Страница 27: ...Crestron IM RXV1 IM RXV3 iMedia Receiver Processor with Video Operations Installation Guide DOC 6478 iMedia Receiver Processor with Video IM RXV1 IM RXV3 23 This page intentionally left blank...

Страница 28: ...ron Electronics Inc Operations Installation Guide DOC 6478 15 Volvo Drive Rockleigh NJ 07647 2014909 Tel 888 CRESTRON 05 06 Fax 201 767 7576 Specifications subject to www crestron com change without n...

Отзывы: