background image

xii

Using This Manual


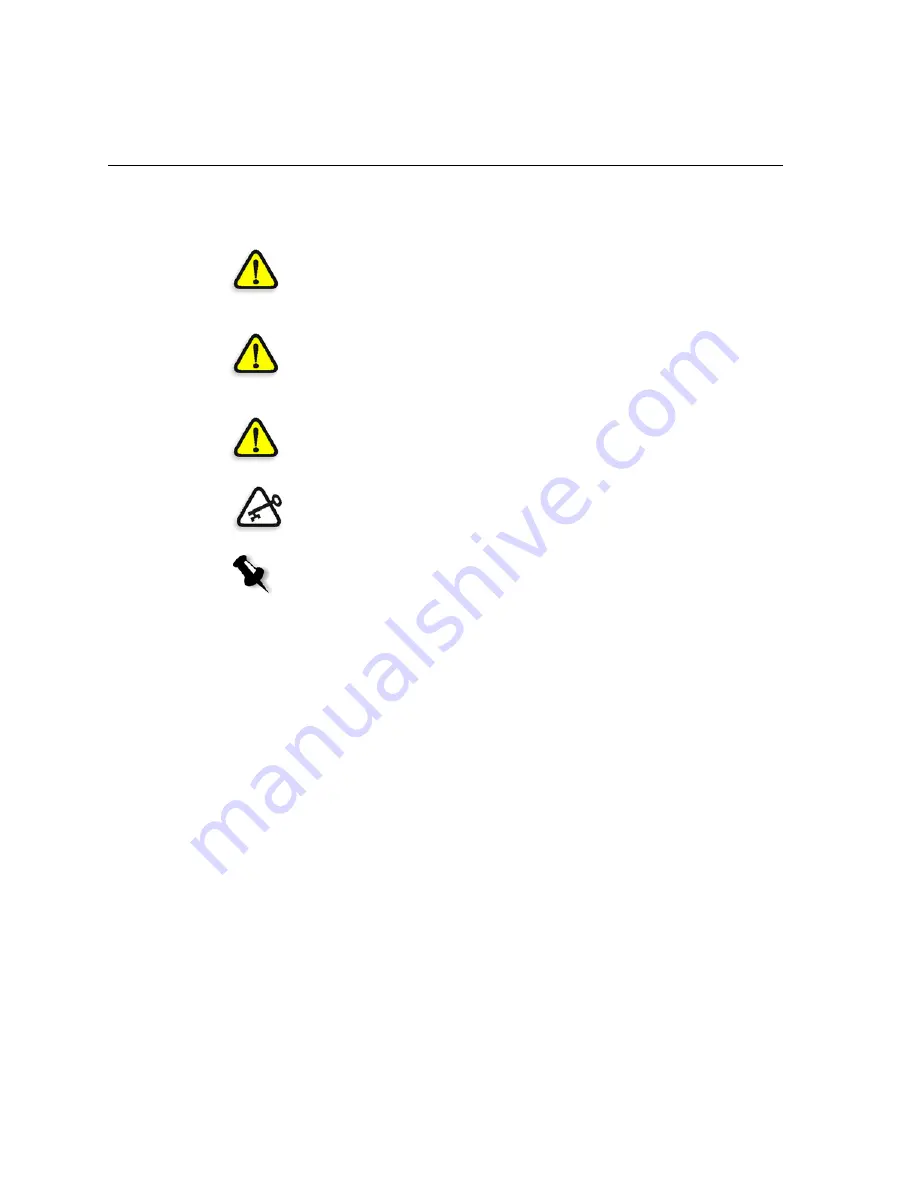
Symbols

PDF Document

This manual is also provided in PDF (Portable Document Format).

The PDF document can be used for online viewing and printing using 
Adobe Acrobat Reader. When printing the manual, please print the entire 
manual, including the copyright and disclaimer statements.

DANGER:  This indicates an imminently hazardous situation, which, if not 
avoided, will result in death or serious injury. This does not alert you to a 
property damage accident unless personal injury risks are associated 
with the accident.

WARNING:  

This indicates a potentially hazardous situation, which, if not 

avoided, could result in death or serious injury. This does not alert you to a 
property damage accident unless personal injury risks are associated with the 
accident.

CAUTION:   

This indicates a potentially hazardous situation, which, if not 

avoided, may result in minor or moderate injury. This may also alert you to 
unsafe practices or potential property-damage-only accidents.

Important:  

This symbol tells you about things that may cause process delays or 

reduce functionality, reliability, or quality.

Note:  

A note provides additional information that you may need to consider.

Содержание Trendsetter 3244+ AL

Страница 1: ...www creo com Operator Manual English Trendsetter 3244 AL version TS8 03 4165C A Internal 731 00318A EN Rev A ...

Страница 2: ......

Страница 3: ...Trendsetter 3244 AL version TS8 Operator Manual ...

Страница 4: ......

Страница 5: ...PEARLsetter PEARLhdp PEARLdry and PEARLgold are registered trademarks of Presstek Inc XEROX The Document Company the digital X and DocuColor are trademarks of XEROX CORPORATION Other brand or product names are the trademarks or registered trademarks of their respective owners FCC Compliance The Creo equipment referred to in this document complies with the requirements in Part 15 of FCC Rules for a...

Страница 6: ...5 649 220 5 650 076 5 652 804 5 680 129 5 691 823 5 691 828 5 696 393 5 699 174 5 699 740 5 708 736 5 713 287 5 742 743 5 764 374 5 771 794 5 785 309 5 802 034 5 813 346 5 818 498 5 854 883 5 861 904 5 861 992 5 875 288 5 894 342 5 900 981 5 934 196 5 946 426 5 947 028 5 958 647 5 966 504 5 969 872 5 973 801 5 986 819 5 995 475 5 996 499 5 998 067 6 003 442 6 014 471 6 016 752 6 043 865 6 060 208 ...

Страница 7: ...mponents 6 Load Table 6 Operator Door 6 Manual Bypass Panel 6 Manual Bypass Tray 6 Operator Interface 7 Unload Table 8 Safety panels 9 Trendsetter 3244 AL Consumables 9 Supported Media 10 Media Sizes Supported 10 Media Orientation 11 Details on Portrait Orientation 11 Media Dimensions 11 Media Processing 13 Features of the Trendsetter 3244 AL 13 Interlock System 13 Multiple Media Sizes 15 Error Re...

Страница 8: ...ning the Interior of the Output Device 37 Cleaning the Edge Detection Strip 37 Cleaning the Plate Roller 39 Replacing Air Supply Filters 40 Compressed Air Supply Filters 40 Intake Air Filter 48 Replacing the Debris Removal Cabinet Filter 49 Replacing the Desiccant Bag 51 Replacing the Mylar Strip 53 4 Troubleshooting 57 Operator Recoverable Errors 58 Recovering From a Suspend Condition 58 Error Me...

Страница 9: ...Encoder Radiation Output Label 101 Door Interlock Danger Label 101 Safety Labels 102 High Leakage Current Label 102 CE Label 102 CSA Label 103 AC Outlet Maximum Air Pressure Bulkhead Label 103 FCC Certification Label 103 Static Discharge Caution Label 104 Hazardous Voltage Label 104 Hot Surface Caution Label 105 Keep Hands Out Warning Label 105 Hand Protection Caution Label 105 Moving Parts Cautio...

Страница 10: ...viii Trendsetter 3244 AL Operator Manual ...

Страница 11: ...Using This Manual Who Should Use This Manual x Conventions Used in This Manual x PDF Document xii ...

Страница 12: ...figured by an authorized service representative and are operating correctly Files submitted to the Trendsetter system are free of common errors usually resolved during preflight such as missing fonts and PostScript errors Conventions Used in This Manual This section describes the fonts terminology and symbols used in this manual Fonts Frutiger bold is used to refer to buttons and other items in a ...

Страница 13: ... the ENTER or RETURN key Point Position the mouse pointer over a submenu or menu command For example point to the File menu Press Press the specified key or key combination on your keyboard for example press CTRL ALT DEL Right click Place the mouse pointer over an area of the application window and then press and release the right mouse button to display the shortcut menu For more information abou...

Страница 14: ...al injury risks are associated with the accident WARNING This indicates a potentially hazardous situation which if not avoided could result in death or serious injury This does not alert you to a property damage accident unless personal injury risks are associated with the accident CAUTION This indicates a potentially hazardous situation which if not avoided may result in minor or moderate injury ...

Страница 15: ...iew General Notes on Technical Safety 2 Trendsetter 3244 AL System 4 Trendsetter 3244 AL Components 6 Trendsetter 3244 AL Consumables 9 Supported Media 10 Media Processing 13 Features of the Trendsetter 3244 AL 13 ...

Страница 16: ...t is turned on In case of danger for example if there is a fire in the output device you should immediately disconnect the output device from the wall outlet DO NOT attempt to turn the power switch off DANGER This indicates an imminently hazardous situation which if not avoided will result in death or serious injury This does not alert you to a property damage accident unless personal injury risks...

Страница 17: ...m only the maintenance activities that are described in Chapter 3 Maintenance If you perform any other maintenance operations and or remove covers or other housing parts for any reason you may be injured Other maintenance and all service work should be performed only by your service representative DANGER Interfering with the interlock system can result in serious personal injury from visible and i...

Страница 18: ...ividual plates can also be imaged using the Manual Bypass mode The Trendsetter 3244 AL system consists of the output device computer workstation and workstation software This manual covers the output device only Output Device This manual describes the output device as if you are facing the front of it Figure 1 illustrates the output device s main components Figure 1 Output device components Status...

Страница 19: ...hen the unload table is lowering or raising and from moving parts inside the unload table CAUTION Keep your hands and fingers away from the unload table when you hear the beeping sound CAUTION The output device contains static sensitive subassemblies If you must access the interior of the output device be sure to wear a grounding wrist strap Do not touch any of the electronic subassemblies the exp...

Страница 20: ...anual bypass tray Manual Bypass Panel This small panel located directly below the operator door must be closed for automatic operation and open for manual operation Manual Bypass Tray The manual bypass tray allows you to manually load and image one individual plate on the output device Depending on the media type selected in the workstation software the imaged medium may be unloaded onto this tray...

Страница 21: ...2 Operator interface Error light This light indicates an error has occurred It will go out when the error condition is resolved The workstation will display specific information about the error See Error Reporting on page 15 for details Sometimes an unrecoverable system error occurs for example cable faults power supply failures loss of air pressure etc See Recovering From a Suspend Condition in C...

Страница 22: ...ting for an operator to unload media the output device is otherwise busy During manual operation the device cannot accept another plate until the imaged media in the device is unloaded and the Load light comes back on Start button During manual operation this button initiates medium loading and imaging CAUTION Be careful to keep your hands and fingers away from the unload table when the unload tab...

Страница 23: ...nd images thermal plates it does not require darkroom conditions Trendsetter 3244 AL Consumables Consumable materials required to use the Trendsetter 3244 AL consist of the following Filters A number of filters are used in the output device to maintain the air quality See Replacing Air Supply Filters on page 40 for details Debris Filters Some Trendsetters are equipped with Debris Removal Systems S...

Страница 24: ...t your service representative Media Sizes Supported On installation Trendsetter systems are configured with the media sizes you will use Table 1 Media sizes supported For details on media handling see Automatic Operation on page 19 Maximum Size Minimum Size Thickness 26 x 37 8 650 mm x 960 mm 18 x 11 5 457 mm x 290 mm 0 006 to 0 012 0 15 mm to 0 3 mm ...

Страница 25: ...e of the medium The output device registers along the short side of the medium meaning you must punch on the long side To punch on the short side the plate must be cut perfectly square Media Dimensions The following media dimensions apply to the Trendsetter 3244 AL They may not apply to media dimensions you define in other pressroom operations for example putting a plate on a press Medium Size Ori...

Страница 26: ...ze of a medium along the drum If the length of the medium around the drum is correct but the width along the drum does not correspond with the medium size selected in the workstation software the output device will go ahead and image the medium This does not damage the output device in any way but the output device does not notify you that a medium of an incorrect size has been imaged ...

Страница 27: ...cause laser emissions from a thermal exposure head are invisible to the naked eye and are very dangerous if they contact the skin or eyes If mechanical movements do not stop when you open or remove an access panel do the following shut down the output device close or replace the panel contact your service representative Do NOT touch or attempt to stop moving internal parts of the output device DAN...

Страница 28: ...ons Figure 5 Emergency Stop switch To reset the Emergency Stop switch Rotate the Emergency Stop switch clockwise 90º If you have questions about using the Emergency Stop switch write down the serial number of your output device and contact your service representative You can find the serial number on the Identification label which is located on the fan box inside the left end access panel of the o...

Страница 29: ...m it does one of the following continues processing If the output device can continue processing without immediate assistance the condition is reported in the message log on the workstation See your workstation software documentation for details on the message log suspends operation The output device operation is suspended and a Suspend dialog box is displayed on the workstation describing the pro...

Страница 30: ...16 Chapter 1 System Overview ...

Страница 31: ...Operation Starting the Trendsetter 3244 AL 18 Shutting Down the Trendsetter 3244 AL 19 Automatic Operation 19 Manual Operation 22 Media Registration 28 ...

Страница 32: ...art the Trendsetter system 1 Turn on the output device The power switch is located on the rear of the output device at the bottom left corner Figure 6 illustrates Figure 6 Power switch 2 Turn on the computer workstation For details on turning the workstation on see your workstation documentation 3 Start the workstation software For details on starting the workstation software see your workstation ...

Страница 33: ... operation you can load up to 80 0 15 mm 0 006 plates up to 40 0 3 mm 0 12 plates Note Remove all slip sheets either before or after you place the media on the load table You can submit the files you want to image either before or after you place the media on the load table For details on submitting files see your workstation software documentation CAUTION Plate edges can be sharp Failure to wear ...

Страница 34: ...the media Note You may remove slip sheets from plates either before or after you stack the plates on the load table CAUTION You MUST ensure all slip sheets and packaging material have been removed from both the back and front of the plates before you image them in the output device Otherwise the thermal laser could ignite the paper causing a fire in the output device 5 Position the media on the lo...

Страница 35: ...media 6 When the plates are properly loaded close the operator door Figure 9 Close operator door Note You do not need to press the Start button on the operator interface to initiate automatic operation Load table Plate stack Media alignment label ...

Страница 36: ...sn t necessary or practical the output device supports manual media loading The operator door on the load table converts into a manual bypass tray that can be used to image a single manually loaded plate or film CAUTION Plate edges can be sharp Failure to wear protective gloves can result in personal injury To manually load a plate for imaging 1 Submit the file you want to image to the output devi...

Страница 37: ...ruts and slowly lifts itself upward Figure 10 Opening the operator door 5 Open the manual bypass panel Simultaneously pull the release mechanisms one on each end of the panel in towards you and then lower the panel Figure 11 Opening manual bypass panel 6 Close the operator door ...

Страница 38: ...y sliding it between the tray and the door handle Manual bypass tray Manual bypass panel open CAUTION You MUST ensure all slip sheets and packaging material have been removed from both the back and front of a plate before you image it in the output device Otherwise the thermal laser could ignite the paper causing a fire in the output device Note Ensure that the side of the plate to be imaged the e...

Страница 39: ... of the manual bypass tray CAUTION Do not load the plate until prompted to do so by the workstation Lowering the plate onto the drum prematurely can result in damage to the medium or output device Note Alignment labels on the manual bypass tray indicate where the upper left hand corner of the medium should be positioned Aligning the medium in this way ensures that it will sit properly on the regis...

Страница 40: ... unload table depending on the setting in the workstation software See your workstation software documentation for details Removing Imaged Media From the Output Device To remove an imaged media from the output device 1 Be sure the output device has finished imaging the medium 2 When imaging is complete the Load light will turn on and the medium is returned to the manual bypass tray or the unload t...

Страница 41: ...is will help protect the medium from scratches Closing the Manual Bypass Panel You must close the manual bypass panel again in order to ready the output device for automatic operation To close the manual bypass panel 1 Lift the operator door 2 Close the manual bypass panel You will hear the release mechanisms snap as they lock the panel into the closed position The output device is once again read...

Страница 42: ...cron if you load the media to within 0 125 3 mm of the correct position on the load table manual bypass tray If affixed the media alignment labels can help you quickly identify the correct position ensure the media are resting on the registration pins at the base of the load table manual bypass tray These pins ensure the media registers properly on the drum Performing these steps can result in fas...

Страница 43: ...sing the Interior of the Output Device 34 Cleaning the Interior of the Output Device 37 Cleaning the Edge Detection Strip 37 Cleaning the Plate Roller 39 Replacing Air Supply Filters 40 Replacing the Debris Removal Cabinet Filter 49 Replacing the Desiccant Bag 51 Replacing the Mylar Strip 53 ...

Страница 44: ...es Location Description Maintenance Procedure Clean Replace Every Output device exterior Clean exterior surfaces See page 32 Weekly N A Load table Load table See page 33 Weekly N A Manual bypass tray Manual bypass tray See page 33 Weekly N A Filters inside the front access panel Check the filter bowls for water or oil See page 42 Weekly When cracked Debris removal cabinet Vacuum interior of debris...

Страница 45: ...evice Debris removal cabinet Ablative media filter See page 51 When error message appears on workstation Desiccant box Desiccant box contains a desiccant bag which controls humidity within the output device See page 51 N A When indicator on box turns pink Load panel Mylar strip See page 54 N A 6 months Location Description Maintenance Procedure Clean Replace Every DANGER Interfering with the inter...

Страница 46: ... exterior weekly Reliable and high quality output depends on keeping the exterior of the output device clean Cleaning Recommendations Before cleaning the exterior surfaces of the output device vacuum all access panel seams to remove any accumulated dust It may be sufficient to simply wipe the surfaces clean with dry rags if it is done frequently and if the environment is relatively dry and free of...

Страница 47: ...p cloth To clean the load table and manual bypass tray 1 Dampen a clean cloth with water 2 Gently wipe the load table and manual bypass tray clean leaving them dry Figure 16 Load table and manual bypass tray CAUTION Avoid regular use of chemical cleaners as these can damage the exterior of the output device Read and follow all directions provided by the acetone manufacturer Failure to do so can re...

Страница 48: ...and left end access panels should only be removed by a service representative DANGER Do NOT open or remove any access panel while the output device is imaging a medium Be sure that there is no mechanical movement within the output device before reaching inside Right end access panel Front access panel Note Opening or removing access panels will turn off power to the laser It takes up to five minut...

Страница 49: ...ir filters see Replacing Air Supply Filters on page 40 clean the plate roller see Cleaning the Plate Roller on page 39 clean the edge detection strip see Cleaning the Edge Detection Strip on page 37 To open the front access panels 1 Rotate the two latches on the front panel 90º counterclockwise to the vertical position Figure 18 Latches on front access panel 2 Lift the front panel upward The front...

Страница 50: ...he right end access panel to inspect and replace the air pre filter or the desiccant bag There are two screws that secure this panel to the output device To remove the right end access panel 1 Use a flathead screwdriver to rotate both screws 90º counterclockwise to release the panel 2 Tilt the panel back and carefully lift it off its locating pins to remove it To replace the right end access panel...

Страница 51: ...an result in personal injury or electrical shock as well as damage to the equipment Cleaning the Edge Detection Strip To register an image to the edge of a medium the output device uses an edge detection algorithm This algorithm relies on a 29 2 741 mm strip set into the surface of the drum inside the output device beside the leading edge clamps This strip is black and non reflective You must clea...

Страница 52: ...ce of the drum Doing so can damage the optical encoder in the drum 5 Dampen a Kimwipe with a mixture of 90 isopropanol and 10 distilled water and swipe along the strip once in one direction only Be careful not to leave any fingerprints or smudges on the strip 6 Close the front access panel See Opening and Closing the Front Access Panel on page 35 for more information Note Kimwipes EX L Extra Low L...

Страница 53: ...ly imaging a medium 2 Shut down the output device See Shutting Down the Trendsetter 3244 AL on page 19 3 Open the front access panel See Opening and Closing the Front Access Panel on page 35 for more information 4 Wipe the plate roller which is bright blue gently with a dry Kimwipe See Appendix A Part Numbers for the part number for Kimwipes 5 Close the front access panel See Opening and Closing t...

Страница 54: ...ersonal injury or damage to the output device Frequency of Filter Replacement Do not rely on the appearance of filters to determine when the filters should be cleaned or replaced They can seem dirty before they need to be replaced if there is coarse dust in the operating environment and they can appear clean when they need to be replaced if there are smaller particulates in the air Filters should ...

Страница 55: ...ontaminants can damage the air system in the output device Replacement Parts The recommended replacement parts for the compressed air filtration system are manufactured by Wilkerson Corporation See Appendix A Part Numbers 0 01 micron filter Air pressure gauge 5 micron filter WARNING Read and follow all precautions provided by the manufacturer of the filters used in the compressed air system Failur...

Страница 56: ...ion 4 Check the filter bowls for any accumulation of water or oil CAUTION Notify your service representative immediately if you find water or oil in the filter bowls Disconnecting the Compressed Air Before you can replace the compressed air supply filters you must disconnect the compressed air supply letting the air bleed completely out of the output device CAUTION Do not disconnect the compressed...

Страница 57: ... in the output device should return to 80 psi To reconnect the compressed air supply 1 Grasp the spring loaded collar of the compressed air hose 2 Push it firmly onto the compressed air inlet on the output device Figure 24 Connecting air supply WARNING Failure to remove air pressure from the output device before removing some or all of the air filters causes unfiltered air to be drawn into sensiti...

Страница 58: ...nt Access Panel on page 35 for more information 3 Disconnect the compressed air See Disconnecting the Compressed Air on page 42 for more information WARNING Failure to shut off the compressed air system before replacing a compressed air filter can result in personal injury or damage to the output device 4 On the filter pull down the thumb release and rotate the plastic bowl a quarter turn either d...

Страница 59: ...epresentative if replacement is necessary 11 Check for water or oil in the bowl If there is water or oil in the bowl call your service representative to have the air supply inspected 12 Reinstall the bowl 13 Once all filters are properly installed turn the air supply back on See Connecting the Compressed Air on page 43 for more information The air pressure gauge should read approximately 80 psi 14...

Страница 60: ...el on page 35 for more information 3 Disconnect the compressed air See Disconnecting the Compressed Air on page 42 for more WARNING Failure to shut off the compressed air system before replacing a compressed air filter can result in personal injury or damage to the output device 4 On the filter pull down the thumb release and rotate the plastic bowl a quarter turn either direction pull down to rem...

Страница 61: ...ment is necessary 11 Check for water or oil in the bowl If there is water or oil in the bowl call your service representative to have the air supply inspected 12 Reinstall the bowl 13 Once all filters are properly installed turn the air supply back on See Connecting the Compressed Air on page 43 for more information The air pressure gauge should read approximately 80 psi 14 Close the front access ...

Страница 62: ...placement Parts The recommended replacement intake air filter can be ordered from your service representative See Appendix A Part Numbers Replacing the Intake Air Filter The intake air filter is white and 2 50 8 mm thick Observe the air flow indication arrows on the edge of the filter during installation To replace the intake air filter 1 Shut down the output device See Shutting Down the Trendsett...

Страница 63: ...ion arrows on the edge of the new filter Figure 28 Installing intake air filter 6 Replace the right end access panel See Removing and Replacing the Right end Access Panel on page 36 for more information Replacing the Debris Removal Cabinet Filter When the output device is turned on it checks the debris removal system to make sure that the filter is present An error message is displayed on the work...

Страница 64: ...ks to hold the top open Figure 29 Debris Removal cabinet 4 Undo the four snap latches around the top edge of the canister inside the cabinet 5 Use the two handles on top to lift the lid of the canister Lift slowly to avoid stirring up carbon dust You may have to tug to break the seal 6 Rest the attached lid against the top of the cabinet 7 Slowly pull the filter out by the handle on top Use your o...

Страница 65: ...om of the canister will help you to center it 13 Rotate the filter until it is properly seated 14 Fold the filter handle down 15 Replace the canister lid and close its four latches 16 Check to make sure that the lid is sealed 17 Close the cabinet by lifting the top slightly to release the locked support strut then shutting the lid Replacing the Desiccant Bag Depending on the operating environment ...

Страница 66: ...lacing the Right end Access Panel on page 36 3 Using a flathead screwdriver remove the four screws securing the cover of the desiccant box 4 Replace the old desiccant bag with a new one see Appendix A Part Numbers 5 Replace and secure the cover of the desiccant box 6 Replace the right end access panel See Removing and Replacing the Right end Access Panel on page 36 Desiccant box Indicator replace ...

Страница 67: ... at the workstation 2 Press and hold the Start button for six seconds to put the machine in maintenance mode The machine beeps once to indicate it is in maintenance mode 3 Open the plate cover If you do not open the plate cover within two minutes the machine will exit maintenance mode and the picker will move down to its default position 4 Remove the existing mylar strip from the picker by pulling...

Страница 68: ... side move the foam blocks closer to the ends of the picker see Figure 31 The holes in the strip should align with the holes in the center of each suction cup Figure 32 Mylar Strip Alignment Note If you experience difficulty at any point in this procedure please call your service representative 9 Close the plate cover When the plate cover is closed the picker moves back to the down position The ma...

Страница 69: ...Replacing the Mylar Strip 55 ...

Страница 70: ...56 Chapter 3 Maintenance ...

Страница 71: ...oting Operator Recoverable Errors 58 Error Messages and Recommended Solutions 59 Resetting the Emergency Stop Switch 80 Removing a Stuck Plate From the Output Device 80 Image Quality Problems 85 Power Failures 86 ...

Страница 72: ...conditions occur when there are errors or problems with the output device such as a misaligned plate or a plate stuck on the drum When a suspend condition occurs The output device stops The Error light on the operator interface flashes as do the Status lights on either side of the operator door A Suspend message is displayed on the workstation The Suspend message indicates the type of problem and ...

Страница 73: ...efore you click the Plate Removed button Cancel This option terminates the current operation for example load image or unload The output device will unload the media if currently loaded Click this button to terminate the operation Error Message Possible Operator Actions Carriage could not find edge of plate check that plate size is entered correctly Click the Cancel Image button to cancel the imag...

Страница 74: ...d on the workstation will be preceded by the error category which may be abbreviated The error number in square brackets follows For example WSCOMM Door is open Error 3017 In this case WSCOMM stands for Workstation Communications However to assist you in finding the message listed alphabetically in this category the category name has been omitted Messages of a more general nature are listed under ...

Страница 75: ...o category N A starts on page 62 Auto Loader ALE starts on page 63 Carriage CARRIAGE starts on page 69 Hardware HARDWARE starts on page 70 Head HEAD starts on page 72 Image IMAGE starts on page 74 Laser LASER starts on page 76 SCSI SCSI starts on page 77 Workstation Communications WSCOMM starts on page 79 ...

Страница 76: ... Configure the workstation software to use a valid resolution Resume or clear received when not suspended Error N A You can safely ignore this message Too many characters in command string Error N A Ensure the computer serial interface is connected to the correct port on the workstation Workstation communications lost Error 21 This error is reported every 30 seconds while it persists To correct th...

Страница 77: ...alog box on the workstation click the Resume button 2 Place the plate on the manual bypass tray 3 Press the Start button on the operator interface Can t move picker in when separators are in Error 15303 The separator arms have not yet moved out To correct the error 1 Wait a few seconds and then click the Resume button 2 If the error persists contact your service representative Cassette bay empty E...

Страница 78: ...lates are likely to stick together 4 Resubmit your job and try again Plate still on unload table can t unload Error 15311 The output device was unable to move the plate from the unload table to the plate stacker or processor To correct the error 1 Ensure your plate stacker or processor is on and working properly 2 Check whether the plate is stuck between the unload table and the plate stacker or p...

Страница 79: ...ccess panel 2 In the workstation software click Plate Removed 3 Remove the plate from the drum 4 Close the front access panel 5 Check the workstation to confirm the plate size selected matches the actual dimensions of the plate you re loading 6 Resubmit job and try again Plate smaller than expected Please remove plate Error 15253 The output device attempted to load a plate that was the wrong size ...

Страница 80: ...ce The output device will not operate when an access panel has been opened or removed To correct the error 1 Close or replace the panel in question 2 In the Suspend dialog box on the workstation click the Resume button 3 If the output device does not return to normal operation contact your service representative Please close cover plate Error 15313 The output device cannot load or image media whil...

Страница 81: ...te Removed to continue Remove plate from picker Error 15170 A plate was on the picker during initialization To correct the error 1 Open the operator door and remove the plate 2 Select Plate Removed to continue Remove plate from unload table Error 15171 A plate was on the unload table during initialization To correct the error 1 Remove the plate from the cups 2 Select Plate Removed to continue Remo...

Страница 82: ...s the Start button on the operator interface Unload carriage not in safe position to rotate cups Error 15306 The unload table traveller was not able to find the rotate position The plate may have become stuck in the clamps causing the traveller to lose steps and not reach the rotate position To correct the error 1 In the Suspend dialog box on the workstation click the Resume button 2 When the plat...

Страница 83: ...OME and AWAY Error 7000 1 Open the top and front access panels of the output device 2 Check to see if there is a slip sheet a medium or debris stuck around the exposure head inside the output device 3 Remove any material and try to image the medium again Or If there is no foreign material present write down the error message and call your service representative Stuck in AWAY position Error 7002 1 ...

Страница 84: ...he Suspend dialog box on the workstation click either the Resume or Cancel Image button The Trendsetter should recover automatically from the error 2 Check the medium for image artifacts 3 Even if you do not find any artifacts call your service representative to report the error Important Your Trendsetter may need servicing Unexpectedly arrived at HOME position Error 7003 1 In the Suspend dialog b...

Страница 85: ... to report the problem External debris blower filter full Replace the debris filter See Replacing the Debris Removal Cabinet Filter on page 49 External debris blower filter almost full Replace the debris filter See Replacing the Debris Removal Cabinet Filter on page 49 External debris blower system blocked high vacuum 1 Shut down the output device 2 Open the debris removal cabinet and check for ob...

Страница 86: ...3 This message is displayed when an edge detection strip is too dirty to perform a proper medium edge detection Depending on the severity of the problem the output device may succeed if you try to resume the operation To try the edge detection again 1 Clean the edge detection strips 2 In the message box on the workstation click the Resume button The message box closes and the output device tries t...

Страница 87: ...e Incorrect light level at start of edge detection Check plate if plate size entered too small Error 17731 1 Make sure the medium was loaded in the correct position on the load ramp 2 Check the plate type information to ensure the medium size stated in the workstation software matches the size you loaded 3 If the medium sizes match In the Suspend dialog box on the workstation click the Resume butt...

Страница 88: ...ine Error 17014 1 Shut down the output device 2 Reboot the workstation 3 Start the output device 4 Even if the Trendsetter recovers from the error call your service representative to report it Unable to learn focus Error 17031 The laser could not focus properly on the plate because the plate may be dented or improperly loaded To correct the error 1 Cancel the job and check the plate for damage 2 L...

Страница 89: ... imaging media To correct the error 1 If the Suspend dialog box is displayed on the workstation click the Resume or Cancel Image button 2 Close or replace the access panel The Trendsetter should recover from this error automatically The medium in the output device when the panel was opened or removed will be marked as a reject Error Category Image ...

Страница 90: ... has recovered from the error the message log on the workstation will display the following message Laser is ready One or both plate dimensions too large Error N A To correct the error 1 Check the plate type information to ensure the medium size stated on the workstation matches the size you loaded 2 If the medium sizes match In the Suspend dialog box on the workstation click the Resume button to ...

Страница 91: ...ce representative One or both plate dimensions too small Error N A To correct the error 1 Check the plate type information to ensure the medium size stated on the workstation matches the size you loaded 2 If the medium sizes match In the Suspend dialog box on the workstation click the Resume button to resume imaging Or If the medium sizes don t match Click the Cancel Image button in the Suspend di...

Страница 92: ...e button The Trendsetter should recover from this error automatically The medium in the output device however will be marked as a reject 2 Call your service representative to report the error SCSI parity error while imaging Check plate for artifacts Error 21001 1 Check the medium for image artifacts 2 If you find image artifacts or if you think artifacts might be on the medium but are not visible ...

Страница 93: ...ia while the Emergency Stop switch is activated To correct the error 1 Reset the Emergency Stop switch to continue operations Resolution does not exist Error 3047 This error message can occur routinely when you start the workstation You can safely ignore this message Image too wide for plate Error 3048 1 Ensure the medium size loaded is the size defined in the file you sent to the output device to...

Страница 94: ...ch 90º clockwise Removing a Stuck Plate From the Output Device On occasion a plate may get stuck on the drum as the result of an output device error You must remove the stuck plate before the output device can return to normal operation If an error occurs while a plate is being loaded onto or unloaded from the drum the partially loaded plate must be removed and the trailing edge clamps may have to...

Страница 95: ...c clamps If you have additional concerns consult your physician and or the manufacturer of your implant CAUTION Keep magnetic data floppy disks magnetic stripe cards watches etc away from the powerful magnetic trailing edge clamps To remove a plate from the drum 1 Open the top and front access panels See Opening and Closing the Front Access Panel on page 35 2 Put on protective gloves Protective gl...

Страница 96: ... the trailing edge of the plate straight out the front of the output device until the leading edge clamps can be reached 5 Fold over the corners of the free end of the plate 6 Grasp the corners of the plate and firmly pull until the plate comes free of the leading edge clamps Trailing edge clamps Leading edge clamps ...

Страница 97: ...amps See Repositioning the Trailing Edge Clamps on page 83 10 Close the top and front access panels See Opening and Closing the Front Access Panel on page 35 for more information Repositioning the Trailing Edge Clamps Use the following procedure to reposition the trailing edge clamps in the output device for example when you moved the clamps in order to remove a medium from the drum the clamps wer...

Страница 98: ...formation 2 If there is a plate on the drum remove it See Removing a Stuck Plate From the Output Device on page 80 for more information 3 Rotate the drum by hand until the trailing edge clamps are visible at the front of the output device CAUTION When placing or sliding a trailing edge clamp on the drum always ensure the steel tabs on the clamps are centered on the steel straps on the drum The cla...

Страница 99: ...e clamps above them 6 Verify that the trailing edge clamps are installed in a straight line and are parallel to and touching the leading edge clamps 7 Verify that the trailing edge clamp labels alternate between S and N 8 Close the front top access panels See Opening and Closing the Front Access Panel on page 35 for more information 9 Click the Resume button in the Suspend dialog box on the workst...

Страница 100: ...ly It retains its last state and if nothing changed while it was powered down it attempts to recover when power is restored Sometimes automatic recovery is not possible This occurs for example if the power fails when a medium is partially on the drum In this case a message is displayed on the workstation You must remove the medium See Removing a Stuck Plate From the Output Device on page 80 When a...

Страница 101: ...reaker panel 2 Press in the switch of the circuit breaker that has popped out 3 Restart the output device See Starting the Trendsetter 3244 AL on page 18 for more information If the output device does not start properly call your service representative Loss of Air Pressure in the Output Device Compressed air is supplied to the output device from an external air compressor If a power failure also a...

Страница 102: ...88 Chapter 4 Troubleshooting ...

Страница 103: ...Part Numbers Parts List 90 ...

Страница 104: ...00 N A Plastic bowl guard with automatic drain 55 0175 N A Plastic bowl guard with manual drain 55 0174 N A Kimwipes EX L Extra Low Lint from Kimberly Clark 4 5 x 8 size 89 0029 N A Kimwipes EX L Extra Low Lint from Kimberly Clark 15 x 17 size 89 0030 N A Debris removal cabinet filter 55 0691 Debris removal cabinet filter Desiccant bag 82 1027 Desiccant bag Mylar strip 57 6640A N A ...

Страница 105: ...Labels Overview 92 Labels on the Power Box 93 External Laser Safety Labels 95 Internal Laser Safety Labels 98 Safety Labels 102 ...

Страница 106: ...RH Certification Label page 95 Non interlocked Panel Danger label page 97 Exposure Head Aperture Label page 99 Class 4 Laser Product Label page 99 Laser Hazard Warning Label page 99 Exposure Head Radiation Output Label page 100 Class 3B Laser Product Label page 101 Drum Encoder Radiation Output Label page 101 Door Interlock Danger Label page 101 High Leakage Current Label page 102 CSA Label page 1...

Страница 107: ...ox The labels located on the power box left side rear are shown in Figure 38 below Figure 38 Labels on the power box Circuit Breaker Label page 107 For an illustration of Go to CDRH Certification label Class 1 Laser Identification label Product label ...

Страница 108: ...l This label is located on the power box as shown in Figure 38 on page 93 Figure 39 Identification label Class 1 Laser Product Label This label is located on the power box as shown in Figure 38 on page 93 Figure 40 Class 1 Laser Product label ...

Страница 109: ...l External Laser Safety Labels There is one label located on the rear service access panel of the fan box screw secured the Non interlocked Panel Danger label It is illustrated in Figure 42 There are two of these labels at each end of the screw secured panels under the load table as shown in Figure 43 on page 96 The label itself is shown in Figure 44 on page 97 ...

Страница 110: ...96 Appendix B Labels Figure 42 Label location on the fan box Figure 43 Label location under Load Table Non interlocked Panel Danger label Non interlocked Panel Danger labels ...

Страница 111: ...External Laser Safety Labels 97 Figure 44 Non interlocked Panel Danger label ...

Страница 112: ...d on the drum encoder protective housing as shown in Figure 45 below Figure 45 Internal laser safety labels Class 3B Laser Product label Drum Encoder Radiation Output label Class 4 Laser Product label Exposure Head Aperture label Exposure Head Radiation Output label Laser Hazard Warning label Laser Hazard Warning label ...

Страница 113: ... Exposure Head Aperture label Class 4 Laser Product Label This label is located on the top of the exposure head protective housing Refer to Figure 45 on page 98 for a diagram showing the location Figure 47 Class 4 Laser Product label Laser Hazard Warning Label This label is located in two places on the drum encoder non interlocked protective housing on the top of the exposure head See Figure 45 on...

Страница 114: ...ion Output Label Depending on the exposure head option provided one of the following radiation output laser safety labels is located on top of the exposure head protective housing Figure 49 Exposure Head Radiation Output label 24W Figure 50 Exposure Head Radiation Output Label 40W ...

Страница 115: ...ass 3B Laser Product label Drum Encoder Radiation Output Label This label is located on the drum encoder non interlocked protective housing See Figure 45 on page 98 for a diagram of the location Figure 52 Drum Encoder Radiation Output label Door Interlock Danger Label This label is located beside the safety interlock switches inside the interlocked protective housing Figure 53 Door Interlock Dange...

Страница 116: ...age Current Label This label is located on the rear panel of the power box See Figure 38 on page 93 Figure 54 High Leakage Current label CE Label This label is located on the rear panel of the power box See Figure 38 on page 93 Figure 55 CE label ...

Страница 117: ...bel AC Outlet Maximum Air Pressure Bulkhead Label This label is located on the rear panel of the power box See Figure 38 on page 93 Figure 57 AC Outlet Maximum Air Pressure Bulkhead label FCC Certification Label This label is located on the rear panel of the power box See Figure 38 on page 93 Figure 58 FCC Certification label ...

Страница 118: ...ad board on the exposure head Figure 59 Static Discharge Caution label Hazardous Voltage Label This label is located on the terminal box service access cover in the fan box DANGER The Hazardous Voltage label is located on service access panels that house hazardous voltage For your safety do NOT attempt to open these panels Figure 60 Hazardous Voltage label USE A STATIC DISCHARGE STRAP WHEN TOUCHIN...

Страница 119: ...lead screw Figure 61 Hot Surface Caution label Keep Hands Out Warning Label This label is located behind the front panel on the leading edge actuator Figure 62 Keep Hands Out Warning label Hand Protection Caution Label This label is located in three places on the leading edge actuators on the top of the exposure head Under the manual bypass panel ...

Страница 120: ...bels Figure 63 Hand Protection Caution label Moving Parts Caution Label This label is located in six places two on the end of the unload table two on each of the safety unload panels Figure 64 Moving Parts Caution label ...

Страница 121: ...Safety Labels 107 Circuit Breaker Label This label is located beside the circuit breakers under the flip up access panel on the end panel of the power box Figure 65 Circuit Breaker label ...

Страница 122: ...108 Appendix B Labels ...

Страница 123: ...Regulatory Compliance Electrical and Mechanical Safety 110 Laser Safety 110 EMI EMC Compliance 111 Noise Emissions 111 ...

Страница 124: ...following amended Low Voltage Directive 73 23 EEC Machinery Directive 98 37 EC EMC Directive 89 366 EEC See Appendix B Labels for examples of these labels Laser Safety The Trendsetter 3244 AL has been designed tested and evaluated for compliance with the following laser safety standards U S Federal Regulations 21 CFR 1040 10 and 1040 11 in accordance with the regulations of the Center of Devices a...

Страница 125: ...o radio communications Operation of the Trendsetter in a residential area is likely to cause harmful interference You will be required to correct the interference at your own expense The FCC Certification label on the output device indicates compliance with these limits See Appendix B Labels for an illustration of this label The Trendsetter 3244 AL has been designed tested and evaluated for compli...

Страница 126: ...112 Appendix C Regulatory Compliance ...

Страница 127: ...ng head See exposure head load ramp The glass ramp onto which you load a medium for imaging media Refers to the physical material the plates onto which an image is exposed The output device produces one exposed medium plate for each image PDF Adobe s Portable Document Format A cross platform computer file format plate A physical medium upon which an image is exposed The Trendsetter produces one ex...

Страница 128: ...and workstation software The computer provides the operator s console queueing management raster image processor RIP and system control It is connected to a local area network LAN over which it receives PostScript files workstation software A Creo software application that creates a rasterized image of a PostScript file It is a PostScript Level 3 software RIP raster image processor The software RI...

Страница 129: ...s removal filter replacing 50 desiccant bag replacing 52 disconnecting compressed air 42 Door Interlock Danger label 100 drum location 39 Drum Encoder Radiation Output label 100 E edge detection strip cleaning 37 electrical safety 108 EMC standards 109 Emergency Stop switch resetting 13 80 error messages recommended solutions 59 operator recoverable 58 reporting 14 error categories 60 no category ...

Страница 130: ... manual bypass panel 6 closing 26 opening 22 manual bypass tray cleaning 33 removing imaged media 26 materials filters 9 plates 9 Maximum Air Pressure label 102 mechanical safety 108 media alignment labels 27 dimensions 11 processing 12 registration 27 removing from output device 26 sizes supported 10 supported 10 messages suspend conditions 14 Moving Parts label 105 N noise emissions 109 Non inte...

Страница 131: ... 31 audible warning 5 interlock system 3 symbols 2 safety panels 9 shutting down the output device 17 stains removing 32 Start button 8 starting the output device 16 Static Discharge Caution label 103 static sensitivity warning 5 stuck plates removing 80 Suspend Condition dialog box Cancel Image button 59 Plate Removed button 58 Resume button 58 suspend conditions 14 recovery from 58 symbols used ...

Страница 132: ...118 Trendsetter 3244 AL Operator Manual ...

Страница 133: ......

Страница 134: ...www creo com www Creo com ...

Отзывы: