background image

Содержание 917.388320

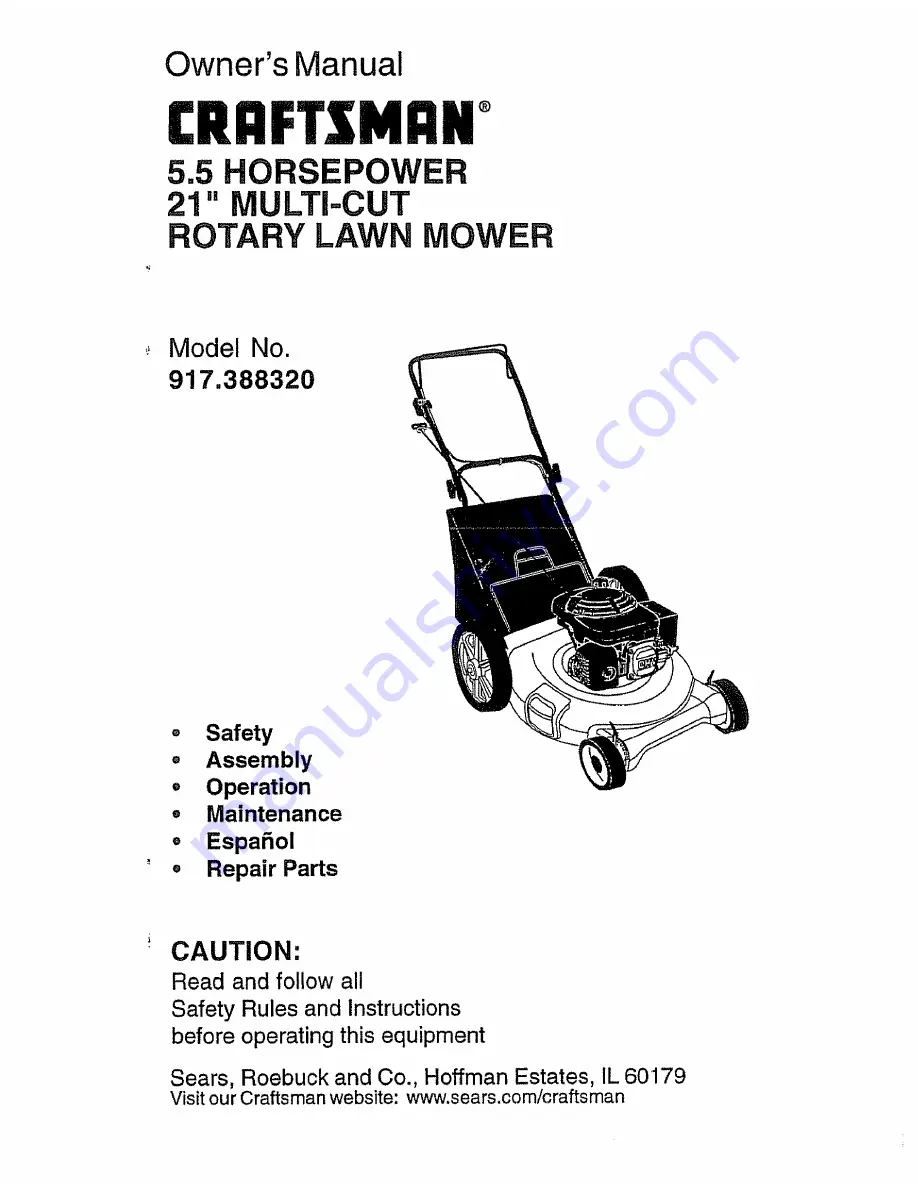
Страница 1: ...el No 917 388320 Safety Assembly Operation o Maintenance o EspaSol Repair Parts CAUTION Read and follow all Safety Rules and instructions before operating this equipment Sears Roebuck and Co Hoffman Estates IL 60179 Visit our Craftsman website www sears com craftsman ...

Страница 2: ...ty gives you specific legal rights and you may also have other rights which vary from state to state SEARS ROEBUCKAND CO D 817 WA HOFFMAN ESTATES ILLINOIS 60179 Safety standards require operator presence control to minimize the risk of injury Your unit is equipped with cuch controls do not attempt to defeat the function of the operator presence controls under any circumstances TRAINING Read this o...

Страница 3: ...ally Excessivevibration is an indication of damage stop the engine safely checkfor the cause of vibration and repair as required Do not run the engineindoors Exhaust fumes are dangerous Nevercut grass by pullingthe mower towardsyou Mowacrosstheface of slopes never up and down or you mightlose your footing Donot mow excessivelysteepslopes Usecaution when operatingthe mower on uneven terrain or when...

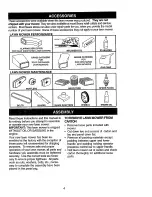
Страница 4: ...ety before you attempt to assemble or operate your new lawn mower IMPORTANT This lawn mower is shipped WITHOUT OIL OR GASOLINE in the engine Your new lawn mower has been as sembled at the factory with the exception of those parts left unassembled for shipping purposes To ensure safe and proper operation of your lawn mower all parts and hardware you assemble must be tightened securely Use the corre...

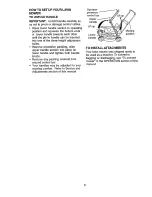
Страница 5: ...ve protective padding raise upper handle section into place on lower handle and tighten both handle knobs Remove any packing material from around control bar Your handles may be adjusted for your mowing comfort Refer to Service and Adjustments section of this manual Operator presence control bar Upper handle Lift up Lower handle up Mowing position TO INSTALL ATTACHMENTS Your lawn mower was shipped...

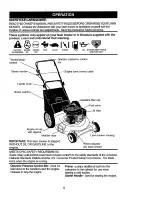
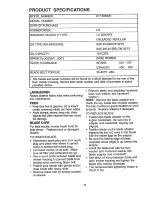
Страница 6: ...control bar Starter Engine zone control cable Handle knob Grass filler cap valve Engine oil cap with dipstick J Mulcher door Lawn mower housing IMPORTANT This lawn mower is shipped WITHOUT OIL OR GASOLINE in the Wheel adjuster engine on each wheel MEETS CPSC SAFETY REQUIREMENTS Sears rotary walk behind power lawn mowers conform to the safety standards of the American National Standards Institute a...

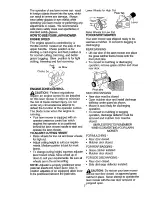
Страница 7: ...uire ments Medium position is best for most lawns To change cutting height squeeze adjuster lever toward wheel Move wheel up or down to suit your requirements Be sure all wheels are in the same setting NOTE Adjuster is propedy positioned when plate tab inserts into hole in lever Also 9 position adjusters if so equipped allow lever to be positioned between the plate tabs Lower Wheels for High Cut L...

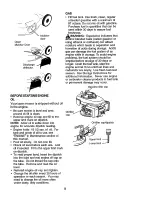
Страница 8: ...engine or carburetor cleaner products in fuel tank or permanent damage may occur Gasoline filler cap BEFORE STARTING ENGINE OIL Your lawn mower is shipped without oil in the engine Be sure mower is level and area around oil fill is clean Remove engine oil cap and fill to the upper limit mark on dipstick NOTE Allow oil to settle down into engine for accurate dipstick reading Engine holds 18 1 2 ozs...

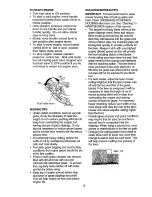
Страница 9: ...engine life MULCHING MOWING TIPS IMPORTANT For best performance keep mower housing free of built up grass and trash Clean UNDERSIDE OF MOWER HOUSING after each use See Cleaning in MAINTENANCE section of this manual The special mulching blade will recut the grass clippings many times and reduce them in size so that as they fall onto the lawn they will disperse into the grass and not be noticed Also...

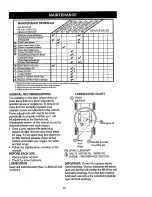
Страница 10: ...orabuse or negligence To receivefull valuefrom the warranty operatormust maintain mower as instnJctedinthis manuaJ Some adjustments will need to be made periodicallyto properly maintain your unit All adjustmentsinthe Service and Adjustments section of this manual shouldbe checked at least once each season Once a year replace the spark plug replace air filterelement and check blade for wear A new s...

Страница 11: ...t cannot come in contact with spark plug o Turn lawn mower on its side Make sure air filter and carburetor are up Use a wood block between blade and mower housing to prevent blade from turning when removing blade bolt Protect your hands with gloves and or wrap blade with heavy cloth Remove blade bolt by turning counter clockwise Remove blade and attaching hardware bolt lock washer and hardened was...

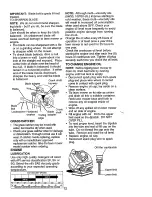
Страница 12: ... wscosrn G_DES C _30 20 _I_0 O 10 20 _0 40 T_P_TURE RANGEA_iCIPATED BEFORE NEXT OIL cHANGE NOTE Although multi viscosity oils 5W30 10W30 etc improve starting in cold weather these multi viscosity oils will result in increased oil consumption when used above 32 F Check your engine oil level more frequently to avoid possible engine damage from running low on oil Change the oil after every 25 hours o...

Страница 13: ...ping to remove build up of grass and trash o Clean engine often to keep trash from accumulating A clogged engine runs hotter and shortens engine life o Keep finished surfaces and wheels free of all gasoline oil etc We DO NOT recommend using a garden hose to clean lawn mower unless the electrical system muffler air filter and carburetor are covered to keep water out Water in engine can result in sh...

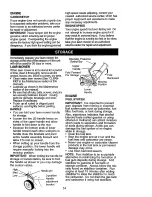
Страница 14: ...to the rear Squeeze the bottom ends of lower handle toward each other until pins in handle clear the brackets and pivot entire handle assembly forward and allow it to rest on mower When setting up your handle from the storage position the lower handle will require manually locking into the mowing position IMPORTANT When folding the handle for storage or transportation be sure to fold the handle as...

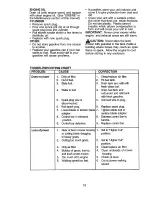
Страница 15: ...building where fumes may reach an open flame or spark Allow the engine to cool before storing in any enclosure TROUBLESHOOTING CHART PROBLEM CAUSE Does not start 5_ 6_ Loss of power 1 Dirty airfiiter 2 Out of fuel 3 Stale fuel 4 Water in fuel Spark plug wire is disconnected Bad spark plug CORRECTION J J JJJ _ 1 Clean replace air filter 2 Fill fuel tank 3 Drain tank and refill with fresh clean fuel...

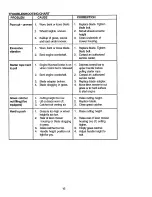
Страница 16: ...rake is on when control bar is released Bent engine crankshaft Blade adapter broken Blade dragging in grass 1 Cutting height too low 2 Lift on blade wom off 3 Catcher not venting air 1 Grass is too high or wheel height is too low 2 Rear of lawn mower housing or blade dragging in grass 3 Grass catcher too full 4 Handle height position not right for you 1 Depress controlbar to upper handle before pu...

Страница 17: ...n tenga otros derechos que vafian de estado a estado Sears Roebuck and Co D 817WA Hoffman Estates IL 60179 USA Los estandrares de segur_dad exigen la presenda del operator en los conl_oles para reducir a un minimo el riesgo de lesionarse S u unidad viene equipada con dichos con oles Por ningun motivo trate del eliminar la fund6n de los controles que exJgen la presencia del operador ENTRENAMIENTO L...

Страница 18: ... No haga funcionar el motor en recintoscerrados Los gases de escape son petigrososo Nunca corte el c_sped tirando la segadora hacia usted Siegue a trav_s de la cara de las pendientes nunca hacia arriba o hacia abajo o pues puede perder el equilibdo No siegue pendientes demasiado empinadas Tenga cuidado cuando opere la segadora en terreno disparejo o cuando cambie de direcci6n mantenga un buen equi...

Страница 19: ...nes de env_o Todas las partes como las tuercas las arandelas los pemos etc que son necesarias para comptetar el montaje han sido colocadas en la bolsa de parteso Pare asegurarse que su segadora funcione en forma segura y adecuada todas las partes y los artfculos de ferreterfa que se monten tienen que ser apretados seguramente_ Use las herramientas correctas como sea necesario para asegurar que se ...

Страница 20: ...para que le acomode al segar Refi_rase a la secci6n de Servicio y Ajustes en este manual Barra de control que exige ta presencia del operador _ Mango supedor _ f Z 7 Levantar __Levantar t_ _ _ _ Post cidn para gar PARAINSTALAR LOS ACCESORIOS Su segadora fue enviada lista para usarse como una acolchadora de capa vegetal Para converlJrla de modo que pueda ensacar o descargar Refi_rase a Para Convert...

Страница 21: ...edorc c6sped Manilla del mango Tapa det relleno de la asolina Valvula del Tapa del deposito de aceite del motor con vafllla indicadora de nivel Puerta de la acolchadora Ajustadorde la rueda en cadarueda IMPORTANTE Este cortac6sped viene SIN ACEtTE O GASOLINA en el motor CuMPLE C ON LOS REQUISITOS DE sEGuRIDAD DE _ CPSC Las segadoras a motor que se conducen desde la parle de at_s rotatofias Sears c...

Страница 22: ...os c_spedes Para cambiar la altura de code empuje Ia palanca de ajustador hacia la rued Mueva la rueda hacia arriba o hada abajo de modo que se acomode a sus requ sitos Asegt3rese que todas las ruedas queden igualmente ajustadas AVI O El ajustador esta correctamente colocado cuando las orejas de la placa est q insertadas en el agujero del mango Tambi_n los ai stes de 9 posiciones si equipado permi...

Страница 23: ... apri_tela Cambie el aceite despu6s de 25 horas de operaci6n o por Io menos una vez al afio si la segadora se utiliza menos 25 horas al afio Puede necesitar cambiar el aceite mils a menudo cuando las condiciones son p61vorosas o sucias GASOLINA Llene el estanque de gasolina Utilice gasolina nueva limpia sin plomo con octanaje de mfnimo de 87 No mezcle el aceite con la gasolinao Compre gasolina en ...

Страница 24: ...ecortes de c_sped y pajaoEsto ayudar el flujo del aire det motor y extender_ su duraci6n CONSEJOS PARA SEGAR Y ACOLCHAR IMPORTANTE Para obtener el mejor rendimiento mantenga la caja de la segadora sin acumulacion de cesped y basura Vea limpieza en la seccion de MANTENIMENTO de este manual o La cuchilta acolchadora especial va a volver a cortar los recortes de c_sped muchas veces y los reduce en ta...

Страница 25: ...descritas en este manual Hay algunos ajustes que se tienen qua hacer en forma periSdica para poder mantener su unidad adecuadamente To los los ajustes en ia secciOn de Servicioy Ajustes de este manual tJenenque ser revisados pot o menos un vez por cada temporada Una vez a afio cambie la bujia Iimpie o cambie el elemento del filtro de aire y revise si la cuchilla est _desgastada Una bujfa nueva y u...

Страница 26: ... de la bujfa y p6ngalo en donde no pueda entrar en contacto con _sta Haga descansar la segadora en su lado Aseg_3rese que el filtro de aire y que et carburador queden mirando hacia arriba Use un bloque de madera entre la cuchilla y la caja de la segadora para evitar que la cuchilla gire cuando sete quite el pemo Proteja sus manos con guantes ylo envuelva la cuchilla con una tela gruesa Remueva el ...

Страница 27: ...H de servicio API Seleccione la catidad de viscosidad SAE segQn su temperatura de operaci6n esperada CAUDADES OE WSCOS_DAD O_SAE GAMA DE TEMFERATURA ANTICIPN2A ANTES DEL PROXIMo CAMBiO DE ACEiTE AVISO A pesar de que los aceites de multiviscosidad 5W30 10W30 etc mejoran el arranque en clima frio estos aceites de multiviscosidad van a aumentar el consumo de aceite cuando se usan en temperaturas sobr...

Страница 28: ...d corroi do pues producir un peligro de incendio y o daSo BUJfA Cambte su bujfa cada a_o para hacer que su motor arranque m s f cilmente y funcione mejor Ajuste la abertura de la bujfa en 0 030 pulgada LIMPIEZA IMPORTANTE Para obtener el mejor rendimiento mantengala caja de la segadora sin acumulaciSn de c6sped y basurao Limpie la parte de abajo de su segadora despues de cada uso a_amPRECAUCI6N De...

Страница 29: ...e la pinza del mango pueda ser insertada en uno de los tres agujeros del control de ta albJra MOTOR CARBURADOR Si su motor no est funcionando en forma adecuada debido a problemas que se sospecha vienen del carburador lleve su segadora a un centro de servicio autorizado para repararla y o ajustarla IMPORTANTE Nunca manipulee el reguador del motor el que ha sido ajustado en la fagdca para la velocld...

Страница 30: ...alcohol conocido como gasohol o que tienen etanol o metanol pueden atraer humedad 1oqueconduce a la separacion y a la formacion de acidos durante el almacenamientOoLa gasolina acdica puede danar et sistema de combustible de un motor durante el periodo de almacenamiento Drene et estanque de combustible Haga arrancar el motor y d_jelo funcionar hasta que las Ifneas det combustible y el carburaclor e...

Страница 31: ...ebajo de la segadora 5 Demasiado aceite en el motor 6 Velocidad de recorrido demasiado rapid Cuchilla desgastada doblada o suelt 2 Altura de la nJedas dispareja 3 Acumulacion de cesped hojas o basura debajo de la segadorao C0RRECCION 1_ Lirnnpie carnbie il filtro de aire 2o Llene el estanque de combustible 3 Drene el estanque y vuelva a Itenario con combustible limpo y nuevo 4o Drene et estanque d...

Страница 32: ...ose en el cesped 3 Recogedor de cesped demasiado ileno 4o Psicion de ta altura del mango no adecuada para usted illl Dificet de empujar 14 Cambie la cuchilla Apdete el pemo de la cuchilla 2 Pngase en contacto con su centro de servicio autodzado mas cercanoo 1 Presione la barra de control hacia el mango superior antes de tirar el cordon arrancadon 2o 3 4o Pongase en contacto con su centro de servic...

Страница 33: ...33 ...

Страница 34: ...0 0 cO cO r_ Tm Cv_ d Z I LU t LL C X I t r 0 X t_ _ 34 ...

Страница 35: ...0 CXl z 0 I ILl 0 I 0 Z I 0 rr Z z Iz o m l U 13 R 0 _ _ _ _ _o _ r r _ m _ Z _ a x _ __ _ c_ _ g _o__o__ _ _ ____o__ 0 z 5 _ _ a t _ _ 0 vZ 35 ...

Страница 36: ...4_ _y CLE ENGINE M DEL NUMBER GCV160AIA CONTROL j 13 8 CAMSHAFT j CARBURETOR J 13 _ 11 12 4 14 36 ...

Страница 37: ...insulator Carburetor 8 5580386 Rod Governor 11 5580246 Gasket Carburetor 9 2418671 Bolt Governor arm 12 4581120 Gasket Carburetor 10 5580998 Bolt Flange 6X45 CT200 13 5580253 Gasket Carburetor 11 0145557 Screw Pan 5X16 I4 5580535 Guide Comp Air 12 0471623 Nut Flange 6MM 15 3344520 Screw Pan 5X6 16 0635474 Jet Main 60 OPTIONAL I6 0635482 Jet Main 62 OPTIONAL CAMSHAFT PULLEY t6 0636126 Jet Main 65 O...

Страница 38: ...MODEL NUMBER GCVI60AIA F A_ CO_RI FLYWHEEL I _ 10 12_ _P 1t 1 3 5 RECOIL STARTER I 4 2 6 I 38 ...

Страница 39: ...ube B8 12 1824630 13 0250985 Clip Tube B10 13 0485946 14 0053447 Clip Tube C9 14 1510361 Key Special Woodruff _o5 x 18 it Assyo Ignition FlywheelAssyo Wire Stop Switch Switch Assy Engine Stop Brake Assy Spring Brake Lever Bolt Flange 6X14 Bolt Flange 6X23 Bolt Flange 6X20 Nut Speclal 14ram Clip Cable Screw Washer 4Xt2 Washer Plain AIR CLEANER RECOIL STARTER KEY PART KEY PART NO NO DESCRIPTION NO N...

Страница 40: ...4 CYCLE ENGIN E MODEL NUMBER GCV160AIA CYLINDER BARREL CRANKSHAFT OIL PAN PISTON CONNECTING ROD I 6 4 k 0 18 5 _3 1 3 ...

Страница 41: ...or Holder Govemor Assyo Weight Governor Holder Governor Weight Pin Governor Weight Slider Governor Shaft Governor Arm Bolt Flange 6Xt4 Bolt Flange 6X25 Washer Thrust 6mm Clip Governor Holder Oil Seal 28X41 25X6 Washer Plain 6ram Pin Lock 8mm Pin Dowel 8X20 Gauge Assy Oil Level KEY PART NO NO DESCRIPTION 1 5580030 5 5581O12 Crankshaft Comp N1 Type Washer Thrust PISTON CONNECTING ROD KEY PART NO NO ...

Страница 42: ...42 ...

Страница 43: ...43 ...

Страница 44: ... the repair or replacement parts you need Call 6 am 11pm CST 7 days a week PartsDirect sM 1 800 366 PART 1 800 366 7278 Para ordenar piezas con entrega a domicilio 1 800 659 7084 For the location of a Sears Parts and Repair Center in your area Call 24 Hours a day 7 days a week 1 800 488 1222 For information on purchasing a Sears Maintenance Agreement or to inquire about an existing Agreement Call ...

Отзывы: