


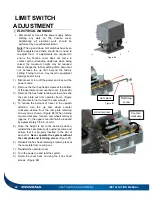
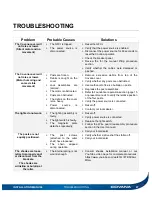
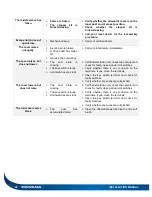


INSTALLATION MANUAL
INSTALLATION
37
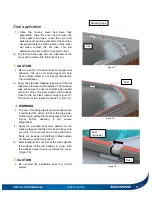
Seal
Figure 78
Seal application
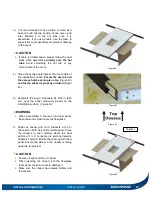
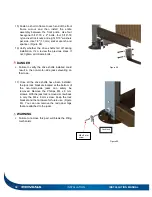
1) Once the Covana cover has been fully
assembled, raise the cover and remove the
foam spacers and tape. Lower the cover and
walk around the entire perimeter of the hot tube,
observing where the inside surface of the cover
will make contact the hot tube. This will
determine the best location to apply the seal.
2) Dry the hot tube edge and the underside of the
cover with a clean cloth. Wait until it is dry.
CAUTION
Remove all dirt, oil and moisture for proper seal
adhesion. The use of mild detergent can help
clean surface. Refer to hot tube
manufacturer’s
recommendation.
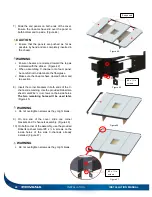
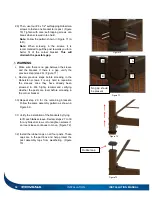
3) Apply the provided masking tape around the hot
tube where the seal will be installed. The masking
tape will ensure the seal is straight when pulled
corner to corner. The ideal location for the seal is
closer to the hot tube
’s interior edge (Figure 77)
The minimum turn radius for seal is 4 in (10 cm).
WARNING
The use of masking tape is recommended since
it will
protect the acrylic tub from the clips’ glue.
Furthermore, pulling the masking tape to the next
corner
before
adhering
it
will
ensure
straightness.
4) Apply the provided seal clips parallel on the
masking tape around the hot tube and be sure to
put more in the corners and on any tight turns,
filters, etc., keeping in mind that a limited number
of clips are provided. (Figure 77)
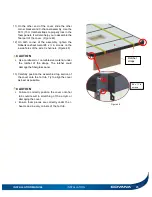
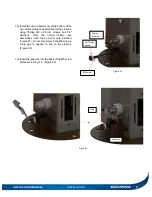
5)
Start installing the seal joint at the side opposite
the entrance of the tub (halfway in a clip), with
the adhesive layer facing up toward the cover.
(Figure 78)
CAUTION
Do not start the installation near to a control
system.
Figure 77
Masking tape
Clip
Seal
Seal
connector
Figure 79
Содержание Evolution GHSC
Страница 1: ...1 INSTALLATION MANUAL Revision 1 2017 05 29 Revision 2 2017 11 10...
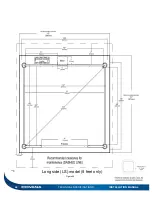
Страница 44: ...44 TECHNICAL SPECIFICATIONS INSTALLATION MANUAL Figure 85 NOT TO SCALE Long side LS model 8 feet only...
Страница 49: ...INSTALLATION MANUAL APPENDIX 49 APPENDIX...
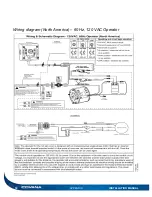
Страница 50: ...50 APPENDIX INSTALLATION MANUAL Wiring diagram North America 60 Hz 120 VAC Operator...
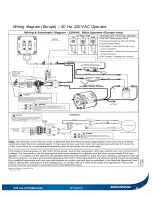
Страница 51: ...INSTALLATION MANUAL APPENDIX 51 Wiring diagram Europe 50 Hz 220 VAC Operator...
Страница 53: ...INSTALLATION MANUAL INSTALLATION CHECKLIST Customer copy 53...
Страница 56: ...56 INSTALLATION MANUAL...


