


INSTALLATION MANUAL
INSTALLATION
27
Lifting mechanism assembly
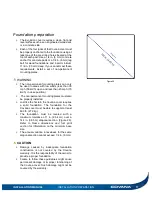
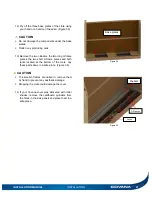
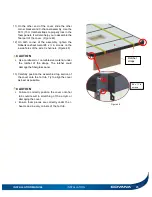
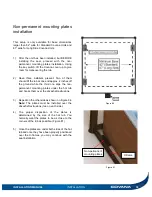
1) Put the motor frame in place, usually to the back
of the hot tub entrance. Place the motor frame
according to Figure 51. The standard model will
need the motor frame to be on the short side of
the Covana cover, whereas the long-side model
will need the motor frame on the long side of the
Covana cover.
2)
IMPORTANT: The steps that follow are side-
specific.
The following steps are for the left-
hand post foot assembly.
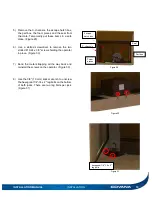
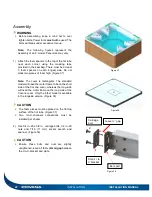
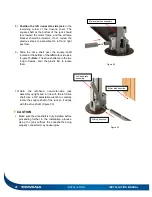
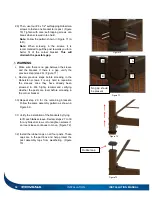
3) Use the uncrated non-motor-side jacks, and
install one of the post feet on one of the non-
motor-side jacks. First, align the foot bracket on
the right side of the U-frame shaft. (Figure 52)
4) Slide the alignment brackets of the post foot in
the alignment slots of the non-motor-side jack.
(Figure 52 and 53)
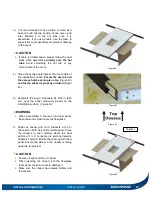
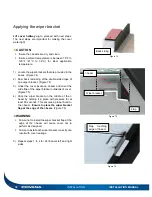
5) Push upwards to lock in the post foot. Ensure
full contact is made along the bottom. Using a
rubber mallet may facilitate the lock-in process.
(Figure 53)
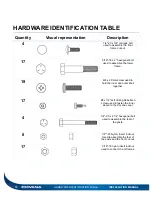
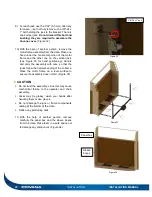
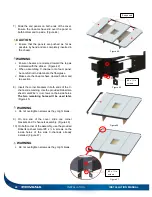
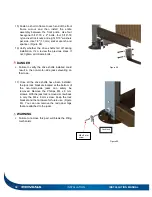
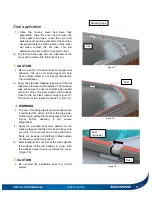
6) Use the two 1/4
″-20 x 2¼″ hexagonal bolts and
nylon-insert lock nuts provided and a 7/16
″ (11
mm) socket wrench and spanner to fasten the
assembly.
Do not overtighten these bolts.
The mechanism may bend inwards as a
result.
It is important to respect the
assembly orientation of the hardware.
(Figure 54)
7) For
the
right-hand
non-motor-side
jack
assembly, repeat steps 3 to 6, putting the foot
bracket on the left side at step 3. (Figure 52)
CAUTION
Posts will fall easily when placed upright. Secure
the posts by laying them down before proceeding
with next step.
Figure 51
U-frame
bracket
Shaft
Alignment slots
Figure 52
Figure 53
Figure 54
Left side for
post assembly
Right side for
post assembly
Содержание Evolution GHSC
Страница 1: ...1 INSTALLATION MANUAL Revision 1 2017 05 29 Revision 2 2017 11 10...
Страница 44: ...44 TECHNICAL SPECIFICATIONS INSTALLATION MANUAL Figure 85 NOT TO SCALE Long side LS model 8 feet only...
Страница 49: ...INSTALLATION MANUAL APPENDIX 49 APPENDIX...
Страница 50: ...50 APPENDIX INSTALLATION MANUAL Wiring diagram North America 60 Hz 120 VAC Operator...
Страница 51: ...INSTALLATION MANUAL APPENDIX 51 Wiring diagram Europe 50 Hz 220 VAC Operator...
Страница 53: ...INSTALLATION MANUAL INSTALLATION CHECKLIST Customer copy 53...
Страница 56: ...56 INSTALLATION MANUAL...


