

Содержание 59217680
Страница 1: ...Dollhouse TP10012 ...
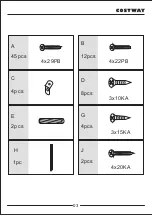
Страница 3: ...A B 45pcs 12pcs 4x29PB 3x10KA 4x22PB C 4pcs D 8pcs E 2pcs H 1pc G 4pcs 3x15KA 4x20KA J 2pcs 03 ...
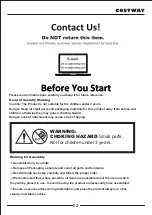
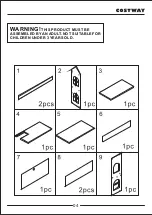
Страница 4: ...WARNING THIS PRODUCT MUST BE ASSEMBLED BY AN ADULT NOT SUITABLE FOR CHILDREN UNDER 3 YEARS OLD 04 ...
Страница 5: ...05 ...
Страница 6: ...06 ...
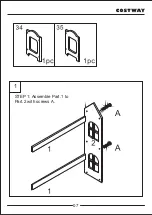
Страница 7: ...1 STEP 1 Assemble Part 1 to Part 2 with screws A 07 ...
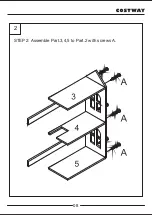
Страница 8: ...2 STEP 2 Assemble Part 3 4 5 to Part 2 with screws A 08 ...
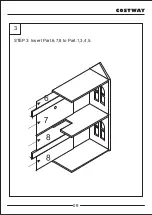
Страница 9: ...3 STEP 3 Insert Part 6 7 8 to Part 1 3 4 5 09 ...
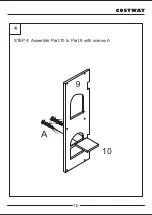
Страница 10: ...4 STEP 4 Assemble Part 10 to Part 9 with screws A 10 ...
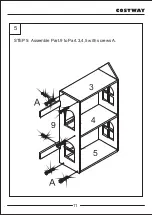
Страница 11: ...5 9 3 4 5 STEP 5 Assemble Part 9 to Part 3 4 5 with screws A 11 ...
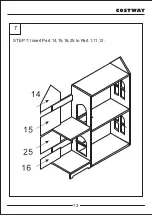
Страница 13: ...7 STEP 7 Insert Part 14 15 16 25 to Part 1 11 12 13 ...
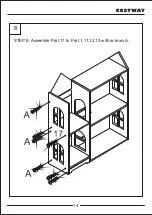
Страница 14: ...8 STEP 8 Assemble Part 17 to Part 1 11 12 13 with screws A 14 ...
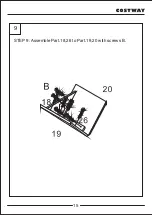
Страница 15: ...9 STEP 9 Assemble Part 18 26 to Part 19 20 with screws B 15 ...
Страница 16: ...10 STEP 10 Assemble Part C to Part 9 17 with screws D 16 ...
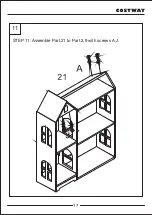
Страница 17: ...11 STEP 11 Assemble Part 21 to Part 2 9 with screws A J 17 ...
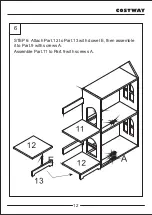
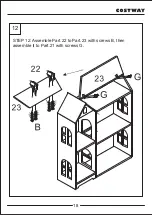
Страница 18: ...12 STEP 12 Assemble Part 22 to Part 23 with screws B then assemble it to Part 21 with screws G 18 ...
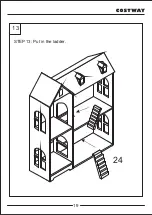
Страница 19: ...13 24 STEP 13 Put in the ladder 19 ...
Страница 21: ...15 31 31 H STEP 15 Attach Part 31 to Part H then insert it to Part 12 28 with screws A 21 ...
Страница 22: ...16 A A 29 STEP 16 Assemble Part 29 to Part 12 13 27 28 with screws A 22 ...
Страница 23: ...17 STEP 17 Complete installation 23 ...
Страница 24: ...1 2 3 4 5 6 9 12 7 8 10 11 13 14 9 12 Dollhouse Furniture Set 24 ...
Страница 25: ......