


68
5.5 Parental Control
This selection provides WAN access control functionality.
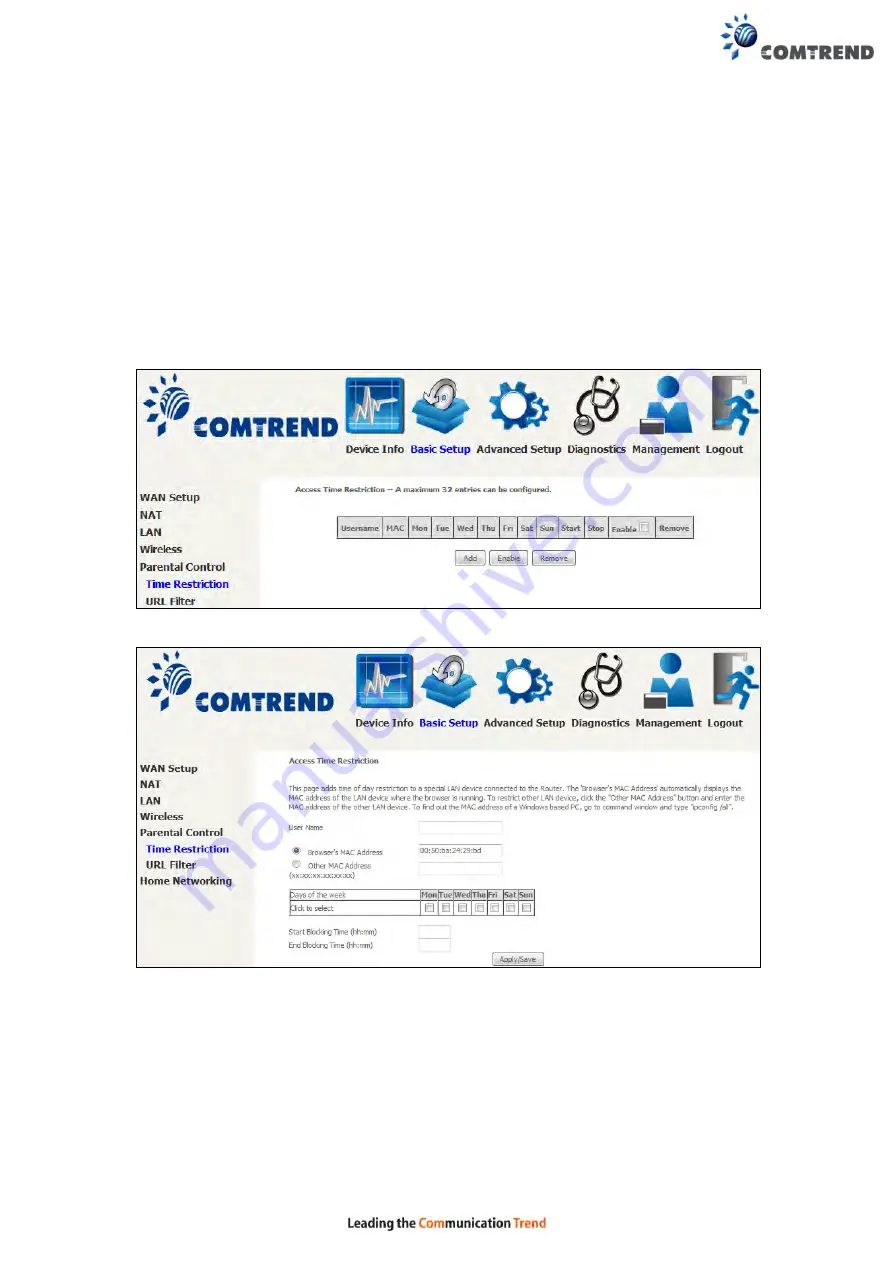
5.5.1 Time Restriction
This feature restricts access from a LAN device to an outside network through the
device on selected days at certain times. Make sure to activate the Internet Time
server synchronization as described in section
, so that the
scheduled times match your local time.
Clicking on the checkbox in the Enable field allows the user to select all / none
entries for Enabling/Disabling.
Click
Add
to display the following screen.
See below for field descriptions. Click
Apply/Save
to add a time restriction.
User Name:
A user-defined label for this restriction.
Browser's MAC Address:
MAC address of the PC running the browser.
Other MAC Address:
MAC address of another LAN device.
Days of the Week:
The days the restrictions apply.
Start Blocking Time:
The time the restrictions start.
End Blocking Time:
The time the restrictions end.
Содержание VR-3060
Страница 1: ...261099 038 VR 3060 Multi DSL Router User Manual Version A1 0 December 22 2015...
Страница 18: ...17 This screen shows hardware software IP settings and other related information...
Страница 39: ...38 4 11 2 Site Survey The graph displays wireless APs found in your neighborhood by channel 5GHz...
Страница 40: ...39 2 4GHz...
Страница 58: ...57 5 3 3 UPnP Select the checkbox provided and click Apply Save to enable UPnP protocol...
Страница 71: ...70 A maximum of 100 entries can be added to the URL Filter list...
Страница 88: ...87...
Страница 139: ...138 Enter the MAC address in the box provided and click Apply Save...
Страница 160: ...159 Note Passwords may be as long as 16 characters but must not contain a space Click Save Apply to continue...
Страница 175: ...174 STEP 3 Click Next to continue when you see the dialog box below STEP 4 Select Network Printer and click Next...
Страница 177: ...176 STEP 7 Select driver file directory on CD ROM and click OK STEP 8 Once the printer name appears click OK...
Страница 178: ...177 STEP 9 Choose Yes or No for default printer setting and click Next STEP 10 Click Finish...
Страница 179: ...178 STEP 11 Check the status of printer from Windows Control Panel printer window Status should show as Ready...
Страница 203: ...202 F2 4 PPP over ATM PPPoA STEP 1 Click Next to continue...


