


95
6.9 Certificate
A certificate is a public key, attached with its owner’s information (company name,
server name, personal real name, contact e-mail, postal address, etc) and digital
signatures. There will be one or more digital signatures attached to the certificate,
indicating that these entities have verified that this certificate is valid.
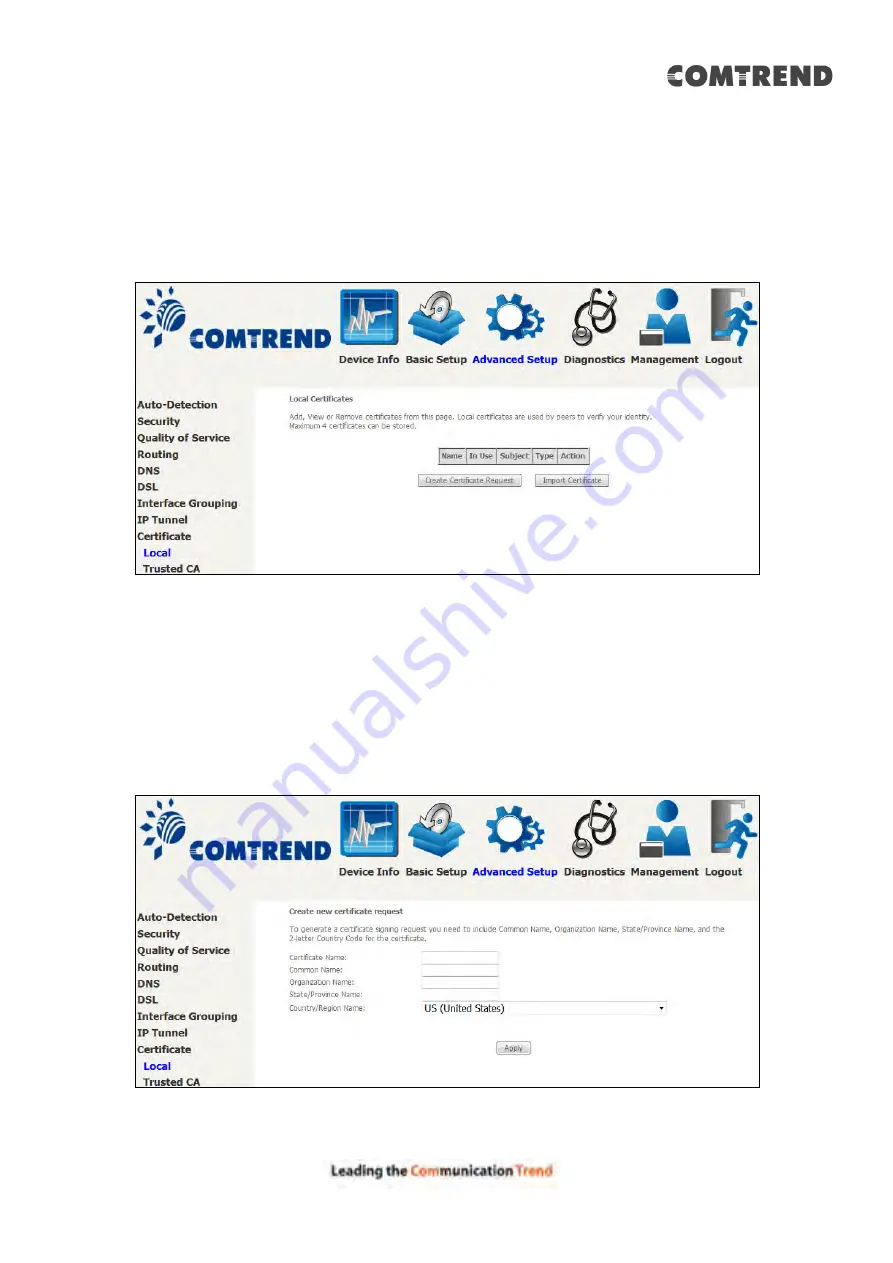
6.9.1 Local
CREATE CERTIFICATE REQUEST
Click
Create Certificate Request
to generate a certificate-signing request.
The certificate-signing request can be submitted to the vendor/ISP/ITSP to apply for
a certificate. Some information must be included in the certificate-signing request.
Your vendor/ISP/ITSP will ask you to provide the information they require and to
provide the information in the format they regulate. Enter the required information
and click
Apply
to generate a private key and a certificate-signing request.
The following table is provided for your reference.
Содержание AR-5319
Страница 1: ...AR 5319 ADSL2 WLAN Router User Manual 261056 079 Version A1 1 March 6 2017...
Страница 40: ...39 4 11 2 Site Survey The graph displays wireless APs found in your neighborhood by channel...
Страница 56: ...55 5 3 3 UPnP Select the checkbox provided and click Apply Save to enable UPnP protocol...
Страница 67: ...66 Enter the PPP username password given by your service provider for PPP service detection...
Страница 79: ...78 6 3 2 Wlan Queue Displays the list of available wireless queues for WMM and wireless data transmit priority...
Страница 111: ...110 Enter the MAC address in the box provided and click Apply Save...
Страница 132: ...131 Note Passwords may be as long as 16 characters but must not contain a space Click Save Apply to continue...
Страница 149: ...148 To add a WAN connection go to E2 WAN Connections...
Страница 156: ...155 10 IPoA IPv6 Not Supported The subsections that follow continue the WAN service setup procedure...
Страница 185: ...184 Click Next to continue or click Back to return to the previous step...
Страница 203: ...202 STEP 2 Click the Windows start button Then select Control Panel...
Страница 204: ...203 STEP 3 Select Devices and Printers STEP 4 Select Add a printer...