2V9WP Instruction Manual
IMPORTANT
- Do not open the battery door while submerged in water.
- Close the battery door properly for the best water-tight seal.
- Ensure that the latch on the battery door is correctly closed.
- Rinse with clean water after use.
1. Getting to Know Your Camera
Ultra Slim Waterproof Design
Waterproof up to 10 ft. / 3 meters
20.0 Mega Pixels Max Resolution
Wide Angle Lens
Digital Still Camera
Digital Video Camcorder
Built-in Flash Light
4X Digital Zoom
2.7"+1.8" TFT Color Display
Micro SD / SDHC Card Support
2x AAA Alkaline Batteries
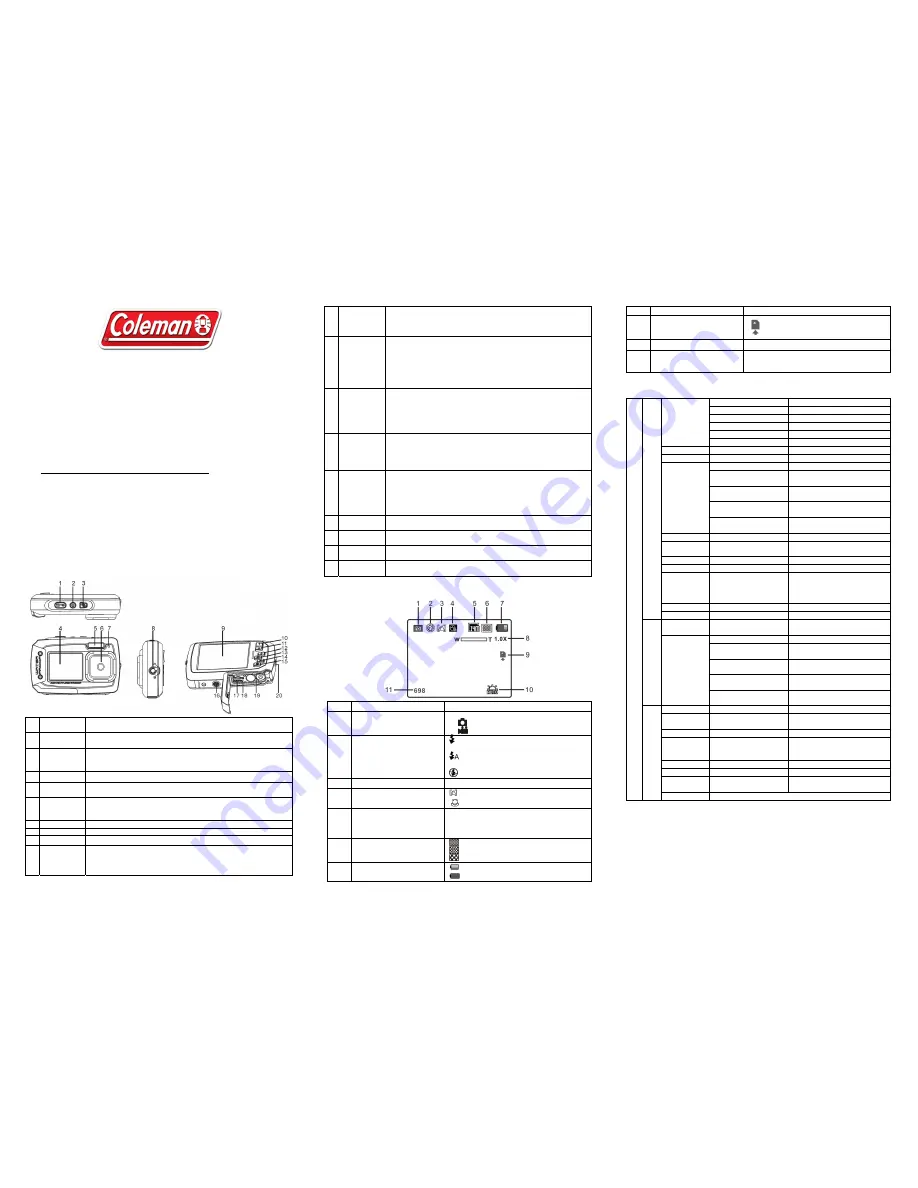
2. Functional Parts
1
Shutter
Press this button to take photographs or to start /stop recording
a video clip, or to confirm changes in menu mode
2
Power on/off
button
Press this button for at least 2 seconds to switch on or off the camera
,
or press it to display or hide the status icon on LCD.
3
Monitor
switching
button
Press this button to switch between the front monitor and the back
monitor.
4
Front monitor Use the front monitor when taking self-portrait shots
5
Flash light
Use the built-in flash to give the subject extra lighting when shooting in
the dark (the best shooting distance is within 1.5m).
6
Lens
Capture the image.
Note:
Keep the lens clean. Dirt and fingerprints will affect the quality of
the picture.
7
Busy indicator When the indicator is blinking, the camera is busy.
8
Strap hook
Hook for attaching the wrist strap to the camera.
9
Main Screen
Display photographs, video clips, camera setting and menu.
10
Up/Tele
In Preview mode: press this button for zooming in.
In Menu mode: press this button to move up the selection bar.
In Image Playback mode: press this button for enlarging the photo.
In Video Playback mode: press it to start/pause the video.
11
Down/Wide
In Shooting mode: press this button for zooming out.
In Menu mode: press this button to move down the selection bar.
In Image Playback mode: press this button for reducing the photo size.
In Video Playback mode: press this button to enter the thumbnail mode
12
Left / Flash
light
In Menu mode: press this button for the left selection;
In Playback mode: press this button to go back to the previous one;
In Photo Infinite Preview mode: press this button to switch to Flash
mode;
When zooming in under Image Playback mode: press it to move to the
left portion of the photo.
In Video Playback mode: press it for fast rewind.
13
Right /
Playback
Press this button to enter Playback mode;
In Playback mode: press this button to move to the next one;
In Menu mode: press this button for the right selection;
When zooming in under Image Playback mode: press it to move to the
right portion of the photo.
In Video Playback mode: press it for fast forward.
14
Mode Switch
Press this button to switch between movie and still capture mode;
In Playback mode: press this button to exit.
When zooming in under Image Playback mode: press it to move to the
upper portion of the photo. In Video Playback mode: press it to stop the
video.
15
Menu / Delete
In Preview mode: press it to enter the Settings Menu.
In Playback mode:
Press it for a short time to enter the
“
Delete single/ all files
”
mode;
Press it for a long time to enter the "File compiling and system settings
menu". When zooming in under Image Playback mode: press it to move
to the lower portion of the photo.
16
MicroSD card
slot
MicroSD card storage location.
17
USB interface
You can download photographs and video clips to a computer when
connecting with a USB cable. (not included)
18
Battery
compartment
Compartment for 2 x AAA alkaline batteries
19
Tripod
connector
For fixing the camera on the tripod.
3. Explanation of Status Icons
Item
Function
Description
1
Mode
Shows the current operating mode:
Photo mode.
Videos mode.
2
Flash
Force flash:
The flash will be on under any
environment.
Auto flash:
The camera determines if
the flash should be used or not.
No flash:
The flash is turned off.
3
Self-Timer
Indicates the Self-timer is set
4
Normal / Macro Mode
Mode (0.5m – infinity).
Macro mode (11cm – 18cm).
5
Resolution
Shows the selected picture’s resolution:
20 M = 5184X3888;14M = 4320x3240;
8M = 3264x2448; 5M = 2592x1944;
3M = 2048x1536; VGA = 640x480
6
Picture quality
Super fine
Fine
Normal
7
Battery indicator
The batteries are full.
The batteries are empty.
8
Zoom indicator
Shows the zoom ratio during preview mode
9
MicroSD card
Indicates the MicroSD card is inserted and
will be used as storage for PHOTO and
VIDEO
10
White Balance
Shows the selected White-balance mode.
11
Photo/Video counter
Photo mode:
No. of pictures that can be taken.
Video mode:
Recording time in seconds.
4. Camera Settings Details
20M pixel resolution
5184X3888
14M pixel resolution
4320x3240
8.0M pixel resolution
3264x2448
5.0M pixel resolution
2592x1944
3.0M pixel resolution
2048 x 1536
Resolution
VGA resolution
640 x 480
Quality
Super Fine/Fine/Normal
Picture quality setting
Metering Center/Multi/Spot Metering
setting
Auto
Automatic white balance
Daylight
White balance for shooting under
fine weather condition
Cloudy
White balance for shooting under
cloudy condition
Tungsten
White balance for shooting under
tungsten lighting
White Balance
Fluorescent
White balance for shooting under
fluorescent lighting
ISO
Auto/100/200/400/800 Sensitivity selection
Exposure
±
2.0,
±
5/3,
±
4/3,
±
1.0,
±
2/3,
±
1/3, 0
Exposure setting
Self Timer
On/Off
Self timer setting
Sharpness
Hard/ Normal/ Soft
Sharpness setting
Effect
Normal/ B&W/ Sepia/
Negative/ Lomo/ Pencil
Sketch/ Red/ Green/
Blue/ Vivid
Effect setting
Date Stamp
On/ Off
Date stamp setting
Photo
Quick View
On/ Off
Quick view setting
Movie Size
VGA 640 x 480
QVGA 320 x 240
Video resolution setting
Auto
Automatic white balance
Daylight
White balance for shooting under
fine weather condition
Cloudy
White balance for shooting under
cloudy condition
Tungsten
White balance selected for
shooting under tungsten lighting
Video
White balance
Fluorescent
White balance for shooting under
fluorescent lighting
Sounds
Off/On
Sounds setting
Frequency
50Hz / 60Hz
Select power frequency in your
location
Power Save
Off / 1Minute / 3 Minutes
Auto power off selection
Language
English/ French/
Deutsch/Italian/Spanish/
Portuguese/Japanese
Display language selection
Date/Time
YY/MM/DD
Date or time setting
Format
Yes/No
Format the MicroSD Card
Reset All
Yes/No
Reset all settings to factory default
positions
settings
Setup
Version
Shows the firmware version
Note:
Turning off the camera will not erase the last settings.
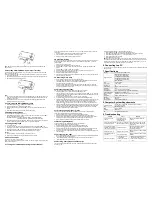
5. Using the camera
5.1 Installing the batteries
1. Open the battery door.
2. Insert 2 x AAA alkaline batteries into the battery compartment.
3. Close the battery door.


