


98
The parameters are:
•
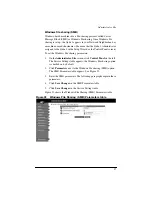
Workgroup or NT Domain
Enter a workgroup or NT domain to
which you want the Qube 2 to belong. This entry determines how
the Qube 2 appears in the Network Neighborhood on a Windows
client machine.
•
Windows 95 Network Logon Support
Enable this option if you
want the Qube 2 to act as a Windows logon server, authenticating
users when they begin a session on a Windows 95 or Windows 98
machine. This means that when Windows users log into the
network, they are authenticated using their Qube 2 account.
•
WINS Server
If your Windows network spans more than one TCP/
IP subnet, you must use a WINS server for NetBIOS name
resolution. To use your Qube 2 as a WINS server, click the radio
button “Be a WINS Server.”
If you do have a WINS server on your network, be sure to specify
the IP address of the WINS server in the “Other machine” field. If
you do not have a WINS server on your network, choose “Other
machine” field and leave the field blank.
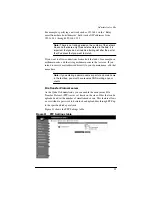
For detailed information on setting up Windows file sharing, see “Using
Windows file sharing (SMB)” on page 42.
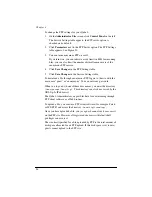
Apple file sharing (AppleShare)
AppleShare is the Macintosh file-sharing protocol. This option allows
you to share files between the Qube 2 and Macintosh computers on your
network. In the Qube 2, Appleshare works over IP networks, which
makes Macintosh-to-Qube 2 file sharing faster (even on your internal
network).
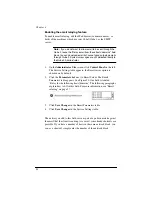
To enable Apple file sharing:
1.
On the
Administrator Site
screen, click
Control Panel
on the left.
The Service Settings table appears.
2.
Click the check box next to “Apple file sharing (AppleShare)” to
enable this option.
3.
Click
Save Changes
in the Service Settings table. The UI screen
refreshes.
Содержание Cobalt Qube 2
Страница 1: ...Cobalt QubeTM 2 User Manual...
Страница 6: ...vi...
Страница 20: ...Chapter 1 6 Figure 3 Administrator Site screen Figure 4 Public Site screen...
Страница 26: ...Chapter 1 12...
Страница 45: ...Setting up the Qube 2 31 Figure 15 shows the online registration page Figure 15 Online registration page...
Страница 46: ...Chapter 2 32 Figure 16 shows the Public Site screen on the Qube 2 Figure 16 Public site on the Qube 2...
Страница 68: ...Chapter 3 54...
Страница 70: ...Chapter 4 56 Figure 17 Administrator Site screen...
Страница 72: ...Chapter 4 58 Figure 18 shows the Administrator Settings table Figure 18 Administrator Settings table...
Страница 76: ...Chapter 4 62 Figure 19 shows the User Defaults table Figure 19 User Defaults table...
Страница 78: ...Chapter 4 64 Figure 20 shows the Add New User table Figure 20 Add New User table...
Страница 81: ...Administrator Site 67 Figure 21 shows the Email Settings table for a user Figure 21 Email Settings table...
Страница 87: ...Administrator Site 73 Figure 24 shows the Add New Group table Figure 24 Add New Group table...
Страница 184: ...Appendix B 170...
Страница 206: ...Appendix E 192...
Страница 218: ...Appendix F 204...