Disassembly
2 - 8 Removing the Optical (CD/DVD) Device
2.Disassembly
Removing the Optical (CD/DVD) Device
1.
Turn
off
the computer, and remove the battery (
).
2.
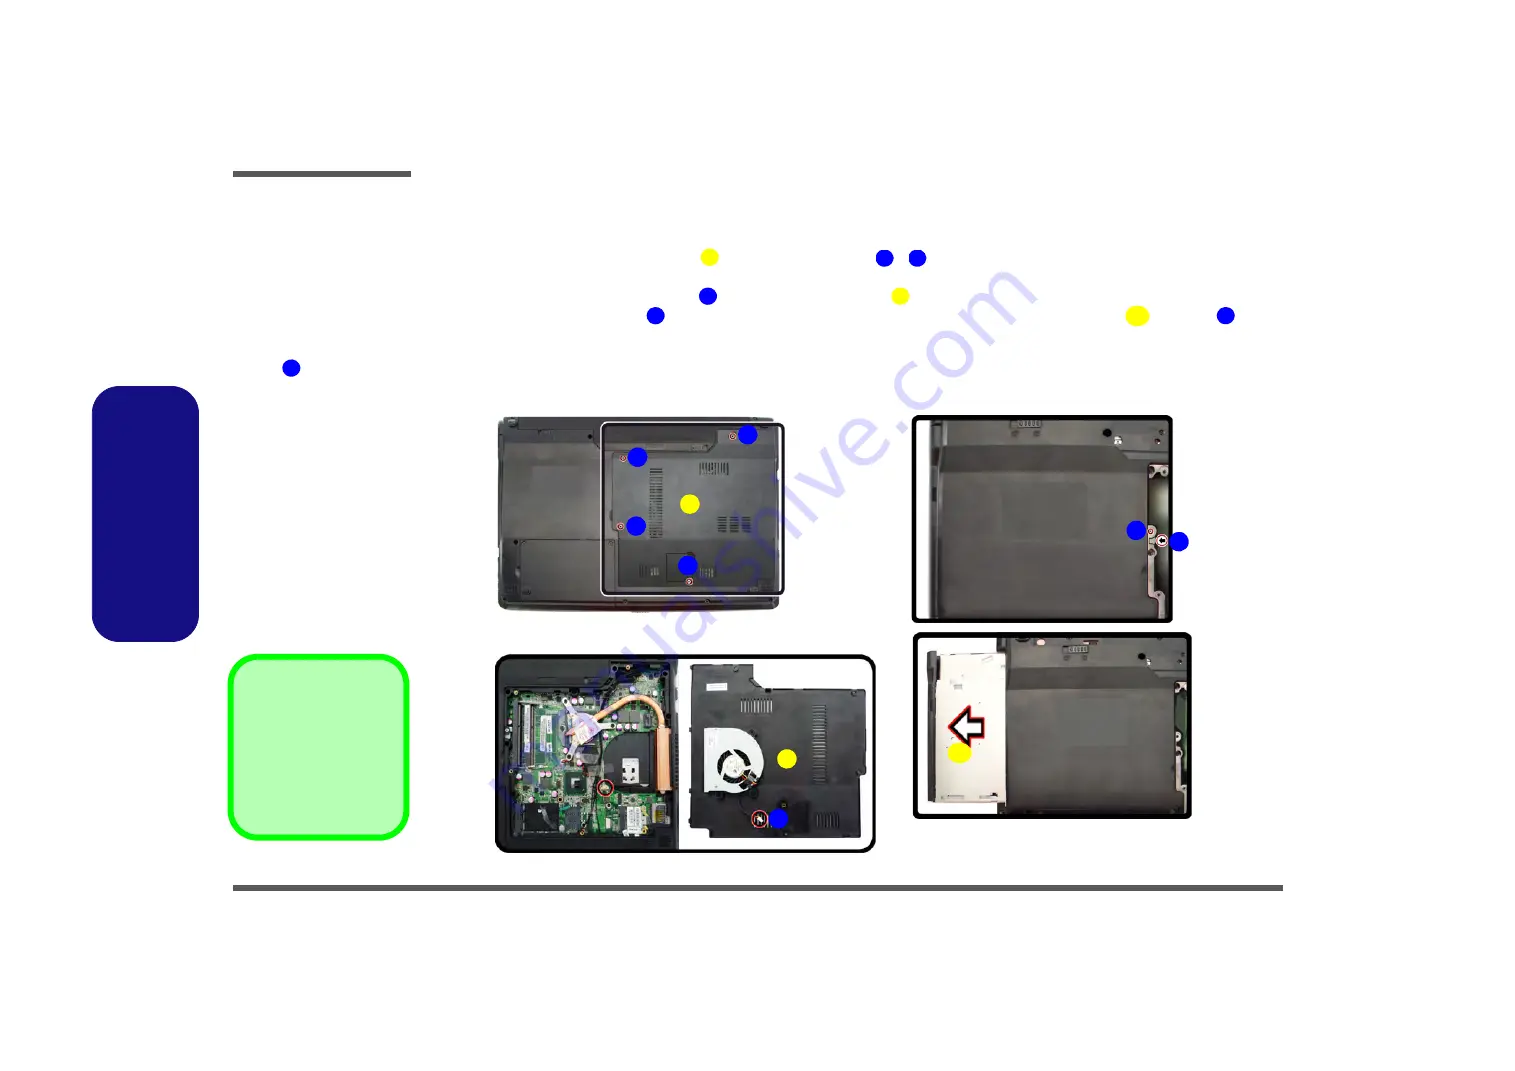
Locate the RAM & CPU bay cover
, and remove screws
-
(
Figure 4a
)
.
3.
Carefully (
a fan and cable are attached to the under side of the cover
) lift up the bay cover.
4.
Carefully disconnect the fan cable
, and remove the cover
(
Figure 4b
).
5.
Remove the screw at point
, and use a screwdriver to carefully push out the optical device
at point
(
Fig-
ure 4c
)
.
6.
Insert the new device and carefully slide it into the computer (the device only fits one way. DO NOT FORCE IT; The
screw holes should line up).
7.
Restart the computer to allow it to automatically detect the new device.
Figure 4
Optical Device
Removal
a. Remove the screws.
b. Remove the cover.
c. Remove the screw and
push the optical device
out off the computer at
point .
8
1
2
5
6
1
7
9
8
1. Component Bay Cov-
er
9. Optical Device
• 5 S
crews
3
c.
9
1
4
6
a.
b.
1
2
5
7
8
Содержание W243HUQ Series
Страница 1: ...W243HUQ W244HUQ Series ...
Страница 2: ......
Страница 3: ...Preface I Preface Notebook Computer W243HUQ W244HUQ Service Manual ...
Страница 24: ...Introduction 1 12 1 Introduction ...
Страница 47: ...Top A 3 A Part Lists Top 灰色 黑色 Figure A 1 Top ...
Страница 48: ...A 4 Bottom with 3G A Part Lists Bottom with 3G Figure A 2 Bottom with SIM W240HUQ W241HUQ W245HUQ Series ...
Страница 49: ...Bottom without 3G A 5 A Part Lists Bottom without 3G Figure A 3 Bottom without 3G ...
Страница 50: ...A 6 SATA BLU RAY COMBO A Part Lists SATA BLU RAY COMBO Figure 4 SATA BLU RAY COMBO ...
Страница 51: ...SATA DVD SUPER MULTI A 7 A Part Lists SATA DVD SUPER MULTI Figure 5 SATA DVD SUPER MULTI ...
Страница 52: ...A 8 A Part Lists LCD W243HUQ 銘板 銅箔接地 Figure A 6 LCD W243HUQ ...
Страница 53: ...LCD W244HUQ A 9 A Part Lists LCD W244HUQ 銘板 Figure A 7 LCD W244HUQ ...
Страница 54: ...A 10 HDD A Part Lists HDD 無鉛 無鉛 Figure A 8 HDD ...
Страница 99: ...www s manuals com ...


