Operating manual
imop lite
36
1.01
– 2019 D
Step
Activity
Explanation/illustration
5
Removing the existing cleaning
brushes
Releasing the cleaning brushes or
pads from the locking mechanism
by gently turning them clockwise
and then removing them by lifting
them from the mounting.
Figure 23
6
Fitting the cleaning brushes or pads
The fitting is done by following
these steps in reverse order.
Inserting new cleaning brushes or
pads into the mounting and
locking them by gently turning
them counter-clockwise
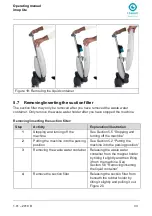
Figure 22: Removing the squeegee
Содержание i-mop Lite
Страница 17: ...Operating manual imop lite 18 1 01 2019 D Figure 5 Handlebar grip with lever Figure 6 Drive and suction unit ...
Страница 26: ...Operating manual imop lite 1 01 2019 D 27 Figure 14 Putting the machine into the parking position ...
Страница 36: ...Operating manual imop lite 1 01 2019 D 37 Figure 23 Removing cleaning brushes ...
Страница 44: ...Operating manual imop lite 1 01 2019 D 45 ...
Страница 46: ...Operating manual imop lite 1 01 2019 D 47 ...
Страница 47: ...Operating manual imop lite 48 1 01 2019 D Figure 25 Disassembling the squeegee ...
Страница 48: ...Operating manual imop lite 1 01 2019 D 49 Figure 26 Attaching the squeegee to the machine ...
Страница 56: ...Operating manual imop lite 1 01 2019 D 57 ...
Страница 58: ...Operating manual imop lite 1 01 2019 D 59 15 Declaration of conformity and manufacturer ...

