w w w . c l a s s i c
e x h i b i t s . c o m
Step 1
Page 1 of 5
866.652.2100
© 2015
WHEN DISASSEMBLING ALUMINUM EXTRUSION, TIGHTEN ALL
SETSCREWS AND LOCKS TO PREVENT LOSS DURING SHIPPING
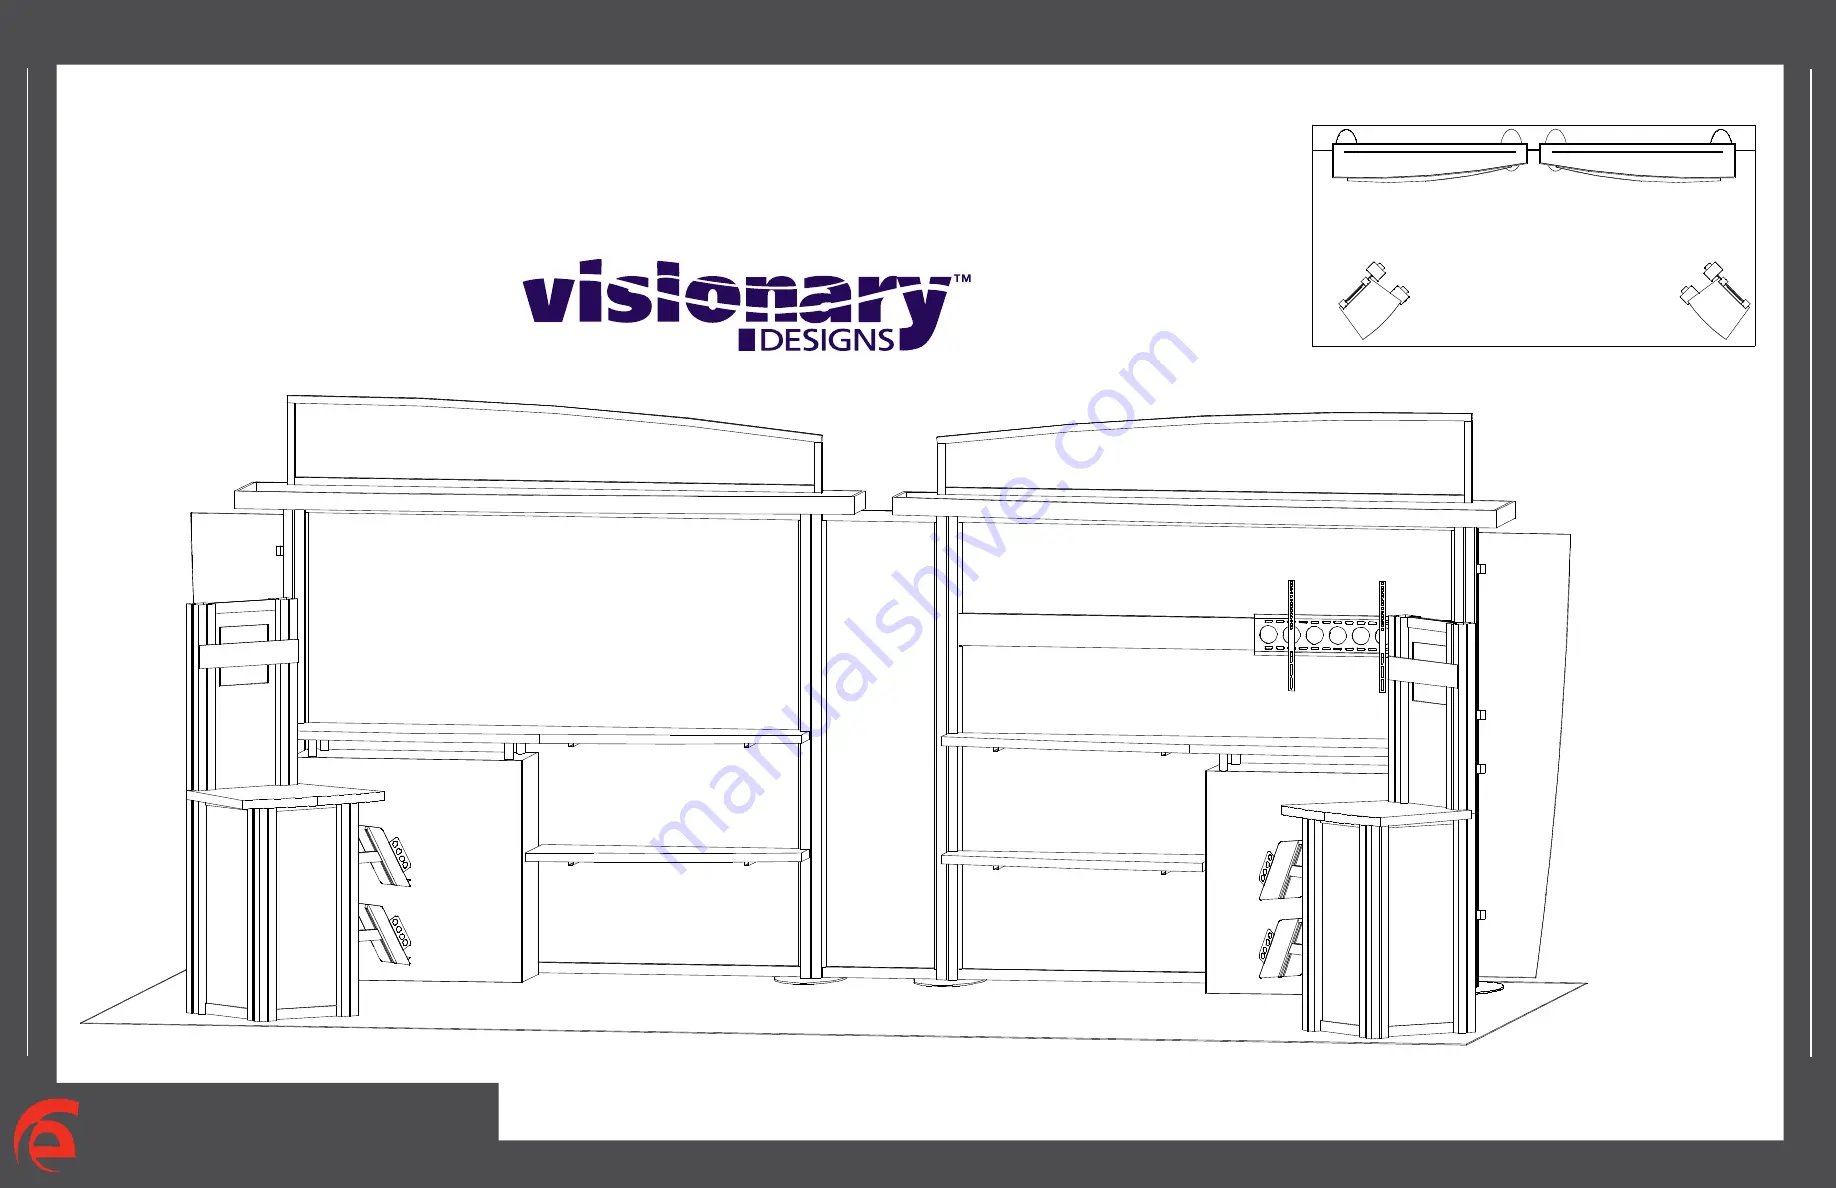
Order #XXXXX - VK-2916 General Layout
Plan View
10’
20’
Страница 1: ...i c e x h i b i t s c o m Step 1 Page 1 of 5 866 652 2100 2015 WHEN DISASSEMBLING ALUMINUM EXTRUSION TIGHTEN ALL SETSCREWS AND LOCKS TO PREVENT LOSS DURING SHIPPING Order XXXXX VK 2916 General Layout...
Страница 2: ...after assembling it Before packing replace setscrews in extrusion to avoid losing them Using Your Setup Instructions The Visionary Designs Setup Instructions are created specifically for your configu...
Страница 3: ...tal Extrusion 86 Horizontal Extrusion 86 Horizontal Extrusion 86 Horizontal Extrusion 80 Vertical Extrusion 80 Vertical Extrusion 20 Horizontal Extrusion Steps 1 Connect Baseplates 1 2 1 2 to Vertical...
Страница 4: ...ng to connectors where indicated Note Frame should be assembled from Backside A B C D Backside View Front View Front View Lock Lock Lock Lock Part Number A A B B C C D D Qty 1 1 1 1 1 1 1 1 Descriptio...
Страница 5: ...s in position 3 Attach Standoff Barrells to top of Backwall Counter 4 Place Shelves onto Shelf Supports and Standoff Barrells 5 Attach Monitor Mounts to backwall see Detail 6 Attach Wings to Verticals...
Страница 6: ...s c o m Step 4 Page 4 of 5 866 652 2100 2015 WHEN DISASSEMBLING ALUMINUM EXTRUSION TIGHTEN ALL SETSCREWS AND LOCKS TO PREVENT LOSS DURING SHIPPING Order XXXXX Header Attachment Steps 1 Attach Headers...
Страница 7: ...d then attach upper horizontals as shown 3 Velcro shelf supports to inside of assembled base then set internal shelf atop supports 4 Place counter top on assembled base 5 Attach monitor mount and lit...