GREAT BRITAIN • CUSTOMER SERVICE
tel: 0845 300 9799
e-mail: [email protected] internet: www.clasohlson.com/uk
A
B
D
C
20140404
Watch
Art.no 36-5605
Model MR-8815
Please read the entire instruction manual before using
the product and then save it for future reference. We reserve
the right for any errors in text or images and any necessary
changes made to technical data. In the event of technical
problems or other queries, please contact our Customer
Services.
Things to consider
• Never try to open the watch or to remove the back of
the casing.
• Never push any of the buttons whilst under water.
• The watch is constructed to withstand bumps and
vibrations but should not be subjected to undue impacts
or rough treatment.
• Avoid exposing the watch to extreme temperatures.
• Avoid exposing the watch to environments where there
is electromagnetic radiation.
Buttons and functions
Timekeeping with split times
1. Press [ START ] to start the stopwatch.
2. Press [ RESET ] to take a split time.
3. Press [ RESET ] again to resume the timekeeping.
4. Press [ START ] to stop the stopwatch.
5. Press [ RESET ] to reset the stopwatch time to zero.
Timekeeping with 2 finishing times
1. Press [ START ] to start the stopwatch.
2. Press [ RESET ] to take the first finishing time. Write the time
down. The time for the second finishing time is running
undisplayed within the stopwatch.
3. Press [ START ] to take the second finishing time.
4. Press [ RESET ] to reset the stopwatch time to zero.
Alarm
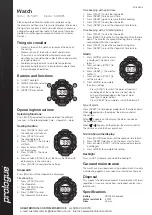
A. [ LIGHT ] backlight
B. [ MODE ] Function selector
C. [ START ] Start/stop
D. [ RESET ] Reset button
Operating instructions
Selecting functions
Press [ MODE ] repeatedly to move between the different
functions, in the following order: time – stopwatch – alarm.
Setting the time
1. Press [ MODE ] 3 times until
the seconds start to flash.
2. Press [ START ] to reset
the seconds to zero.
3. Press [ RESET ] – the minutes
will flash.
4. Press or hold in [ START ] to
set the minutes.
5. Press [ RESET ] – the hours
will flash.
6. Press or hold in [ START ] to set the hours. Set the month,
date and day in the same way.
7. Press [ MODE ] to complete the settings.
Stopwatch
Press [ MODE ] until the stopwatch is displayed.
Timekeeping
1. Press [ START ] to start
the stopwatch.
2. Press [ START ] to stop
the stopwatch.
3. Press [ RESET ] to reset
the stopwatch time to zero.
1. Press [ MODE ] until the alarm
is displayed. The hours start
to flash.
2. Press or hold in [ START ] to
set the hours.
3. Press [ RESET ] – the minutes
will flash.
4. Press or hold in [ START ] to
set the minutes.
5. Press [ MODE ] to complete
the alarm settings.
-
Press [ START ] to switch the alarm off and let it
sound again at the same time the next day or
an hour later depending on the type of alarm
(see
Type of alarm
below).
-
Press [ RESET ] to completely switch the alarm off.
Type of alarm
Press [ RESET ] (in time display mode) to set the type of alarm:
When
appears on the display: the alarm sounds at
the set time.
When
appears on the display: the alarm sounds on
the hour every hour.
When
appears on the display: the alarm sounds at
the set time and on the hour every hour.
12 or 24 hour time display
1. Press [ MODE ] three times until the seconds start to flash.
2. Press [ RESET ] two times until the hours start to flash.
3. Press or hold in [ START ] until the preferred time format
is displayed.
4. Press [ MODE ] to complete the setting.
Backlight
Press [ LIGHT ] whenever you need the backlight.
Care and maintenance
The watch can be wiped clean using a damp cloth. Use only
mild cleaning agents, never solvents or corrosive chemicals.
Disposal
This product should be disposed of in accordance with local
regulations. If you are unsure how to proceed, contact your
local council.
Specifications
Battery
SR2025 (included)
Water resistant to
5 ATM
Diam
45 mm


