background image

English

GREAT BRITAIN •


customer service


tel:

 08545 300 9799 

e-mail:

 [email protected] 

internet:

 www.clasohlson.com/uk

2

3

V

er

. 20
13091

6

Combination Holder and 
Charger for iPhone

Art.no  38-5238  

Model  OY059-A


Please read the entire instruction manual before use and save 
it for future reference. We reserve the right for any errors in text 
or images and for making any necessary technical changes to 
this document. If you should have any questions concerning 
technical problems please contact our Customer Services. 

Note:

• 

The product produces a total of 1.5 A.

• 

The USB port is capable of delivering 1.5 A.

• 

The iPhone connector is capable of delivering 1.5 A.

• 

If both connections are used simultaneously, the output 
to each port will be reduced and the charge current will 
be lower.

Safety

• 

Never try to open, repair or modify the product in any way.

• 

Never let children play with the product.

Product description

• 

USB port for charging electronic devices.

• 

LED-indicator (shows blue when connected to 12 V).

• 

Overcharge protection.

• 

Short-circuit protection.

Operating instructions

Mounting

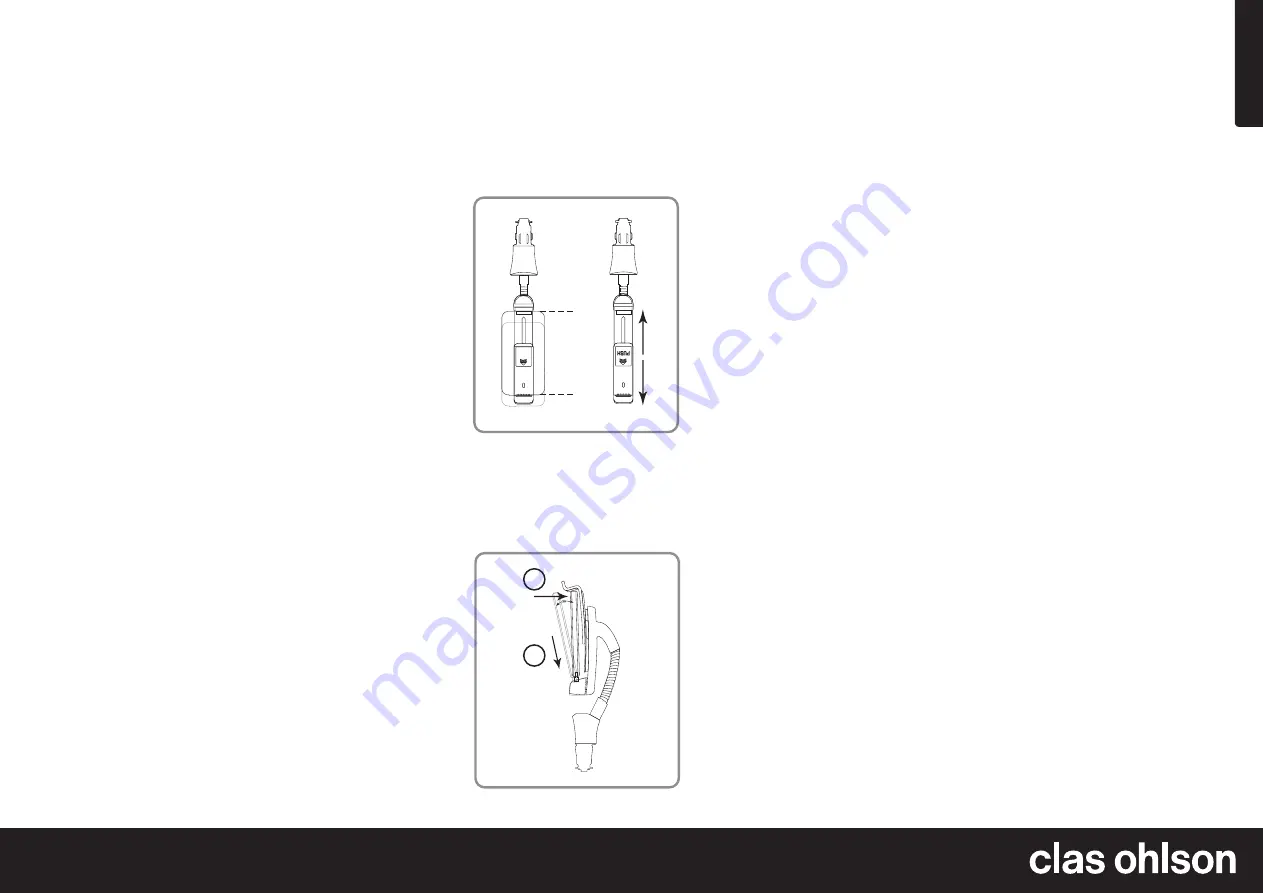
1.  Press the lock button on the adjustable clamp to adjust 

the size of the holder so that it is slightly smaller than 
the device you plan to fit into to.

2.  Carefully insert your device onto the dock connector.
3.  Slightly bend the clamp upwards until the device falls into 

place and is cupped securely by the clamp.

4.  Plug the holder into your car’s 12 V socket.
5.  Make sure that the holder is not placed in such a way that it 

interferes with the control of your vehicle.

6.  To remove the device, slightly bend the clamp upwards until 

the device is free and remove the device from the docking 
connector.

Disposal

This product should be disposed of in accordance with local 
regulations. If you are unsure how to proceed, contact your 
local authority.

Specifications

Fits 

iPhone 4S/4/3GS/3G, 


iPod, iPod touch

Input voltage 

12–36 V DC

Power output 

DC 5 V 1.5 A

Operating temperature 

0–45 °C

Weight 

120 g

Содержание OY059-A

Страница 1: ...product Product description USB port for charging electronic devices LED indicator shows blue when connected to 12 V Overcharge protection Short circuit protection Operating instructions Mounting 1 Press the lock button on the adjustable clamp to adjust the size of the holder so that it is slightly smaller than the device you plan to fit into to 2 Carefully insert your device onto the dock connect...

Страница 2: ...uttag för laddning av externa enheter LED indikator lyser blått när hållaren är ansluten till 12 V Överladdningsskydd Kortslutningsskydd Användning Montering 1 Tryck in låsknappen och skjut isär eller ihop hållaren så att öppningen blir något mindre än den enhet som ska anslutas 2 Anslut försiktigt din enhet till dockningskontakten 3 Böj upp hållarens överdel något och placera din enhet så att den...

Страница 3: ...t Produktbeskrivelse USB port for lading av eksterne enheter LED indikator lyser blått når holderen er koblet til 12 V Overladingsvern Kortslutningsvern Bruk Montering 1 Trykk inn låseknappen og skyv holderen sammen eller fra hverandre sånn at den passer til enheten som kobles til 2 Enheten kobles forsiktig til dockingkontakten 3 Bøy holderens øvre del litt og plasser enheten sånn at den sitter go...

Страница 4: ...lään tavalla Älä anna lasten leikkiä telineellä Tuotekuvaus USB liitäntä ulkoisten yksiköiden lataamiseen LED merkkivalo palaa sinisenä kun teline on liitetty 12 V n virtaan Ylilataussuoja Oikosulkusuoja Käyttö Asennus 1 Paina lukituspainiketta ja avaa tai sulje telinettä niin että aukosta tulee hieman pienempi kuin siihen liitettävä laite 2 Liitä laite varovasti telakkaliitäntään 3 Taivuta teline...

Страница 5: ...lossen ist Überlastschutz Schutz gegen Kurzschluss Bedienung Montage 1 Den Verriegelungsknopf eindrücken und die Greifbacken zusammen bzw auseinander drücken sodass die Öffnung etwas kleiner ist als das anzuschließende Gerät 2 Das anzuschließende Gerät vorsichtig an den Docking kontakt anschließen 3 Den oberen Teil der Halterung etwas nach oben biegen und das anzuschließende Gerät so platzieren da...

Отзывы: