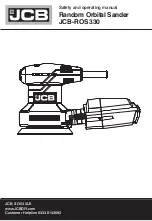
EZ-Sand Orbital Sander
Operation and Safety
Safety Practices:
Sanding dust is flammable!
Empty and clean dust bag
when not in use.
Always wear safety
goggles, protective
clothing, and a dust mask
while sanding.
Keep the dust bag
emptied. Dust generated
from sanding wood floors
can spontaneously ignite
or explode. Promptly
dispose of any sanding
dust in a metal container
clear of any combustibles.
Do not dispose in a fire.
Keep the work area well
ventilated.
Sanding/finishing wood
floors can create an
explosive or combustible
environment. Do not
operate this machine
around solvents, thinners,
fuels, floor finishes, or any
other flammable materials.
Keep hands, feet, and
loose clothing away from
all moving parts on the
machine.
Disconnect the power cord
before replacing the pad or
the abrasive.
Never leave the machine
unattended while it is
connected to a power
source.
More on reverse . . .
Application:
Wood flooring maintenance and light restoration work,
especially small projects that do not require a more aggressive tool.
This tool is well suited for use on parquet floors.
Set-up and operation
Follow the steps listed below to complete a floor sanding project safely.
Step Action
1
To prepare the machine for use follow this procedure:
Step Action
1
Countersink any nails in the flooring.
2
Tape over electrical outlets.
3
Cover doorways and windows with plastic.
4
Cover all air vents in the room (intake and
output vents).
2
Attach the handle to the base
machine by following these
instructions:
a.) The handle label should be
pointing towards the front of the
machine and the black iron casting
should drop down into the top of the
base machine securely.
b.) Snap the three latches down to
the base machine. The hooks on
the latches should slip over the
keepers that are attached to the
base machine. The latches should
require a slight push to snap them
into place (see figure 1).
c.) Plug the interconnect cord into
the base machine (see figure 2).
Figure 1
Figure 2
3
Install or replace circular pads if needed. The pad should be
replaced if they are ripped or torn or the hook material is too
worn to allow attachment of sandpaper. To install or replace the
pad(s), follow the instructions in step 4.
4
a.) Lock handle in the upright
position.
b.) Tilt the machine back until it fully
rests on the handle.
c.) While kneeling and facing the
bottom of the machine, remove the
old pad(s) then center new pad(s)
over the grip face (see figure 3).
Figure 3


