OPERATION & MAINTENANCE
INSTRUCTIONS
LS1119 - ISS 1
ORIGINAL INSTRUCTIONS
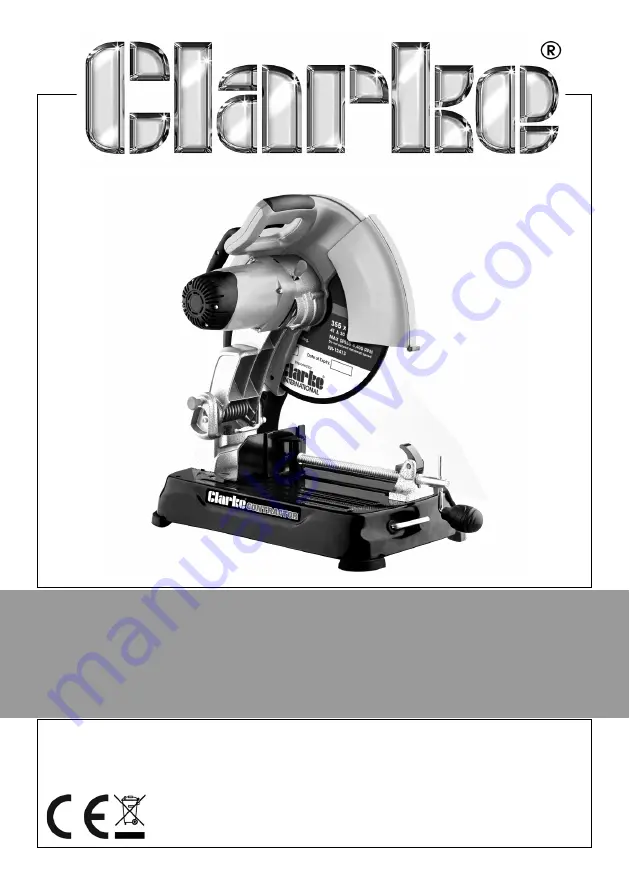
355MM 110 V ABRASIVE CUT-OFF SAW
MODEL NO: CON14110
PART NO: 6470169
Страница 1: ...OPERATION MAINTENANCE INSTRUCTIONS LS1119 ISS 1 ORIGINAL INSTRUCTIONS 355MM 110 V ABRASIVE CUT OFF SAW MODEL NO CON14110 PART NO 6470169...
Страница 2: ...rd to your purchase giving you long and satisfactory service GUARANTEE This product is guaranteed against faulty manufacture for a period of 12 months from the date of purchase Please keep your receip...
Страница 3: ...ct with earthed or grounded surfaces such as pipes radiators ranges and refrigerators There is an increased risk of electric shock if your body is earthed or grounded c Do not expose power tools to ra...
Страница 4: ...es This enables better control of the power tool in unexpected situations f Dress properly Do not wear loose clothing or jewellery Keep your hair clothing and gloves away from moving parts Loose cloth...
Страница 5: ...are thoroughly familiar with metal cutting saws If there is any doubt whatsoever you should consult a qualified person 2 DO NOT operate the machine until it is completely assembled and this entire man...
Страница 6: ...needs changing at any time a plug of identical specification must be used 1 Undo the socket screws remove the rear section 2 Rotate the cable clamp clear of the terminals 3 Feed the cable through the...
Страница 7: ...Push down on the handle 1 2 Pull the locking pin out slightly 2 to unlock the motor arm 3 Release the pressure on the handle The motor arm will then raise into position Reverse this process when lock...
Страница 8: ...then tighten the vice on to the workpiece using the handle TRIGGER SWITCH 1 To start the saw pull the trigger switch Wait a couple of seconds until the blade reaches full speed 2 To turn the saw off...
Страница 9: ...ess of the workpiece and the mitre angle Other aids such as spring bar or C clamps will be necessary to secure the workpiece to the fence when making these cuts SQUARING THE FENCE TO THE BLADE 1 Disco...
Страница 10: ...nd tighten securely before use DEPTH STOP The depth stop is set at the factory for a new 14 355mm cutting disc This can be adjusted as the wheel wears 1 Loosen the jam nut 2 Loosen the depth stop bolt...
Страница 11: ...ver as shown to expose the blade 4 Push and hold the blade lock You may need to rotate the blade by hand to allow the lock to engage 5 Remove the Hex bolt washer outside flange and old cutting disc Ma...
Страница 12: ...gulations in relation to the treatment recycling recovery and environmentally sound disposal of the WEEE This means that this product must not be disposed of with general household waste It must be di...
Страница 13: ...13 Parts Service 020 8988 7400 E mail Parts clarkeinternational com or Service clarkeinternational com PARTS DIAGRAM...
Страница 14: ...x 50 43 Carbon Brush 44 Roll Spring 45 Back Cover 46 Self Tapping Screw ST3 5x13 47 Brush Holder Assembly 48 Rotating Knob II 49 Bolt M5 x8 50 Rotating Sleeve 51 Rotating Knob III 52 Exhaust Reducer...
Страница 15: ...15 Parts Service 020 8988 7400 E mail Parts clarkeinternational com or Service clarkeinternational com DECLARATION OF CONFORMITY...
Страница 16: ......