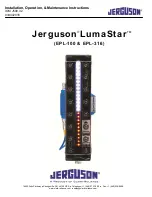
background image


16633 Foltz Parkway 

 Strongsville, OH  44149 USA  

 Telephone: +1 (440) 572-1500   

  Fax: +1 (440) 238-8828 

www.clark-reliance.com  

  [email protected]

TM 

®

Installation, Operation, & Maintenance Instructions


IOM J500.32


03/04/2016


Jerguson LumaStar


(EPL-100 & EPL-316)


Содержание Jerguson LumaStar EPL-100

Страница 1: ...ongsville OH 44149 USA Telephone 1 440 572 1500 Fax 1 440 238 8828 www clark reliance com sales clark reliance com TM Installation Operation Maintenance Instructions IOM J500 32 03 04 2016 Jerguson Lu...

Страница 2: ...d by a qualified technician and should be executed in accordance with all applicable national and local codes The light and power supply should be checked to ensure that they contain no foreign matter...

Страница 3: ...yles Figure 1 Figure 2 Step 1 Check to make sure brackets are properly assembled on the illuminator The cable should be fed through the stud protruding from behind the illuminator locking in the brack...

Страница 4: ...is secure When wrapping the cable around the gauge make sure to feed the cable above the bolt as shown above in Figure 5 Snug the cable and secure the thumb nut but do not fully tighten the thumb nut...

Страница 5: ...acket and loosen the thumb nut enough to allow the cable to slide through freely Pull cable as tight as possible and fully tighten thumb nut as shown in Figure 7 Figure 8 Figure 9 Step 6 The Jerguson...

Страница 6: ...assembly with rear side with bolt heads of gauge Loosen bracket thumb nuts and adjust the position of the brackets to line up with their respective bolts on the gauge as shown in Figure 10 Tighten th...

Страница 7: ...nstallation onto a Reflex Gauge requires removal of nuts on the gauge Do not install illuminator with gauge in service 1 Install the brackets onto the illuminator leaving the bracket thumb screws loos...

Страница 8: ...e Connector Power Supply to 1st Light Strip V20509 6 1 2 foot 2 meter Extension Cable Nickel Plated Brass connectors for Remote Mounting V20601 6 5 2 1 2 foot 75 meter Daisy Chain Cable Nickel Plated...

Страница 9: ...teps NOTE See Figure 14 on next page for component locations 1 Remove enclosure cover and look to see if red LED power indictor is on a If red LED is on go to step 4 2 Check AC wiring to make sure it...

Страница 10: ...3 Disconnect power cable between power supply and light bar assembly 4 Trim gasket material at top end cap to match slot opening and slide out top bracket and mounting hardware 5 Loosen power supply s...

Страница 11: ...rom gage and relocate to desired work area 3 Unplug DC power plug 4 Remove 2 screws holding power supply sub assembly in place See Figure 15 NOTE Screws are installed with Loctite If screws will not c...

Страница 12: ...16633 Foltz Parkway Strongsville OH 44149 USA Telephone 1 440 572 1500 Fax 1 440 238 8828 www clark reliance com sales clark reliance com...

Отзывы: