


3.3 Manual Selection and Adjustments
40
3.3.4 Adjusting Sharpness
The Sharpness control has two types of sharpness settings, one for in the Picture menu which adjusts
the scaler, and one in the Video Adjustments menu, for video sources only, which is in the video
decoder.
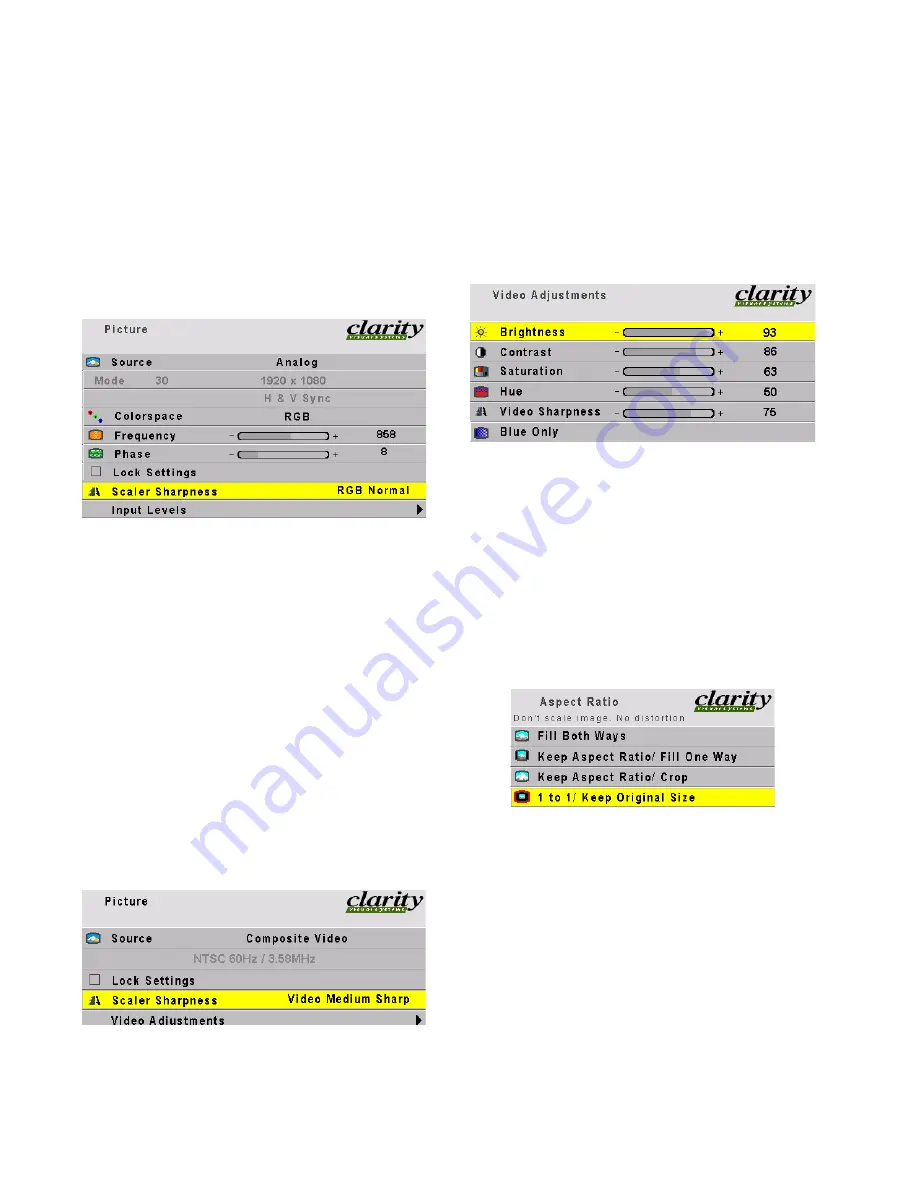
Sharpness for computer sources
If you are using analog or digital computer pictures
as sources, you will use only the Scaler Sharpness set-
ting in the Picture menu.
In this situation, use only the sharpness settings
beginning with “RGB”:
• RGB Soft
• RGB Medium Soft
• RGB Normal
• RGB Medium Sharp
• RGB Sharp
RGB Normal
is the default. It is essentially a
“pass thru” with no effect on the picture. Make any
adjustments to sharpness with the picture scaled,
that is, with the Aspect Ratio set the way you will use
it. Use Scaler Sharpness to reduce or eliminate any
artifacts of scaling.
Sharpness for video sources
There are two sharpness controls for video sources.
One is the scaler described above, but with all the set-
tings beginning with “Video.”
The other is a slider in the Video Adjustments
menu.
Start with the Scaler Sharpness set to the
Video Nor-
mal
position.
• Video Soft
• Video Medium Soft
•
Video Normal
• Video Sharp
• Video Sharp+
• Video Sharp++
• Video Sharpest
Set the Aspect Ratio to
1 to 1
.
Adjust the Video Sharpness slider in the Video
Adjustments menu to get rid of any artifacts from the
video decoder. (Video pictures go through the decoder
first, to turn the picture into a digital form, then they
go through the scaler.)
Now set the Aspect Ratio to the one you will use in
for the program. Choose a Scaler Sharpness setting in
the Picture menu to get rid of any scaling artifacts.
Содержание SN-4035-WX Bobcat
Страница 1: ...Bay Cat SN 4610 1080 User Guide ...
Страница 2: ......
Страница 3: ...i SN 4610 1080 Bay Cat 46 Direct View LCD Display User Guide 070 0146 01 4 October 2004 ...
Страница 6: ...iv ...
Страница 10: ......
Страница 13: ...3 ...
Страница 17: ...7 ...
Страница 18: ...8 ...
Страница 21: ...11 ...
Страница 27: ...17 ...
Страница 32: ...22 ...
Страница 37: ...27 ...
Страница 43: ...33 ...
Страница 47: ...37 ...
Страница 51: ...41 ...
Страница 53: ...43 ...
Страница 57: ...47 Second press of MISC button First press of MISC button ...
Страница 63: ...53 ...
Страница 67: ...57 Find the mode and its Mode ID number in the three tables starting on page 94 ...
Страница 69: ...59 ...
Страница 75: ...65 Position Image Pan moves the image on the screen SIZE POS key opens the Picture menu directly ...
Страница 78: ...68 Diagnostics Test Patterns Move through Test Patterns with the up down arrow keys ...
Страница 90: ...80 4 3 Drawings Dimensions in inches ...
Страница 91: ...81 Side view of Bay Cat measure to rear of installed bracket ...
Страница 92: ...82 ...
Страница 93: ...83 ...
Страница 99: ...89 ...
Страница 103: ...93 ...
Страница 114: ...104 ...