background image

76

Ease of use and comfort

C4-cactus_en_Chap03_Ergonomie-et-confort_ed01-2015

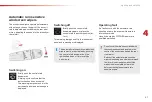
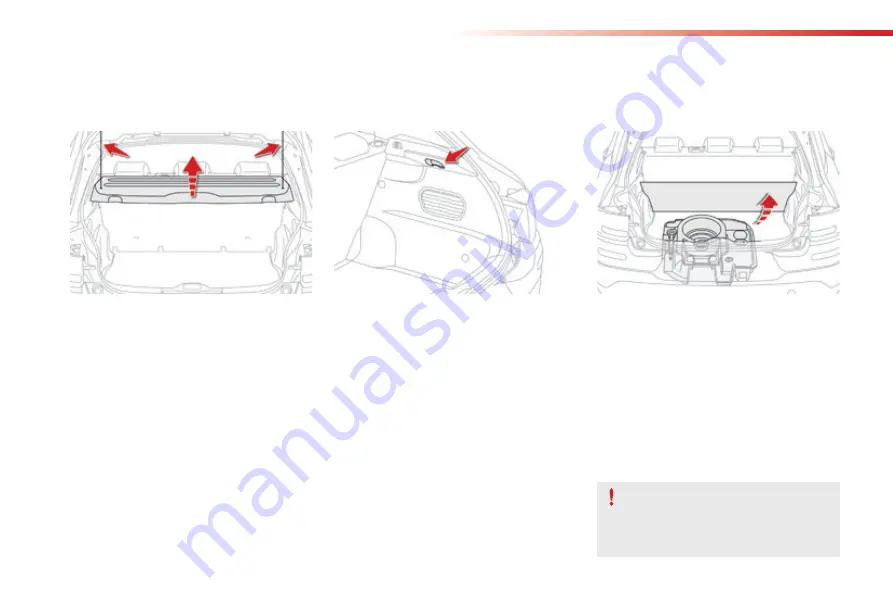
To remove the shelf:

F

  unhook the two cords,

F

  raise the shelf slightly, then remove it.

Rear parcel shelf

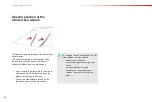
There are several options for storing the shelf:
-  either upright behind the front seats,
-  or flat at the base of the boot.

It can be used to secure shopping bags.

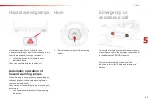
Hook

Storage box

For versions with storage box: it must 
be in place before loading the boot.

F

  Remove the boot carpet for access to the 

storage box.

Depending on the configuration, it is laid out for 
storing:
-  a towing eye,
-  a temporary puncture repair kit,
-  a warning triangle,
-  ...

Содержание C4 CACTUS

Страница 1: ...CITRO N C4 CACTUS Handbook...

Страница 2: ...of access to view your handbook on line This personal and customisable space allows you to establish direct and special contact with the manufacturer the language the vehicle its body style the print...

Страница 3: ...in all circumstances and in complete safety Take the time to read through it so as to familiarise yourself with your vehicle This handbook covers all of the variations in equipment available across t...

Страница 4: ...ditioning 61 Front demist defrost 65 Rear screen demist defrost 66 Courtesy lamp 67 Boot lamp 68 Panoramic sunroof 68 Interior fittings 69 Boot fittings 75 Ease of use and comfort Lighting control 77...

Страница 5: ...y mode 157 Accessories 158 Changing a wiper blade 160 Roof bars 161 Bonnet 164 Petrol engines 165 Diesel engines 166 Checking levels 167 Checks 170 AdBlue additive and SCR system BlueHDi Diesel 172 AI...

Страница 6: ...mic sunroof 68 Roof bars 161 162 Accessories 158 159 Wiper control stalk 85 88 Changing a wiper blade 88 160 Boot 47 opening closing emergency release Park Assist 142 146 Reversing camera 141 Parking...

Страница 7: ...ndows 48 Manual child lock 115 Rear seats 51 52 Airbags 96 100 Front electric windows 48 Deactivating the passenger s front airbag 97 103 106 Seat belts 93 95 Child seats 101 109 114 ISOFIX child seat...

Страница 8: ...ation 55 58 Manual air conditioning 59 60 Automatic air conditioning 61 64 5 speed manual gearbox 122 Gear shift indicator 123 Electronic gearbox 124 127 Hill start assist 128 Stop Start 129 131 Glove...

Страница 9: ...limiter 132 134 Cruise control 135 137 Memorising speeds 138 Front demist defrost 65 Rear screen demist defrost 66 Central locking 44 Park Assist 142 146 ESC 90 92 Hazard warning lamps 89 Instrument...

Страница 10: ...s 170 171 battery air passenger compartment filter oil filter particle filter Diesel brake pads discs Changing bulbs 194 201 front lamps rear lamps interior lighting Dimensions 219 Identification mark...

Страница 11: ...s soon as you consider possible Switch off the heated seat as soon as possible Switch off the headlamps and foglamp when the level of light does not require their use Avoid running the engine before m...

Страница 12: ...ourney at each change of season after a long period out of use Don t forget the spare wheel and the tyres on any trailer or caravan Have your vehicle serviced regularly engine oil oil filter air filte...

Страница 13: ...es or km These functions are displayed in turn when the ignition is switched on 2 Cruise control or speed limiter settings 3 Digital speedometer mph or km h 4 Information related to the electronic gea...

Страница 14: ...er that a system is in operation switched off or has a fault When the ignition is switched on Certain warning lamps come on for a few seconds in the instrument panel when the vehicle s ignition is swi...

Страница 15: ...Sidelamps fixed The lighting stalk is in the Sidelamps position Dipped beam headlamps fixed The lighting stalk is in the Dipped beam headlamps position Main beam headlamps fixed The lighting stalk is...

Страница 16: ...of the warning lamp is determined by the ambient conditions up to about thirty seconds in very low temperatures If the engine does not start switch the ignition off and then on wait until the warning...

Страница 17: ...to move off flashes for a few seconds then goes off STOP mode is temporarily unavailable or START mode is invoked automatically For more information on Stop Start refer to the corresponding section W...

Страница 18: ...mp comes on The DSC ASR is deactivated DSC dynamic stability control ASR anti slip regulation Press the button to activate the DSC ASR Its indicator lamp goes off The DSC ASR system is activated autom...

Страница 19: ...ations Service on temporarily accompanied by a message One or more minor faults for which there is no specific warning lamp have been detected Identify the cause of the fault using the message display...

Страница 20: ...ITRO N dealer or a qualified workshop without delay Dynamic stability control DSC ASR flashing The DSC ASR regulation is operating The system optimises traction and improves the directional stability...

Страница 21: ...The remaining driving range is between 0 and 350 miles 600 km You must top up the AdBlue additive tank to avoid a breakdown go to a CITRO N dealer or a qualified workshop or carry out this operation...

Страница 22: ...al and a message indicating the remaining driving range After confirmation of the fault with the emissions control system you can drive for up to 650 miles 1 100 km before the engine starting inhibiti...

Страница 23: ...roximately 45 or 50 litres depending on version Never continue to drive until you run out of fuel as this could damage the emission control and injection systems Seat belt s not fastened unfastened fi...

Страница 24: ...terminals slack or cut alternator belt The warning lamp should go off when the engine is started If it does not go off contact a CITRO N dealer or a qualified workshop Maximum coolant temperature fix...

Страница 25: ...he tyre pressures as soon as possible Have the system checked by a CITRO N dealer or a qualified workshop Foot on the brake pedal flashing accompanied by an audible signal and a message and associated...

Страница 26: ...ce recorder display line indicates the distance remaining before the next service is due Example 1 700 miles 2 800 km remain before the next service is due For 5 seconds after the ignition is switched...

Страница 27: ...the driving conditions Therefore the spanner may also come on if you have exceeded the period since the last service indicated in the manufacturer s service schedule Less than 600 miles 1 000 km rema...

Страница 28: ...rder display begins a countdown F when the display indicates 0 release the button the spanner disappears Following this operation if you wish to disconnect the battery lock the vehicle and wait at lea...

Страница 29: ...rning lamp and an audible signal If the low oil level is confirmed by a check using the dipstick the level must be topped up to avoid damage to the engine Oil level indicator fault This is signalled b...

Страница 30: ...hen wearing gloves Do not use pointed objects on the touch screen tablet Do not touch the tablet screen with wet hands Uses a soft clean cloth to clean the tablet touch screen Use this button to go to...

Страница 31: ...deactivate adjust settings for certain vehicle functions Configuration Adjust the audio settings balance ambience the colour scheme the brightness of the instruments and controls the display language...

Страница 32: ...range indicator comes on permanently Every time the button is pressed the indicator flashes for a few moments Example Function not activated Operating fault alert then Driving assistance menu Some sys...

Страница 33: ...ed Deactivated Park Assist Activation Deactivation of the function Stop Start Activation Deactivation of the function Parking sensors Activation Deactivation of the function Speed settings Memorisatio...

Страница 34: ...activation deactivation of rear wiper linked to reverse gear For more information on the wiper control stalk refer to the corresponding section Lighting Guide me home lighting activation deactivation...

Страница 35: ...onding function Comments Audio settings Adjustment of volume balance Turn off screen Turns off the screen display in the touch screen tablet black screen Pressing the black screen restores the display...

Страница 36: ...r km l Time Date Setting the time and date Languages Choice of language used by the touch screen tablet French English Italian Spanish German Dutch Portuguese Polish Turkish Russian Serb Croat Hungari...

Страница 37: ...el consumption the distance travelled the average speed for the second trip Trip reset F When the desired trip is displayed press the Reset button or on the end of the wiper control stalk until zeros...

Страница 38: ...les 100 km If dashes are displayed continuously while driving in place of the digits contact a CITRO N dealer or a qualified workshop This function is only displayed from 20 mph 30 km h Current fuel c...

Страница 39: ...units of distance miles or km in the Configuration menu of the touch screen tablet This operation must be carried out with the vehicle stationary System which measures a distance travelled daily for e...

Страница 40: ...ect Adjust time or Adjust date and modify the settings using the number keypad then confirm F In the secondary page press on Time Date F Select the Configuration menu F Press Confirm to quit This func...

Страница 41: ...Adjust the brightness by pressing on the or buttons or by moving the cursor Operates only when the sidelamps are on Black screen Touch screen tablet This function is accessible in the touch screen ta...

Страница 42: ...is confirmed by rapid flashing of the direction indicators for approximately two seconds F Press this button to unfold or fold the key Selective unlocking of the boot F Press and hold the central butt...

Страница 43: ...icle must be locked Locating your vehicle Anti theft protection Electronic engine immobiliser The key contains an electronic chip which has a special code When the ignition is switched on this code mu...

Страница 44: ...s the closed padlock immediately for a few seconds F Turn the key to position 2 Ignition on F Switch off the ignition and remove the key from the ignition switch The remote control is fully operationa...

Страница 45: ...ontrol would have to be reinitialised No remote control can operate when the key is in the ignition switch even when the ignition is switched off except for reinitialisation Locking the vehicle Drivin...

Страница 46: ...tomatic central locking anti intrusion security The doors and boot can lock automatically while driving speed above 6 mph 10 km h To activate or deactivate this function activated by default F Press t...

Страница 47: ...f a front door this unlocks the vehicle completely The interior opening control on a rear door does not work if the child lock is on For more information on the child lock refer to the corresponding s...

Страница 48: ...of a fault with the central locking system it is essential to disconnect the battery to lock the boot and so ensure complete locking of the vehicle On the rear doors check that the child lock is not...

Страница 49: ...ccess to the lock from inside the boot F Insert a small screwdriver into hole A of the lock to unlock the tailgate For mechanically unlocking the boot in the event of a battery or central locking malf...

Страница 50: ...from the ignition when leaving the vehicle even for a short time In the event of contact during operation of the windows reverse the movement of the window To do this press the corresponding switch W...

Страница 51: ...adjust the backrest Forwards backwards Height Seat backrest angle Adjustments driver only As a safety measure adjustments to the driver s seat must only be done when stationary Before moving the seat...

Страница 52: ...lowering this is a safety device in case of impact The adjustment is correct when the upper edge of the head restraint is level with the top of the head Never drive with the head restraints removed th...

Страница 53: ...the cushion Rear seats Bench seat with fixed one piece cushion and folding one piece backrest or a bench seat with a one piece cushion and 1 3 2 3 split backrests to vary the boot load space When fol...

Страница 54: ...ey can be removed and are interchangeable side to side To remove a head restraint F Pull the head restraint upwards to the stop F Then press the lug A Never drive with the head restraints removed they...

Страница 55: ...l position Demisting defrosting of the door mirrors operates with the engine running by switching on the heated rear screen Electric adjustment The objects observed are in reality closer than they app...

Страница 56: ...ing wheel adjustment mechanism F Adjust the height of the steering wheel to suit your driving position F Raise the control lever A to lock the steering wheel adjustment mechanism As a safety precautio...

Страница 57: ...partment air intake passage through a heating circuit heating passage through a cooling circuit air conditioning Control panel 1 Windscreen demisting defrosting vents 2 Front side window demisting def...

Страница 58: ...sure correct operation of the air conditioning system you are also advised to have it checked regularly as recommended in the maintenance and warranty guide F If the system does not produce cold air s...

Страница 59: ...from the system Avoid driving for too long without ventilation risk of misting and deterioration of air quality The heating system works only when the engine is running The symbol for air flow a fan f...

Страница 60: ...ir intake Air recirculation F Press this button to recirculate the interior air F Press this button again to allow the intake of exterior air This function can also be used temporarily to speed up the...

Страница 61: ...ning Air flow adjustment F Press one of these buttons to increase or decrease the air flow The symbol for air flow a fan fills progressively according to the air flow setting made By reducing the air...

Страница 62: ...ir conditioning Avoid the prolonged use of interior air recirculation risk of misting and deterioration of air quality This function can also be used temporarily to speed up the heating or cooling of...

Страница 63: ...ge for the system The air conditioning system operates automatically the system manages the temperature air flow and air distribution in the passenger compartment in an optimum way according to the co...

Страница 64: ...the temperature difference as quickly as possible This setting is associated with AUTO mode only However on deactivation of AUTO mode the last setting used remains on Changing the setting does not rea...

Страница 65: ...ively according to the air flow setting made By reducing the air flow to minimum you are stopping ventilation OFF is displayed alongside the fan Windscreen Centre and side vents Footwells Each press o...

Страница 66: ...ke from entering the passenger compartment F Press this button to recirculate the interior air F Press this button again to allow the intake of exterior air The air conditioning cannot operate when th...

Страница 67: ...or defrost the windscreen and side windows as quickly as possible The indicator lamp in the button comes on The system automatically manages the air conditioning depending on version air flow and air...

Страница 68: ...ally to prevent an excessive consumption of current The rear screen demist defrost can only operate when the engine is running Switch off the heating of the rear screen and door mirrors as soon as you...

Страница 69: ...y thirty seconds with the engine running unlimited In this position the courtesy lamp comes on gradually Permanently off Permanent lighting when the vehicle is unlocked when the key is removed from th...

Страница 70: ...ed visibility and light in the passenger compartment while maintaining normal temperatures thanks to its high thermal protection coating Advice on care In order to preserve the properties of the glaze...

Страница 71: ...r fittings with a manual gearbox 1 Sun visor 2 Glove box It houses an auxiliary socket 3 12 V accessory socket max 120 W 4 USB port 5 Open storage 6 Cup holder 7 Front armrest with storage depending o...

Страница 72: ...mfort Interior fittings with an electronic gearbox 1 Sun visor 2 Glove box It houses an auxiliary socket 3 12 V accessory socket max 120 W 4 USB port 5 Open storage 6 Cup holder 7 Front armrest 8 Fron...

Страница 73: ...box raise the lid Do not exceed the maximum power rating of the socket risk of damage to your device It houses an auxiliary socket and the passenger s front airbag deactivation switch Do not attach or...

Страница 74: ...the connection of a portable device to listen to your music files via the vehicle s speakers The management of the files is done using your portable device It allows the connection of a portable devic...

Страница 75: ...est Manual gearbox depending on equipment These storage spaces can be used to house portable devices mobile phone MP3 player which can be connected to the USB port auxiliary socket or charged from the...

Страница 76: ...jamming of the pedals only use mats which are suited to the fixings already present in the vehicle these fixings must be used never fit one mat on top of another The use of mats not approved by CITRO...

Страница 77: ...e of use and comfort Boot fittings 1 Rear parcel shelf 2 Hook 3 Storage box 4 Storage net accessory 5 Storage net fixing rings The storage net fixing rings are not intended to secure loads or restrain...

Страница 78: ...either upright behind the front seats or flat at the base of the boot It can be used to secure shopping bags Hook Storage box For versions with storage box it must be in place before loading the boot...

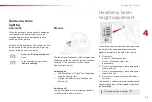
Страница 79: ...provided to meet the requirements of particular driving conditions a rear foglamp front foglamps with cornering lighting daytime running lamps to be more visible during the day guide me home lighting...

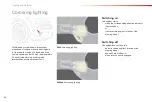
Страница 80: ...umination of headlamps Sidelamps only Dipped or main beam headlamps Dipping the headlamps Pull the stalk to switch the lighting between dipped main beam headlamps In the lighting off and sidelamps mod...

Страница 81: ...rds to switch off the foglamps the sidelamps will then switch off Rear foglamp only F To switch it on turn the ring forwards When the lighting is switched off automatically with AUTO model the foglamp...

Страница 82: ...n off immediately except for dipped beam if guide me home lighting is activated Switching on the lamps after the ignition is switched off To reactivate the lighting control rotate the ring to the 0 po...

Страница 83: ...er the windscreen wipers are switched off the lamps are switched off automatically Deactivation F Turn the ring to another position Deactivation of the function is accompanied by the display of a mess...

Страница 84: ...parking lamps return the lighting control stalk to the central position Daytime running lamps Sidelamps LEDs The light emitting diodes LEDs come on automatically when the engine is started In some we...

Страница 85: ...the ignition Activation or deactivation of the system as well as the period for the guide me home lighting are set in the touch screen tablet F Select the Driving assistance menu F In the secondary pa...

Страница 86: ...40 km h urban driving winding road intersections parking manoeuvres With cornering lighting Without cornering lighting Switching on This system starts when the corresponding direction indicator is swi...

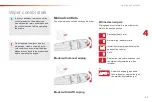
Страница 87: ...o the speed of the vehicle Park Single wipe press downwards or pull the stalk briefly towards you then release or Automatic wiping press down then release or single wipe pull the stalk briefly towards...

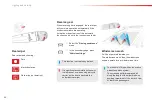
Страница 88: ...are operating Activation or deactivation of this automatic function can be set in the touch screen tablet Windscreen wash Pull the wiper stalk towards you The windscreen wash then the windscreen wipe...

Страница 89: ...ers operate automatically without any action on the part of the driver if rain is detected sensor behind the rear view mirror adapting their speed to the intensity of the rainfall Switching on Switchi...

Страница 90: ...the windscreen replace them at the first signs of wear This position permits release of the windscreen wiper blades It is used for cleaning or replacement of the blades It can also be useful in winte...

Страница 91: ...aking in an emergency depending on the deceleration the hazard warning lamps come on automatically They switch off automatically the first time you accelerate F You can also switch them off by pressin...

Страница 92: ...Emergency braking assistance EBA In an emergency this system enables you to reach the optimum braking pressure more quickly and therefore reduce the stopping distance It is triggered according to the...

Страница 93: ...d a message it indicates that there is a fault with the ABS which could cause loss of control of the vehicle when braking Anti lock braking system ABS and electronic brake force distribution EBFD When...

Страница 94: ...eration if the engine and brakes Deactivation In exceptional conditions starting a vehicle which is bogged down stuck in snow on soft ground it may be advisable to deactivate the DSC system so that th...

Страница 95: ...ainst the body of the occupants The pretensioning seat belts are active when the ignition is on The force limiter reduces the pressure of the seat belt on the chest of the occupant so improving their...

Страница 96: ...and 3 comes on in red in the passenger s seat belt and front airbag warning lamp display if the driver s seat belt or front passenger s seat belt is not fastened or is unfastened 1 Front seat belts n...

Страница 97: ...ion on child seats refer to the corresponding section In order to be effective a seat belt must be tightened as close to the body as possible be pulled in front of you with a smooth movement checking...

Страница 98: ...they do not hinder visibility or the exit of the occupants in the case of a minor or rear impact or in certain roll over conditions the airbags may not be deployed the seat belt alone contributes towa...

Страница 99: ...safety of your front passenger in the event of an impact Front airbags Deployment The airbags are deployed except the passenger s front airbag if it is deactivated in the event of a serious front imp...

Страница 100: ...the vehicle and the corresponding door trim panel System which protects the driver and front passenger in the event of a serious side impact in order to limit the risk of injury to the chest between...

Страница 101: ...he upper passenger compartment area Curtain airbags Deployment The curtain airbag is deployed at the same time as the corresponding lateral airbag in the event of a serious side impact applied to all...

Страница 102: ...wheel Passengers must not place their feet on the dashboard Do not smoke as deployment of the airbags can cause burns or the risk of injury from a cigarette or pipe Never remove or pierce the steering...

Страница 103: ...ing recommendations in accordance with European regulations all children under the age of 12 or less than one and a half metres tall must travel in approved child seats suited to their weight on seats...

Страница 104: ...ild seat is installed on a rear passenger seat move the vehicle s front seat forward and straighten the backrest so that the legs of the child in the forward facing child seat do not touch the vehicle...

Страница 105: ...front passenger seat adjust the seat to the intermediate longitudinal position with the backrest straightened The passenger s front airbag must be deactivated Otherwise the child would risk being ser...

Страница 106: ...g in all of the languages required Never install a rearward facing child restraint system on a seat protected by an active front airbag This could cause the death of the child or serious injury For mo...

Страница 107: ...e v ib last T SISELT v i ELUOHTLIKULT vigastada FI L KOSKAAN aseta lapsen turvaistuinta selk ajosuuntaan istuimelle jonka edess suojana on k ytt n aktivoitu TURVATYYNY Sen laukeaminen voi aiheuttaa LA...

Страница 108: ...m banco protegido por um AIRBAG frontal ACTIVADO Esta instala o poder provocar FERIMENTOS GRAVES ou a MORTE da CRIAN A RO Nu instalati NICIODATA un sistem de retinere pentru copii dispus cu spatele in...

Страница 109: ...us Installed in the rearward facing position L4 KLIPPAN Optima From 22 kg approximately 6 years the booster is used on its own L5 R MER KIDFIX Can be fitted to the vehicle s ISOFIX mountings The child...

Страница 110: ...ion to the weight of the child and the seat in the vehicle Seat Weight of the child indicative age Groups 0 b and 0 Birth to 13 kg Up to about 1 year Group 1 From 9 to 18 kg From 1 to about 3 years Gr...

Страница 111: ...able for the installation of a child seat secured using the seat belt and universally approved rearward facing and or forward facing d When a rearward facing child seat is installed on the front passe...

Страница 112: ...an accident Follow the instructions for fitting child seats contained in the installation guide supplied with the child seat When fitting an ISOFIX child seat to the left hand rear seat before fitting...

Страница 113: ...installed only in the forward facing position Is attached to the anchorage rings A and the upper anchorage ring B referred to as the TOP TETHER using an upper strap Three seat body angles sitting rec...

Страница 114: ...a support leg forward facing fitted with a support leg an infant car seat fitted with an upper strap or a support leg Weight of the child indicative age Less than 10 kg group 0 Up to about 6 months Le...

Страница 115: ...for the child seat and the child s legs The i Size child seats also have either an upper strap which is attached to the ring B or a support leg which sits on the vehicle s floor compatible with seat...

Страница 116: ...so that it is not thrown around the vehicle in the event of sharp braking Refit the head restraint as soon as the child seat is removed The legislation on carrying a child on the front passenger seat...

Страница 117: ...ar door to the left on the right hand rear door Unlocking F With the ignition key turn the red control one quarter of a turn to the left on the left hand rear door to the right on the right hand rear...

Страница 118: ...f waves that might be generated by other users deactivate the Stop Start system drive as slowly as possible without stalling In all cases do not exceed 6 mph 10 km h do not stop and do not switch off...

Страница 119: ...capacity is not dependent on the engine speed F To lower the engine speed reduce your speed The maximum towed load on a long incline depends on the gradient and the ambient temperature In all cases ke...

Страница 120: ...Once the engine is running release the key Starting switching off the engine It has 3 positions position 1 Stop insert and removing the key position 2 Ignition on steering column unlocked ignition on...

Страница 121: ...away and drive at moderate speed Never leave the engine running in an enclosed area without adequate ventilation internal combustion engines emit toxic exhaust gases such as carbon monoxide Danger of...

Страница 122: ...lock the vehicle To facilitate unlocking of the steering column it is recommended that the wheels be returned to the straight ahead position before switching off the engine Switching off F Stop the v...

Страница 123: ...he vehicle is being driven if this warning lamp and the STOP warning lamp come on accompanied by an audible signal and a message in the screen this indicates that the parking brake is still on or has...

Страница 124: ...clutch pedal fully down F Push the gear lever fully to the right then backwards Only engage reverse gear when the vehicle is stationary with the engine at idle As a safety precaution and to facilitate...

Страница 125: ...engaging the intermediate gears You press the accelerator pedal The system may suggest that you engage a higher gear The information appears in the instrument panel in the form of an arrow accompanied...

Страница 126: ...ted controls The steering mounted paddles do not allow neutral to be selected or reverse gear to be engaged or disengaged Five or six speed electronically controlled gearbox which offers the comfort o...

Страница 127: ...s the vehicle to be manoeuvred more easily at low speeds when parking in traffic jams After pressing control D or R the vehicle moves as soon as you take your foot off the brake pedal at low speed and...

Страница 128: ...g the steering mounted and control paddles if the engine speed allows the gear change is carried out This function allows you to anticipate certain situations such as overtaking another vehicle or app...

Страница 129: ...our foot still on the brake pedal start the engine The gearbox is operational again Reinitialisation 5 speed electronic gearbox Following disconnection of the battery it is necessary to reinitialise t...

Страница 130: ...ionary the vehicle is held momentarily when you release the brake pedal provided that you are in first gear or neutral with a manual gearbox you are in position D with an electronic gearbox Operation...

Страница 131: ...ehicle has not exceeded 6 mph 10 km h since the last engine start by the driver the engine is needed to maintain a comfortable temperature in the passenger compartment demisting is active some special...

Страница 132: ...ine is needed for control of a system Special cases START invoked automatically In this case the ECO warning lamp flashes for a few seconds then goes off This operation is perfectly normal Before doin...

Страница 133: ...ecommended that the Stop Start function be deactivated and that you drive very slowly The system can be reactivated in the touch screen tablet Reactivation The system is reactivated automatically ever...

Страница 134: ...er The speed limiter cannot in any circumstances replace the need to observe speed limits nor can it replace the need for vigilance on the part of the driver 1 Speed limiter mode selection wheel 2 Val...

Страница 135: ...six speeds memorised are displayed in the touch screen tablet F choosing a speed it is displayed in the instrument panel The selection screen closes after a few moments Speed limits can be memorised...

Страница 136: ...hing of the dashes indicates a fault with the speed limiter Have it checked by a CITRO N dealer or a qualified workshop Operating fault Switching off F Turn wheel 1 to the 0 position The display of in...

Страница 137: ...m cannot in any circumstances replace the need to observe speed limits nor can it replace the need for vigilance on the part of the driver You are advised to keep your feet near the pedals at all time...

Страница 138: ...CRUISE position the cruise control mode is selected but is not switched on Pause F Press button 2 or 3 your vehicle s current speed becomes the cruise speed The cruise control is activated ON Modific...

Страница 139: ...ot be reached or maintained The use of mats not approved by CITRO N may interfere with the operation of the cruise control To avoid any risk of jamming of the pedals ensure that the mat is secured cor...

Страница 140: ...In the secondary page press Speed settings For safety reasons the driver must carry out these operations when stationary F Select the system for which you want to memorise new speed settings F Select...

Страница 141: ...nfirmed by an audible signal The system is switched off when you come out of reverse gear Audible assistance The proximity information is given by an intermittent audible signal the frequency of which...

Страница 142: ...king sensors are interrupted if the vehicle stops for more than three seconds in forward gear if no further obstacles are detected or when the speed of the vehicle exceeds 6 mph 10 km h Operating faul...

Страница 143: ...distance of about 30 cm beyond the edge of your vehicle s rear bumper The green lines represent distances of about 1 and 2 metres beyond the edge of your vehicle s rear bumper The turquoise blue curv...

Страница 144: ...tyres winter tyres can interfere with the correct operation of the parking assistance system During a manoeuvre the steering wheel turns quickly do not hold the steering wheel do not place your hand...

Страница 145: ...ol comes on F Operate the direction indicator on the parking side F Move forwards alongside the parking space at a speed below 12 mph 20 km h to measure it keeping at a distance of between 0 5 and 1 5...

Страница 146: ...ation given by the parking assistance system until the end of manoeuvre message is displayed The indicator lamp in the control goes off accompanied by a audible signal F Move your vehicle forward unti...

Страница 147: ...ace The indicator lamp in the control goes off accompanied by a audible signal The driver takes back control of the vehicle s steering OR A message is displayed in the screen F Select the exit parking...

Страница 148: ...manoeuvre is started within 5 minutes of selection of the type of manoeuvre after a prolonged stop of the vehicle during a manoeuvre if the road wheel anti spin regulation ASR system is invoked if th...

Страница 149: ...g the spare wheel every month as well as before a long journey Driving with under inflated tyres impairs road holding extends braking distances and causes premature tyre wear particularly under arduou...

Страница 150: ...d after changing one or more wheels A label attached to the middle pillar driver s side gives a reminder of this F Reduce speed immediately avoid excessive steering movements and sudden braking F Stop...

Страница 151: ...he under inflation warning lamp accompanied by illumination of the Service warning lamp indicates a fault with the system In this case under inflation monitoring of the tyres is no longer assured Have...

Страница 152: ...ge When it first comes on about 5 litres of fuel remain in the tank Until sufficient fuel has been added this warning lamp appears every time the ignition is switched on accompanied by an audible warn...

Страница 153: ...to the top do not persist after the 3rd cut off this could cause malfunctions The petrol or Diesel engine of your vehicle is fitted with a catalytic converter a device which helps to reduce the level...

Страница 154: ...isk of engine damage that can result from filling with the wrong fuel It remains possible to use a fuel can to fill the tank In order to ensure a good flow of fuel do not place the nozzle of the fuel...

Страница 155: ...s The Diesel engines are compatible with biofuels which conform to current and future European standards Diesel fuel which complies with standard EN 590 mixed with a biofuel which complies with standa...

Страница 156: ...le F Fit the chains following the instructions provided by the manufacturer F Move off gently and drive for a few moments without exceeding 30 mph 50 km h F Stop your vehicle and check that the snow c...

Страница 157: ...in the same way for the screen on the lower grille F Using a screwdriver lever in turn on the fixings of each screen to unclip them Do not forget to remove the very cold climate screens when the ambi...

Страница 158: ...kshop If the towbar is not fitted by a CITRO N dealer it must still be fitted in accordance with the vehicle manufacturer s instructions Your vehicle is primarily designed for transporting people and...

Страница 159: ...y mode A message then appears in the instrument panel screen indicating that the vehicle has switched to economy mode and the active functions are put on standby If a telephone call is being made at t...

Страница 160: ...rity bolts snow chains non slip covers front foglamp kit dog guard pet seat belt seat belt cutter glass hammer Protection Mats seat covers mud flaps vehicle cover boot If a towbar and wiring harness a...

Страница 161: ...efore installing any after market radio communication transmitter you can contact a CITRO N dealer for the specification of transmitters which can be fitted frequency maximum power aerial position spe...

Страница 162: ...eenwash delivery pipe to disconnect it from the jet located on the wiper blade F Unclip the wiper blade and remove it Fitting F Put the corresponding new wiper blade in place and clip it F Connect the...

Страница 163: ...oof bars Version without longitudinal bars To install the roof bars you must secure them only to the four anchorage points in the roof frame These points are masked by the vehicle s doors when closed...

Страница 164: ...he fixings on the vehicle Please refer to national legislation so as to meet the requirements on carrying objects that are longer than the vehicle Recommendations F Distribute the load evenly avoiding...

Страница 165: ...ts for CITRO N to match the latest technical innovations on CITRO N vehicles both for competition and for everyday motoring For you this is an assurance that you will obtain the best performance from...

Страница 166: ...lever located at the bottom of the door aperture towards you The cooling fan may start after switching off the engine take care with articles and clothing that might be caught by the fan blades Do no...

Страница 167: ...165 7 Practical information 1 Screenwash fluid reservoir 2 Coolant header tank 3 Brake fluid reservoir 4 Battery 5 Fusebox 6 Air filter 7 Engine oil dipstick 8 Engine oil filler cap Petrol engines...

Страница 168: ...nformation 1 Screenwash fluid reservoir 2 Coolant header tank 3 Brake fluid reservoir 4 Battery 5 Fusebox 6 Air filter 7 Engine oil dipstick 8 Engine oil filler cap 9 Priming pump Diesel engines Accor...

Страница 169: ...the engine contact a CITRO N dealer or a qualified workshop If the level is below the MIN mark you must top up the engine oil A MAX B MIN To ensure that the reading is correct your vehicle must be par...

Страница 170: ...e F Wait a few minutes before checking the level again using the dipstick F Add more oil if necessary F After checking the level carefully refit the oil filler cap and the dipstick in its tube Engine...

Страница 171: ...ufacturer s recommendations Fluid specification For optimum cleaning and to avoid freezing this fluid must not be topped up or replaced with plain water In wintry conditions it is recommended that you...

Страница 172: ...ent e g dusty atmosphere and the use of the vehicle e g city driving replace them twice as often if necessary A clogged passenger compartment filter may have an adverse effect on the performance of th...

Страница 173: ...to dry and defrost the brakes Manual gearbox The gearbox does not require any maintenance no oil change Refer to the manufacturer s service schedule for the checking interval for this component Elect...

Страница 174: ...our vehicle will no longer meet the Euro 6 standard you vehicle becomes polluting In the event of a confirmed fault with the SCR system you must go to a CITRO N dealer or a qualified workshop as soon...

Страница 175: ...n system required by regulations is activated automatically once the AdBlue tank is empty In the event of the risk of non starting related to a lack of AdBlue Remaining range between 350 and 1500 mile...

Страница 176: ...arting prevented in 350 miles indicating the remaining range expressed in miles or kilometres When driving the message is displayed every 30 seconds until the additive tank has been topped up Go to a...

Страница 177: ...system is confirmed after 30 miles 50 km covered with the permanent display of the message signalling a fault the SERVICE and engine diagnostic warning lamps come on and the UREA warning lamp flashes...

Страница 178: ...lute the additive with water Never pour the additive into the Diesel fuel tank Never top up from an AdBlue dispenser reserved for heavy goods vehicles Use only AdBlue additive that meets the ISO 22241...

Страница 179: ...25 C It is recommended that bottles be stored in a cool area and protected from direct sunlight Under these conditions the additive can be kept for at least a year If the additive has frozen it can b...

Страница 180: ...Top up emissions additive Starting prevented you must wait around 5 minutes before switching on the ignition without opening the driver s door locking the vehicle or introducing the key into the ignit...

Страница 181: ...inor everyday knocks parking dings opening doors scrapes These coloured protectors also enhance the appearance of your vehicle AIRBUMP protectors AIRBUMP protection areas A Side B Front C Rear Care of...

Страница 182: ...jet at a temperature of between 25 C and 40 C Where possible direct the jet at right angles to the stickers Leather Care of the expressive stickers These styling stickers are treated to give good res...

Страница 183: ...le Placing the triangle in the road F Place the triangle behind the vehicle as required by the legislation in force in your country This safety device is used in addition to the hazard warning lamps I...

Страница 184: ...ures which could affect the tyre located on the tyre tread or shoulder Its compressor can be used to check and adjust the pressure of the tyre Temporary puncture repair kit Access to the kit List of t...

Страница 185: ...inflation adaptors for accessories such as balls bicycle tyres Description of the kit The speed limit sticker I must be affixed to the vehicle s steering wheel to remind you that a wheel is in tempor...

Страница 186: ...n the selector A to the sealant position F Check that the switch B is in position O F Connect the compressor s electric plug to the vehicle s 12 V socket F Start the vehicle and leave the engine runni...

Страница 187: ...crew the cap back on the white pipe Take care to avoid staining your vehicle with traces of fluid Keep the kit to hand F Drive immediately for approximately three miles five kilometres at reduced spee...

Страница 188: ...ssor s electric plug to the vehicle s 12 V socket F Start the vehicle again and leave the engine running As soon as possible go to a CITRO N dealer or a qualified workshop You must inform the technici...

Страница 189: ...le and let the engine run F Adjust the pressure using the compressor to inflate switch B in position I to deflate switch B in position O and press button C according to the vehicle s tyre pressure lab...

Страница 190: ...l trim and the wheel bolts 2 Jack with integral handle For raising the vehicle 3 Wheel bolt cover removal tool For removing the wheel bolt covers on alloy wheels or the central wheel cap depending on...

Страница 191: ...w central bolt F Raise the spare wheel towards you from the rear F Take the wheel out of the boot Putting the wheel back in place F Put the wheel back in its housing F Unscrew the yellow central bolt...

Страница 192: ...re they are safe Ensure that the jack is correctly positioned at one of the vehicle s jacking points Incorrect use of the jack could cause the vehicle to drop Never go underneath a vehicle raised usin...

Страница 193: ...gage with the central part of the head of the jack F Raise the vehicle until there is sufficient space between the wheel and the ground to admit the spare not punctured wheel easily Ensure that the ja...

Страница 194: ...e into contact with the spare wheel The wheel is secured by the conical surface of each bolt After changing a wheel Have the tightening of the bolts and the pressure of the spare wheel checked by a CI...

Страница 195: ...l in place on the hub F Screw in the bolts fully by hand F Pre tighten the bolts using the wheelbrace 1 only F Lower the vehicle fully F Fold the jack 2 and detach it F Tighten the bolts using the whe...

Страница 196: ...g F do not clean them using a dry or abrasive cloth nor with a detergent or solvent product F use a sponge and soapy water or a pH neutral product F when using a high pressure washer on persistent mar...

Страница 197: ...hop F Disconnect the bulb connector F Remove the bulb and change it Dipped beam headlamps F Remove the protective cover by pulling the tab F Take the connector and bulb holder then lift the assembly u...

Страница 198: ...d change it Direction indicators Amber coloured bulbs such as the direction indicators must be replaced with bulbs of identical specifications and colour Rapid flashing of the direction indicator warn...

Страница 199: ...3 wheel arch liner fixing screws F Move the wheel arch liner aside to allow access to the front foglamp F Disconnect the connector from the bulb holder by pressing on its tab located at the top F Remo...

Страница 200: ...ater F Replace the module To obtain a new module contact a CITRO N dealer or a qualified workshop To refit carry out these operations in reverse order While removing the module take care not to damage...

Страница 201: ...rn These bulbs are changed from inside the boot F Open the boot F Remove the corresponding access cover in the trim panel F Disconnect the lamp unit connector a by pressing the locking button located...

Страница 202: ...press on the lens to clip it in place F Insert a thin screwdriver into one of the cutouts in the the lens F Push it outwards to unclip it F Remove the lens F Change the faulty bulb For the replacemen...

Страница 203: ...it F Refit the console around the courtesy lamp ensuring that it is clipped in correctly Courtesy lamp with bulbs W5W Courtesy lamp with LEDs For the replacement of the light emitting diodes LEDs cont...

Страница 204: ...p Tweezer Changing a fuse The extraction tweezer is fitted to the back of the cover of the dashboard fuseboxes Access to the tools To replace a fuse you must F use the special tweezer to extract the f...

Страница 205: ...d by CITRO N and not installed in accordance with its instructions in particular when the combined consumption of all of the additional equipment connected exceeds 10 milliamperes Installing electrica...

Страница 206: ...tive pump electric power steering clutch pedal switch F04 5 Rain and sunshine sensor F06 10 Brake pedal switch 1 diagnostic socket F08 5 Top of steering column contacts with steering mounted controls...

Страница 207: ...Fuse N Rating A Functions F19 5 Seat belt unfastened warning F20 5 Airbags F21 5 Instrument panel F22 30 Locks F23 5 Courtesy lamp map reading lamp F26 15 Horn F27 15 Front and rear screenwash F28 5...

Страница 208: ...breakdown Right hand fuse box Fuse N Rating A Functions F30 10 Heated mirrors F31 25 Heated rear screen F34 30 Front electric windows F36 30 Heated front seats F38 20 Trailer interface unit F40 25 Tr...

Страница 209: ...ment fusebox F4 70 Passenger compartment fusebox F5 70 Built in Systems Interface BSI F6 60 Cooling fan assembly F7 80 Built in Systems Interface BSI F8 15 Engine management petrol pump F9 15 Engine m...

Страница 210: ...er motor F22 40 Electronic gearbox F23 40 ABS ESC F24 20 ABS ESC F25 30 Passenger compartment fusebox F26 15 Electronic gearbox F27 25 Built in Systems Interface BSI F28 30 Diesel emissions control sy...

Страница 211: ...ng the battery the Stop Start system will only be active after a continuous period of immobilisation of the vehicle a period which depends on the climatic conditions and the state of charge of the bat...

Страница 212: ...vehicle with the good battery and leave it running for a few minutes First check that the slave battery has a nominal voltage of 12 V and a capacity at least equal to that of the discharged battery D...

Страница 213: ...he internal components have not been damaged and the casing is not cracked which could cause a leak of toxic and corrosive acid Do not reverse the polarity and use only a 12 V charger Do not disconnec...

Страница 214: ...owing a vehicle with the engine off there is no longer any power assistance for braking or steering In the following cases you must always call on a professional recovery service vehicle broken down o...

Страница 215: ...f the cover to unclip it F Screw the towing eye in fully F Install a towing arm F Put the gear lever into neutral control N for an electronic gearbox Towing the vehicle Failure to follow this instruct...

Страница 216: ...starter until the engine starts if the engine does not start at the first attempt wait around 15 seconds before trying again F If the engine does not start after a few attempts operate the priming pum...

Страница 217: ...ax power EU standard kW 55 60 81 Max power engine speed rpm 5 750 5 750 5 500 Max torque EU standard Nm 116 118 205 Max torque engine speed rpm 2 750 2 750 1 500 Fuel Unleaded Unleaded Unleaded Cataly...

Страница 218: ...520 525 545 Recommended nose weight towbar 55 55 55 55 Weights and towed loads in kg PETROL The GTW and towed load values indicated are valid up to a maximum altitude of 1 000 metres the towed load m...

Страница 219: ...ard kW 68 73 73 Max power engine speed rpm 4 000 3 750 3 750 Max torque EU standard Nm 230 254 254 Max torque engine speed rpm 1 750 1 750 1 750 Fuel Diesel Diesel Diesel Catalytic converter yes yes y...

Страница 220: ...825 825 Unbraked trailer 565 570 570 580 Recommended nose weight towbar 55 55 55 55 Weights and towed loads in kg DIESEL The kerb weight is equal to the unladen weight driver 75 kg The GTW and towed...

Страница 221: ...219 9 Technical data Dimensions in mm These dimensions have been measured on an unladen vehicle...

Страница 222: ...manufacturer s name the European whole vehicle type approval number the vehicle identification number VIN the maximum authorised weight gross vehicle weight the maximum authorised weight with trailer...

Страница 223: ...221 9 Technical data...

Страница 224: ...s on without flashing when communication is established It goes off at the end of the call This call is dealt with by the Localised Emergency Call centre which receives locating information from the v...

Страница 225: ...hicle being driven Press this button for more than 2 seconds to request assistance if the vehicle breaks down A voice message confirms that the call has been started Pressing this button again immedia...

Страница 226: ......

Страница 227: ...e 254 Traffic 258 Configuration 260 Connected services 268 CITRO N Multicity Connect 269 Telephone 270 Frequently asked questions 278 The system is protected in such a way that it will only operate in...

Страница 228: ...ccess to the menus then press the virtual buttons in the touch screen tablet Each menu is displayed in one or two pages primary page and secondary page Secondary page Primary page In very hot conditio...

Страница 229: ...pper band of the touch screen tablet it is possible to go directly to the selection of audio source the list of stations or titles depending on the source or to the temperature setting The screen is o...

Страница 230: ......

Страница 231: ...hone press and hold reject an incoming call end a call in progress other than a call in progress access to the telephone menu Decrease volume Radio turn automatic search for the previous next station...

Страница 232: ...n Select an audio source a radio station display photographs Control of the settings for temperature and air flow Access to the trip computer Activate deactivate adjust settings for certain vehicle fu...

Страница 233: ...of instruments and controls the display settings lnguage inits date time and access the interactive help for the main vehicle systems and warning lamps CITRO N MULTICITY CONNECT Connect to an applicat...

Страница 234: ...Audio and Telematics 232 Media Level 1 Level 2 List of FM stations Preset Media Primary page...

Страница 235: ...l 1 Level 2 Comments Media List List of FM stations Press on a radio station to select it Media Source FM Radio Select change of source DAB Radio AM Radio CD USB iPod Bluetooth AUX Media Preset Press...

Страница 236: ...Audio and Telematics 234 Level 1 Level 2 Level 3 Media Photos List of FM stations Media Secondary page...

Страница 237: ...received Frequency Enter the desired radio frequency Confirm Save the settings Media Secondary page Photos Page selection Display the selected photo full screen Rotate Rotate the photo 90 Select all S...

Страница 238: ...Audio and Telematics 236 Level 1 Level 2 Level 3 Media Settings Settings Settings Media Secondary page...

Страница 239: ...ia Settings Random all tracks Choose the play settings Random current album Loop Aux amplification Radio Settings RDS options Activate or deactivate the options DAB FM options Display Radio Text DAB r...

Страница 240: ...display the primary page then go to the secondary page Select List in the primary page Radio Changing a radio frequency Selecting a station OR or OR The exterior environment hills buildings tunnel car...

Страница 241: ...e keypad then Confirm By alphabetical list Press the current radio band then choose the radio station from the list offered Or Press on Media to display the primary page then select Save Preset a stat...

Страница 242: ...nail broadcast by the station Preset stations buttons 1 to 15 Short press select the preset radio station Long press preset a radio station Next Multiplex Next radio station Secondary page Display the...

Страница 243: ...ly switching to the corresponding FM analogue station if there is one If DAB FM auto tracking is activated there is a difference of a few seconds when the system switches to FM analogue radio with som...

Страница 244: ...updated every time the ignition is switched off or connection of a USB memory stick The lists are memorised if they are not modified the subsequent loading time will be shorter Insert the USB memory...

Страница 245: ...Control of the peripheral device is with the audio system controls Other peripherals not recognised on connection must be connected to the auxiliary socket using a Jack cable not supplied It is recom...

Страница 246: ...is recommended that you activate Repeat on the Bluetooth peripheral Connecting Apple players Connect the Apple player to the USB port using a suitable cable not supplied Play starts automatically Con...

Страница 247: ......

Страница 248: ...Audio and Telematics 246 Level 1 Level 2 Level 3 Navigation Navigation Route settings Navigation Primary page...

Страница 249: ...Time distance Ecological Tolls Ferries Strict Close Show route on map Display the map and start navigation Confirm Save the options Save Save the current address Stop navigation Delete the navigation...

Страница 250: ...el 1 Level 2 Level 3 To use the telephone functions refer to the Telephone section For managing contacts and their addresses refer to the Telephone section Navigation Address Enter destination Contact...

Страница 251: ...dress Add waypoint Add a waypoint to the route Navigate to Press to calculate the route Contacts Addresses Select a contact then calculate the route Add contact Add waypoint Search for contact Navigat...

Страница 252: ...Audio and Telematics 250 Search for a point of interest Navigation Point of interest displayed on the map Search for a POI by name Level 1 Level 2 Level 3 Navigation Secondary page...

Страница 253: ...or POI All POIs List of categories available After choosing the category select the points of interest Garage Dining hotels Personal By name Search Save the settings Navigation Secondary page Show POI...

Страница 254: ...Audio and Telematics 252 Moving between the two menus Level 1 Level 2 Level 3 Traffic messages Settings Diversion Map settings Navigation Map settings Settings Settings Navigation Secondary page...

Страница 255: ...Save the options Navigation Secondary page Map settings Orientation Flat view north heading Choose the display and orientation of the map Flat view vehicle heading Perspective view Maps Aspect Day ma...

Страница 256: ...d then in the same way the City or its post code the Road the N Confirm each time Select Navigate to Choose the restriction criteria Include tollroads Include ferries Traffic Strict Close Choose the n...

Страница 257: ...ter destination Select Contacts Press on Navigation to display the primary page Press on the secondary page Select a destination from the contacts in the list offered Select Navigate to Select the cri...

Страница 258: ...e secondary page Towards a point on the map Select Enter destination Select From map Press on Navigation to display the primary page Press on the secondary page Zooming in on the map shows points with...

Страница 259: ...matics 257 An annual mapping update allows new points of interest to be presented to you You can also update the Risk areas Danger areas every month The detailed procedure is available on http citroen...

Страница 260: ...Timing the choice of timing allows the time before giving a Risk Area alert to be defined Select Confirm This series of alerts and displays is only available if Risk Areas have first been downloaded a...

Страница 261: ...ffic Message Channel messages on GPS Navigation contain traffic information transmitted in real time The TA Traffic Announcement function gives priority to TA alert messages To operate this function n...

Страница 262: ...Audio and Telematics 260 Level 1 Configuration Level 2 Level 3 Audio settings Audio settings Audio settings Configuration Primary page...

Страница 263: ...te the link to vehicle speed Ringtones Set the telephone ringtone and volume Voice Set the volume and voice for speaking street names Confirm Save the settings Configuration Turn off screen Turn off t...

Страница 264: ...Audio and Telematics 262 Units Display screen Configuration Adjust date and time Factory settings Level 1 Level 2 Configuration Secondary page...

Страница 265: ...temperature Delete data Select the desired data in the list then press Delete Factory settings Return to factory settings Confirm Save the settings Configuration Secondary page Time Date Confirm Set...

Страница 266: ...Audio and Telematics 264 Choice of language Calculator Configuration Calendar Level 1 Level 2 Configuration Secondary page...

Страница 267: ...Level 1 Level 2 Comments Configuration Secondary page Languages Confirm Select the language then confirm Configuration Secondary page Calculator Select the calculator Configuration Secondary page Cal...

Страница 268: ...ss that allows the audio quality to be adapted to the number of listeners in the vehicle Available only with the 6 speaker configuration The audio settings Ambience Bass Treble and Loudness are differ...

Страница 269: ...and then the date Languages to change the language Calculator to display a calculator Calendar to display a calendar Select System Settings Select Screen settings Select Units to change the units of d...

Страница 270: ...ng assistance applications see the CITRO N Multicity Connect section Identification DUN connection settings Transfer rate Certain new generation smartphones are not compatible with this standard Secon...

Страница 271: ...e MyCITRO N site or to identify a dealer Press the Connected services menu to display the applications Plug the CITRO N Multicity Connect connection key into the USB port Depending on country CITRO N...

Страница 272: ...Audio and Telematics 270 Level 1 Telephone Level 2 Level 3 Contacts Call log Telephone Primary page...

Страница 273: ...ll calls After making choices start the call Incoming calls Outgoing calls Contacts Magnifying glass View Create Call Telephone Contacts Addresses After making choices start the call View New Import D...

Страница 274: ...Audio and Telematics 272 Bluetooth equipment Telephone Options Devices detected Telephone connection Level 1 Level 2 Level 3 Telephone Secondary page...

Страница 275: ...ttings Telephone connection Secondary page Search for devices Devices detected Telephone Start the search for peripheral devices Audio streaming Internet Telephone connection Secondary page Telephone...

Страница 276: ...o all telephone configuration Press on Telephone to display the primary page Press on the secondary page Select Bluetooth connection Select Search The list of telephones detected is displayed If the t...

Страница 277: ...on the ignition the pairing is done without any action on your part with Bluetooth activated To modify the automatic connection mode select the telephone in the list then select the desired profile D...

Страница 278: ...devices Or Connect Disconnect to start or end the Bluetooth connection with the selected device Or Delete to delete the pairing Receiving a call An incoming call is announced by a ring and a superimpo...

Страница 279: ...ys possible to make a call directly from the telephone park the vehicle first as a safety measure Managing contacts entries Press on Telephone to display the primary page Select Contacts Select Add co...

Страница 280: ...rk The audible warning is not active Activate audible warnings in the Navigation menu The system does not suggest a detour around an incident on the route The guidance criteria do not take account of...

Страница 281: ...ntries only major routes motorways are listed for the traffic information This phenomenon is normal The system is dependent on the traffic information available The altitude is not displayed On starti...

Страница 282: ...nt car parks block reception including in RDS mode This phenomenon is normal and does not indicate a fault with the audio system The aerial is absent or has been damaged for example when going through...

Страница 283: ...ity over streaming The CD is ejected automatically or is not played by the player The CD is inserted upside down is unplayable does not contain any audio data or contains an audio format which the pla...

Страница 284: ...mbience Some characters in the media information are not displayed correctly while playing The audio system does not display some types of characters Use standard characters to name tracks and folders...

Страница 285: ...or equalizer settings to obtain the desired musical ambience In changing the equalizer setting treble and bass return to zero When changing the balance settings the distribution setting is deselected...

Страница 286: ...listened to It is advisable to set the Audio functions Bass Treble Fr Re balance Le Ri balance to the middle position select the Linear musical ambience and set the loudness correction to the Active p...

Страница 287: ...e the volume of the telephone if necessary The ambient noise level has an influence on the quality of telephone communication Reduce the ambient noise level close the windows reduce the booster fan sp...

Страница 288: ...alised Emergency Call 222 CITRO N Multicity Connect 269 Cleaning advice 180 Closing the boot 47 Closing the doors 45 Coat hanger 73 Compressor tyre inflation 182 Configuration vehicle 29 33 Connection...

Страница 289: ...ic gearbox 171 Gear lever manual gearbox 122 Glove box 69 71 E Deactivating the passenger airbag 97 104 Deactivation of DSC ESC 92 Demisting Defrosting front 65 Demisting Defrosting rear 66 Diesel 153...

Страница 290: ...fuel system 214 Protecting children 95 97 101 114 Protectors 179 Puncture 182 M N P Locking from the inside 44 Locking the doors 44 46 Low fuel level 150 OIl engine 167 Opening the bonnet 164 Opening...

Страница 291: ...uel Diesel 214 R Safety children 95 97 101 114 Screen cold climate 155 Screen colour 29 230 231 Screen menu 232 234 236 246 248 252 270 272 Screenwash front 86 Screenwash rear 86 SCR Selective Catalyt...

Страница 292: ...8 Windows rear doors 48 180 Wiper blades changing 88 160 Wiper rear 86 Wipers 15 85 87 Wipers automatic rain sensitive 85 87 W Towing eye 76 Traction control ASR 16 18 90 Traffic information TA 259 Tr...

Страница 293: ......

Страница 294: ......

Страница 295: ......

Страница 296: ......

Страница 297: ......

Страница 298: ......

Страница 299: ...lures with the electrical system of your vehicle Contact a CITRO N dealer for information on the range of recommended accessories As a safety measure access to the diagnostic socket used for the vehic...

Страница 300: ...2015 DOCUMENTATION DE BORD 4Dconcept Diadeis Interak 15C4C 0040 Anglais...

Страница 301: ...of the child indicative age Less than 10 kg group 0 Up to about 6 months Less than 10 kg group 0 Less than 13 kg group 0 Up to about 1 year From 9 to 18 kg group 1 From about 1 to 3 years Type of ISOF...

Отзывы: