2-14 Cisco 7010 Hardware Installation and Maintenance
Site Requirements
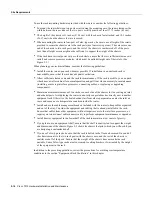
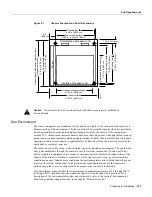
To use the rack-mounting hardware provided with the router, consider the following guidelines:
•
To mount the router between two posts or rails using the mounting ears, the inner clearance (the
width between the inner sides of the two posts or rails) must be at least 17.72 inches (45 cm).
•
The height of the chassis is 11 inches (27.94 cm) with the chassis feet attached, and 10.5 inches
(26.67 cm) when the chassis feet are removed.
•
When mounting the router in four-post or Telco-type racks, be sure to use all eight of the screws
provided to secure the chassis ears to the rack posts (use four screws per ear). The ears secure one
end of the chassis to two rack posts, and the rest of the chassis is cantilevered off of the posts.
Less than all eight screws might not be sufficient to support the weight of the chassis.
•
If the rack has a vertical power strip or other obstacle, ensure that there is sufficient clearance to
install and remove processor modules, which must be pulled straight out of their slots. (See
Figure 2-1.)
When planning your rack installation, consider the following guidelines:
•
Install the router in an open rack whenever possible. If installation in an enclosed rack is
unavoidable, ensure that the rack has adequate ventilation.
•
Allow sufficient clearance around the rack for maintenance. If the rack is mobile, you can push
it back near a wall or cabinet for normal operation and pull it out when necessary for maintenance
(installing or moving interface processors, connecting cables, or replacing or upgrading
components).
•
Maintain a minimum clearance of two inches on each side of the chassis for the cooling air inlet
and exhaust ports. Avoid placing the router in an overly congested rack or directly next to another
equipment rack. Otherwise, the heated exhaust air from other equipment can enter the inlet air
vents and cause an overtemperature condition inside the router.
•
Install and use the cable management brackets included with the router to keep cables organized
and out of the way. Consider the equipment and cabling that is already installed in the rack.
Ensure that cables from other equipment will not impair access to the interface processors, or
require you to disconnect cables unnecessarily to perform equipment maintenance or upgrades.
•
Install heavier equipment in the lower half of the rack to maintain a low center of gravity.
•
If you plan to use an equipment shelf, ensure that the shelf is constructed to support the weight
and dimensions of the chassis. Figure 2-1 shows the chassis footprint, which you will need if you
are designing a customized shelf.
•
If you use Telco-type racks, be sure that the rack is bolted to the floor and secured. One end of
the chassis mounts to the two rack posts with the chassis ears, and the rest of the chassis is
cantilevered off of the posts. Ensure that the weight of the chassis does not make the rack
unstable. Some Telco-type racks are also secured to ceiling brackets, if warranted by the weight
of the equipment in the rack.
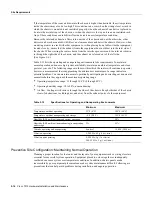
In addition to the preceding guidelines, review the precautions for avoiding overtemperature
conditions in the section “Equipment-Rack Ventilation” in this chapter.
Содержание TelePresence Server 7010
Страница 10: ...x Cisco 7010 Hardware Installation and Maintenence ...
Страница 14: ...iv Cisco 7010 Hardware Installation and Maintenance Document Conventions ...
Страница 112: ...2 52 Cisco 7010 Hardware Installation and Maintenance Initial Configuration Information Page ________ ...
Страница 148: ...3 36 Cisco 7010 Hardware Installation and Maintenance Using the Flash Memory Card ...
Страница 158: ...4 10 Cisco 7010 Hardware Installation and Maintenance Troubleshooting the Processor Subsystem ...
Страница 242: ...5 84 Cisco 7010 Hardware Installation and Maintenance Replacing Internal Components ...
Страница 258: ...A 16 Cisco 7010 Hardware Installation and Maintenance MIP Interface Cable Pinouts ...
Страница 270: ...B 12 Cisco 7010 Hardware Installation and Maintenance Interface Processor LEDs ...
Страница 274: ...C 4 Cisco 7000 Hardware Installation and Maintenance ...
Страница 287: ...Index 13 ...

