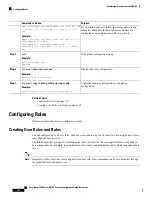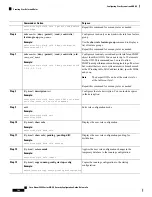
Creating Feature Groups
You can create custom feature groups to add to the default list of features provided by the Cisco NX-OS
software. These groups contain one or more of the features. You can create up to 64 feature groups.
You cannot change the default feature group L3.
Note
Before you begin
If you want to distribute the user role configuration, enable user role configuration distribution on all Cisco
NX-OS devices to which you want the configuration distributed.
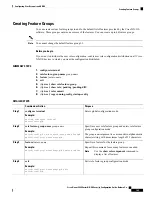
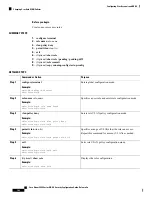
SUMMARY STEPS
1.
configure terminal
2.
role feature-group name group-name
3.
feature feature-name
4.
exit
5.
(Optional)
show role feature-group
6.
(Optional)
show role
{
pending
|
pending-diff
}
7.
(Optional)
role commit
8.
(Optional)
copy running-config startup-config
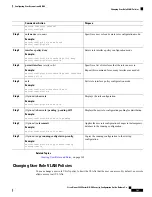
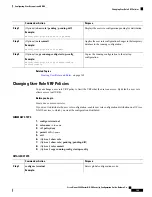
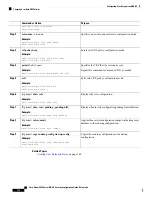
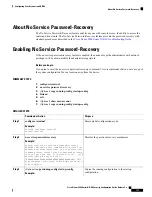
DETAILED STEPS
Purpose
Command or Action
Enters global configuration mode.
configure terminal
Example:
Step 1
switch# configure terminal
switch(config)#
Specifies a user role feature group and enters role feature
group configuration mode.
role feature-group name group-name
Example:
Step 2
The
group-name
argument is a case-sensitive, alphanumeric
character string with a maximum length of 32 characters.
switch(config)# role feature-group name GroupA
switch(config-role-featuregrp)#
Specifies a feature for the feature group.
feature feature-name
Step 3
Example:
Repeat this command for as many features as needed.
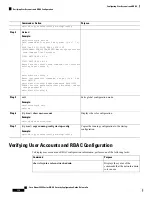
switch(config-role-featuregrp)# feature radius
Use the
show role component
command to
display a list of features.
Note
Exits role feature group configuration mode.
exit
Example:
Step 4
switch(config-role-featuregrp)# exit
switch(config)#
Cisco Nexus 9000 Series NX-OS Security Configuration Guide, Release 9.x
165
Configuring User Accounts and RBAC
Creating Feature Groups

