Determine where in the rack you want the chassis to be mounted. If you are mounting more than one chassis
in the rack, then start from the bottom up or the center of the rack. The following figure shows the brackets
attached to the chassis. Depending on the bracket holes you use, the chassis may protrude in the rack
The cable-management brackets are attached to the chassis after you install the chassis rack-mount brackets
on the chassis and mount the chassis in the rack
Note
Step 1
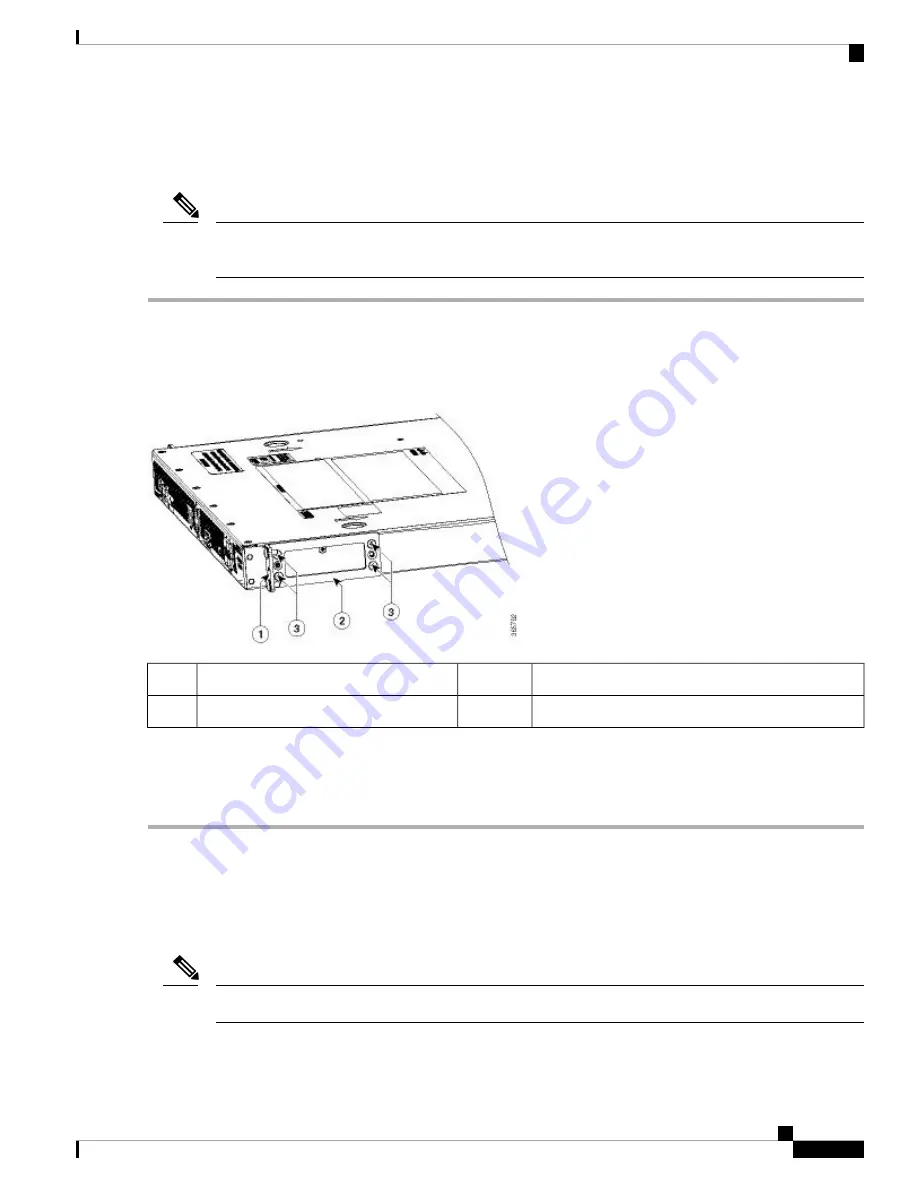
Locate the threaded holes on the side of the chassis. Ensure that you hold the front rack-mount bracket with the ear and
holes facing outward and towards the front of the chassis. The following figure shows where to attach the front rack-mount
brackets to the Cisco Catalyst 9800-40 Wireless Controller.
Figure 2: Attaching the Front Rack-Mount Brackets to the Cisco Catalyst 9800-40 Wireless Controller
Front rack-mount bracket screws
3
Front rack-mount bracket ear and holes
1
Front rack-mount bracket
2
Step 2
Position the front rack-mount bracket top hole with the chassis, first top hole behind the side vent holes.
Step 3
Insert and tighten the black screws on one side.
Step 4
Repeat
Step 1
to
Step 3
on the other side of the chassis. Use black screws to secure the rack-mount brackets to the chassis.
Attaching Rear Rack-Mount Brackets
Before you begin
This procedure is not required if you are installing the chassis in a two-post rack.
Note
Installing the Controller
5
Installing the Controller
Attaching Rear Rack-Mount Brackets


