10-15
Cisco ASA Series Firewall CLI Configuration Guide
Chapter 10 Inspection for Management Application Protocols
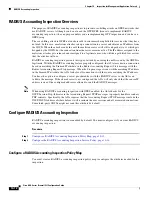
RSH Inspection
Note
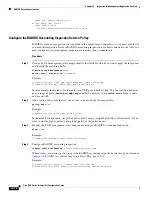
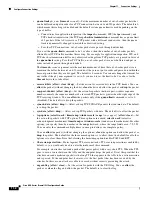
If you are editing an in-use policy to use a different inspection policy map, you must remove the
RADIUS accounting inspection with the
no inspect radius-accounting
command, and then
re-add it with the new inspection policy map name.
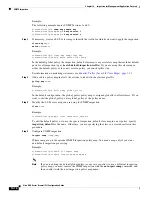
Step 5
If you are editing an existing service policy (such as the default global policy called global_policy), you
are done. Otherwise, activate the policy map on one or more interfaces.
service-policy
policymap_name
{
global
|
interface
interface_name
}
Example:
hostname(config)# service-policy global_policy global
The
global
keyword applies the policy map to all interfaces, and
interface
applies the policy to one
interface. Only one global policy is allowed. You can override the global policy on an interface by
applying a service policy to that interface. You can only apply one policy map to each interface.
RSH Inspection
RSH inspection is enabled by default. The RSH protocol uses a TCP connection from the RSH client to
the RSH server on TCP port 514. The client and server negotiate the TCP port number where the client
listens for the STDERR output stream. RSH inspection supports NAT of the negotiated port number if
necessary.
For information on enabling RSH inspection, see
Configure Application Layer Protocol Inspection,
.
SNMP Inspection
SNMP application inspection lets you restrict SNMP traffic to a specific version of SNMP. Earlier
versions of SNMP are less secure; therefore, denying certain SNMP versions may be required by your
security policy. The ASA can deny SNMP versions 1, 2, 2c, or 3. You control the versions permitted by
creating an SNMP map.
SNMP inspection is not enabled in the default inspection policy, so you must enable it if you need this
inspection. You can simply edit the default global inspection policy to add SNMP inspection. You can
alternatively create a new service policy as desired, for example, an interface-specific policy.
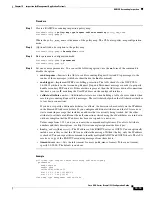
Procedure
Step 1
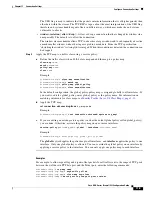
Create an SNMP map.
Use the
snmp-map
map_name
command to create the map and enter SNMP map configuration mode,
then the
deny version
version
command to identify the versions to disallow. The version can be 1, 2, 2c,
or 3.
Содержание ASA 5512-X
Страница 5: ...P A R T 1 Service Policies and Access Control ...
Страница 6: ......
Страница 50: ...3 14 Cisco ASA Series Firewall CLI Configuration Guide Chapter 3 Access Rules History for Access Rules ...
Страница 51: ...P A R T 2 Network Address Translation ...
Страница 52: ......
Страница 126: ...5 28 Cisco ASA Series Firewall CLI Configuration Guide Chapter 5 NAT Examples and Reference DNS and NAT ...
Страница 127: ...P A R T 3 Application Inspection ...
Страница 128: ......
Страница 255: ...P A R T 4 Connection Settings and Quality of Service ...
Страница 256: ......
Страница 288: ...12 14 Cisco ASA Series Firewall CLI Configuration Guide Chapter 12 Quality of Service History for QoS ...
Страница 303: ...P A R T 5 Advanced Network Protection ...
Страница 304: ......
Страница 339: ...P A R T 6 ASA Modules ...
Страница 340: ......
Страница 398: ...17 28 Cisco ASA Series Firewall CLI Configuration Guide Chapter 17 ASA CX Module History for the ASA CX Module ...


