


4-55
Cisco Wireless LAN Controller Configuration Guide
OL-17037-01
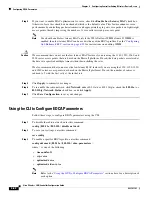
Chapter 4 Configuring Controller SettingsWireless Device Access
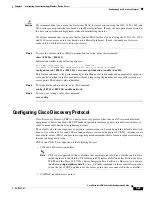
Configuring Voice and Video Parameters
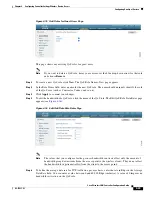
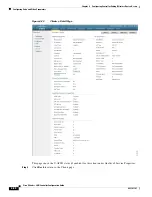
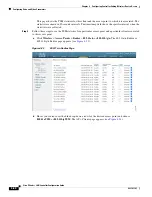
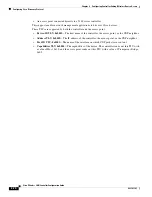
Figure 4-17
802.11a > Voice Parameters Page
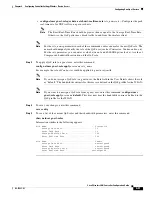
Step 5
To enable bandwidth-based CAC for this radio band, check the
Admission Control (ACM)
check box.
The default value is disabled.
Step 6
To enable load-based CAC for this radio band, check both the
Admission Control (ACM)
check box
and the
Load-based AC
check box. The default value for both check boxes is disabled.
Step 7
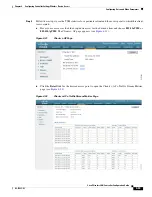
In the Max RF Bandwidth field, enter the percentage of the maximum bandwidth allocated to clients for
voice applications on this radio band. Once the client reaches the value specified, the access point rejects
new calls on this radio band.
Range:
40 to 85%
Default:
75%
Step 8
In the Reserved Roaming Bandwidth field, enter the percentage of maximum allocated bandwidth
reserved for roaming voice clients. The controller reserves this much bandwidth from the maximum
allocated bandwidth for roaming voice clients.
Range:
0 to 25%
Default:
6%
Step 9
To enable expedited bandwidth requests, check the
Expedited Bandwidth
check box. The default value
is disabled.
Step 10
To enable TSM, check the
Metrics Collection
check box. The default value is disabled.
Step 11
Click
Apply
to commit your changes.
Step 12
Re-enable all WMM WLANs and click
Apply
.
Step 13
To re-enable the radio network, click
Network
under 802.11a/n or 802.11b/g/n, check the
802.11a
(or
802.11b/g
)
Network
Status
check box, and click
Apply
.
Step 14
Click
Save Configuration
to save your changes.
Step 15
Repeat this procedure if you want to configure voice parameters for another radio band (802.11a or
802.11b/g).


