background image

IT - 7

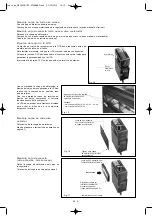
Comando in rotazione della serranda

La serranda ha un angolo di rotazione di 90.

Comando manuale:

montaggio standard

Questo comando manuale è fissato a sinistra (montaggio
standard).

Può essere smontato e fissato a destra (fissaggio mediante 3
viti per lamiera).

Comando motorizzabile:

fornito con il kit di montaggio del

cassone

Dopo lo smontaggio del comando manuale standard (fissato
mediante 3 viti per lamiera), montare al suo posto il comando
motorizzabile fornito nel sacchetto di plastica. Il fissaggio di
questo comando viene effettuato mediante serraggio sull'asse
della serranda (vite M6 x 40 + ro dado).

Servomotore:

opzionale (consultare il nostro centro di

assistenza)

Servomotore con molla di richiamo, ritorno a zero per
mancanza di corrente, finecorsa di regolazione dell'angolo di
rotazione della serranda.

Non cablato - 230 / 1 / 50.

Collegamenti elettrici

Prima di collegare l'apparecchio alla rete, accertarsi che la tensione sia quella indicata sulla targhetta segnaletica

dell'apparecchio.
Il collegamento alla rete elettrica dovrà essere conforme alle norme di installazione in vigore.
La messa a terra dell'apparecchio è obbligatoria.
CIAT declina ogni responsabilità per incidenti conseguenti alla mancata messa a terra dell'apparecchio o ad una messa a terra

non corretta.
Per gli apparecchi che comprendono equipaggiamenti elettrici opzionali, fare riferimento allo schema elettrico fornito con

l'apparecchio.
Per applicazioni specifiche del cliente, lo schema elettrico deve essere progettato partendo dagli schemi generici forniti in basso.

Attenzione:

I fili NERO, BLU e ROSSO non devono mai essere collegati tra loro.

Cablaggio interno dell'apparecchio standard riportato su morsettiera in configurazione
2 tubi o 4 tubi:

Fig. 18

Fig. 19

Fig. 20

Leva di comando con
vite di bloccaggio

Aria riciclata

Aria riciclata (eventuale)

Aria riciclata (eventuale)

Aria fresca

Aria fresca

Aria fresca

Fig. 21

F:

Sezionatore fusibile

MK:

Ventilatore di trattamento dell'aria

XB:

morsettiera di collegamento

Materiale a carico del cliente

Raccordi cliente

V

erde / giallo

V

erde / giallo

A

v

or

io

Nero

Blu

Rosso

copie_de_NI0033B UTA STANDARD.qxd  31/05/2010  15:13  Page 7

Содержание UTA 370-22

Страница 1: ...ice Maintenance Installation Operation Commissioning Maintenance Montage Betriebs und Wartungs Anweisung Instalaci n Funcionamiento Puesta en marcha Mantenimiento Installazione Funzionamento Avviament...

Страница 2: ...3 Manchette 5 Caisson de reprise d air 5 Raccordements lectriques 7 Entretien 9 Essais et garantie 9 CIAT est en conformit avec le marquage CE autorisant une libre circulation de ses appareils sur l e...

Страница 3: ...e r c piss qu apr s IMPORTANT Ces remarques conform ment l article 105 du Code du Commerce doivent tre confirm es par lettre recommand e aupr s du transporteur dans un d lai de 3 jours ouvrables Les m...

Страница 4: ...on Utiliser un tube d vacuation de 16 mm transparent ayant une pente de 2 cm m minimum avec un d nivel constant tout le long du parcours Pr voir un siphon d au moins 5 cm pour viter tout refoulement d...

Страница 5: ...conseill par sortie Fig 7 vis M6 rondelle ventail rondelle plate 3 entr es sorties D bit d air 200 400 m3 h 5 entr es sorties D bit d air 200 400 m3 h 250 600 m3 h 6 entr es sorties D bit d air 250 60...

Страница 6: ...ace du joint PVC sur le pourtour ext rieur pour l tanch t entre la manchette et l UTA Montage de la manchette sur l UTA Caisson de reprise d air Pr sentation Joint PVC Fig 11 Fig 12 vis rondelle venta...

Страница 7: ...n position tout air recycl Apr s avoir serr toutes les vis de fixation du caisson v rifier le bon fonctionnement du volet L UTA doit tre install parfaitement de niveau afin de ne pas provoquer le bloc...

Страница 8: ...e sur la plaque signal tique de l appareil Le raccordement au r seau devra tre conforme aux r gles d installation en vigueur La mise la terre de l appareil est imp rative Notre responsabilit ne saura...

Страница 9: ...ne Green Yellow Rouge Red P V LOW SPEED Rouge Red Vert Jaune Green Yellow N 1 2 Q PE 1 2 3 4 5 5 6 6 7 7 PE 8 9 N N 1 XB MK R BSCA BSCM 6 6 7 7 XB BSCM BSCA R1 R2 LEGENDE Limiteur de temp rature autom...

Страница 10: ...d un petit tournevis port e plate de retirer le fil d alimentation apr s la mise hors tension Puis de s lectionner le rep re moteur d sir et de clipser simplement la main ce fil d alimentation sans l...

Страница 11: ...g of accessories 3 Sleeve 5 Air intake box 5 Electrical connections 7 Servicing 9 Test and guarantee 9 CIAT complies with the CE mark authorising the free circulation of its units throughout the Europ...

Страница 12: ...nce of the delivery person and only sign the receipt after having done this IMPORTANT These remarks in compliance with article 105 of the French trade code must be confirmed by registered letter to th...

Страница 13: ...nstant difference in level along its path Provide a siphon of at least 5 cm to prevent any discharge of gas or unpleasant odours Mounting of accessories Presentation The plenum is an accessory which i...

Страница 14: ...ded air flow per outlet Fig 7 M6 screw star washer flat washer 3 inlets outlets Air flow 200 400 m3 h 5 inlets outlets Air flow 200 400 m3 h 250 600 m3 h 6 inlets outlets Air flow 250 600 m3 h Fig 8 F...

Страница 15: ...ioning of the PVC gasket on the external perimeter for correct sealing between sleeve and UTA Mounting of the sleeve on the UTA Air intake box Presentation PVC gasket Fig 11 Fig 12 screw star washer f...

Страница 16: ...the damper on all recycled air position After having tightened all the fixing screws of the box check the satisfactory operation of the damper The UTA must be installed perfectly levelled so as to av...

Страница 17: ...make sure that the voltage is the same as that indicated on the unit identification plate The connections to the mains should comply with the applicable installation regulations The unit must be eart...

Страница 18: ...ure limiter Fused isolator Contactor relay Air handling fan with overload protection Heating element Terminal block Cold water solenoid valve Equipment supplied on request Customer equipment Customer...

Страница 19: ...s equipped with 4 speed motor for which 3 speeds are pre wired in the factory To modify the factory wiring simply remove the power supply wire using a small flat screwdriver after switching off the un...

Страница 20: ...e der Zubeh rteile 3 Luftstutzen 5 R ckluftbeh lter 5 Elektrische Anschl sse 7 Wartung 9 Tests und Garantie 9 CIAT ist der CE Kennzeichnung konform die eine freie Verbreitung seiner Ger te auf der Ges...

Страница 21: ...ben und erst anschliessend die Empfangsbescheinigung unterschreiben WICHTIG Diese Bemerkungen gem ss Artikel 105 des Code du Commerce m ssen durch ein Einschreiben an den Spediteur innerhalb von 3 Wer...

Страница 22: ...chsichtigenAblasschlauch von 16mm mit einem minimalen Gef lle von 2cm m und einem konstantem Gef lle auf dem gesamten Weg Sehen Sie einen Syphon von 5 cm vor um jeden Gas R cklauf oder schlechte Ger c...

Страница 23: ...fohlenen Luftleistung Fig 7 Schraube F cherscheibe Unterlegscheibe 3 Einl sse Ausl sse Luftleistung 200 400 m3 h 5 Einl sse Ausl sse Luftleistung 200 400 m3 h 250 600 m3 h 6 Einl sse Ausl sse Luftleis...

Страница 24: ...g um eine Dichtheit zwischen dem Luftstutzen und dem Luftaufbereitungsger t zu gew hrleisten Anbringen des Luftstutzens an dem Luftaufbereitungsger t R ckluftbeh lter Darstellung PVC gaslet Fig 11 Fig...

Страница 25: ...Luftaufbereitungsger t mit der Klappe in Position gesamte wiederaufbereitete Luft Nach Anziehen aller Befestigungsschrauben des Kastens die korrekte Funktion der Klappe berpr fen Das Luftaufbereitung...

Страница 26: ...ass die Spannung diejenige ist die auf dem Typenschild angegeben ist Der Netzanschluss muss den geltenden Installationsregelungen konform sein Die Erdung des Ger ts ist unbedingt notwendig Wir bernehm...

Страница 27: ...oir Black G V HIGH SPEED Ivoire Ivory Vert Jaune Green Yellow Rouge Red P V LOW SPEED Rouge Red Vert Jaune Green Yellow N 1 2 Q PE 1 2 3 4 5 5 6 6 7 7 PE 8 9 N N 1 XB MK R BSCA BSCM 6 6 7 7 XB BSCM BS...

Страница 28: ...Einspeisungskabel des Motors mit Hilfe eines Schraubenzieher rauszuziehen nachdem die Spannung abgeschaltet wurde Danach w hlen Sie die gew nschten Motorstufen und klipsen Sie das Einspeisungskabel mi...

Страница 29: ...porte 5 Caj n de recuperaci n del aire 5 Conexiones el ctricas 7 Mantenimiento 9 Pruebas y garant a 9 CIAT cumple con el marcado CE que autoriza la libre circulaci n de sus equipos en el conjunto del...

Страница 30: ...ente en el albar n los da os advertidos en presencia del transportista y firmar el albar n a continuaci n IMPORTANTE Estas observaciones deben ser confirmadas al transportista por carta certificada en...

Страница 31: ...de 16 mm transparente con una pendiente m nima de 2 cm m con un desnivel constante a lo largo de todo el recorrido Debe prever un sif n de al menos 5 cm para evitar posibles emisiones de gas o de olo...

Страница 32: ...o por salida Fig 7 Tornillo M6 arandela en abanico arandela plana 3 entradas salidas Caudal de aire 200 400 m3 h 5 entradas salidas Caudal de aire 200 400 m3 h 250 600 m3 h 6 entradas salidas Caudal d...

Страница 33: ...en el contorno exterior para lograr la estanqueidad entre el cuadro y la UTA Montaje del cuadro en la UTA Caj n de recuperaci n del aire Presentaci n Junta de PVC Fig 11 Fig 12 tornillo arandela en a...

Страница 34: ...vez apretados todos los tornillos de fijaci n del caj n compruebe el correcto funcionamiento de la compuerta La UTA debe quedar perfectamente nivelada para evitar el bloqueo de la compuerta durante su...

Страница 35: ...d compruebe que la tensi n sea la indicada en la placa de caracter sticas del equipo La conexi n a la red debe ser conforme a las normas de instalaci n en vigor Es obligatorio conectar a tierra el equ...

Страница 36: ...een Yellow Rouge Red P V LOW SPEED Rouge Red Vert Jaune Green Yellow N 1 2 Q PE 1 2 3 4 5 5 6 6 7 7 PE 8 9 N N 1 XB MK R BSCA BSCM 6 6 7 7 XB BSCM BSCA R1 R2 ALIMENTACI N BATER A EL C M X 4 600 V REGU...

Страница 37: ...e alimentaci n con un peque o destornillador plano con el equipo desconectado de la corriente A continuaci n seleccione la referencia de motor deseada y conecte manualmente este hilo de alimentaci n s...

Страница 38: ...degli accessori 3 Manicotto 5 Sezione di ricircolo dell aria 5 Collegamenti elettrici 7 Manutenzione 9 Test e garanzia 9 La marcatura CE autorizza la libera circolazione degli apparecchi CIAT in tutto...

Страница 39: ...irmare la bolla di consegna IMPORTANTE I reclami come indicato nell articolo 105 del Codice del Commercio devono essere confermati al trasportatore a mezzo di lettera raccomandata entro 3 giorni lavor...

Страница 40: ...rente avente una pendenza minima di 2 cm m con un dislivello costante lungo tutto il percorso Predisporre un sifone di almeno 5 cm per evitare mandate di gas o di odori sgradevoli Montaggio degli acce...

Страница 41: ...sigliato per uscita Fig 7 vite M6 rondella ventaglio rondella piatta 3 ingressi uscite Portata d aria 200 400 m3 ore 5 ingressi uscite Portata d aria 200 400 m3 ore 250 600 m3 ore 6 ingressi uscite Po...

Страница 42: ...do esterno per la tenuta tra il manicotto e l unit di trattamento dell aria Montaggio del manicotto sull unit di trattamento dell aria Sezicolo dell aria Presentazione Guarnizione in PVC Fig 11 Fig 12...

Страница 43: ...esclusivamente con aria riciclata Dopo avere serrato tutte le viti di fissaggio del cassone verificare il corretto funzionamento della serranda L unit di trattamento dell aria deve essere installata...

Страница 44: ...etica dell apparecchio Il collegamento alla rete elettrica dovr essere conforme alle norme di installazione in vigore La messa a terra dell apparecchio obbligatoria CIAT declina ogni responsabilit per...

Страница 45: ...6 7 7 PE 8 9 N N 1 XB MK R BSCA BSCM 6 6 7 7 XB BSCM BSCA R1 R2 LEGENDA Limitatore di temperatura automatico Limitatore di temperatura manuale Ventilatore di trattamento dell aria Sezionatore fusibile...

Страница 46: ...iciente togliere il filo di alimentazione usando un piccolo cacciavite piatto dopo avere tolto la corrente Selezionare poi il riferimento motore desiderato e agganciare semplicemente questo filo di al...

Страница 47: ...RU 1 RU RU 1 2 2 2 2 3 3 5 5 7 9 9 CIAT CE copie_de_NR0033B UTA STANDARD qxd 31 05 2010 15 15 Page 1...

Страница 48: ...RU 2 1 2 3 4 5 6 7 2 105 250 1 3 2 copie_de_NR0033B UTA STANDARD qxd 31 05 2010 15 15 Page 2...

Страница 49: ...DN 200 UTA 370 22 44 DN 250 UTA 370 44 370 66 1 2 UTA A B C D B C D B C D G 1 2 2 5 19 14 2 19 13 5 1 5 19 13 5 G 3 4 2 5 24 18 2 24 17 5 1 5 24 17 5 G 1 2 5 30 24 2 30 24 1 5 30 24 4 5 6 copie_de_NR...

Страница 50: ...RU 4 7 6 3 200 400 3 5 200 400 3 250 600 3 6 250 600 3 8 9 10 copie_de_NR0033B UTA STANDARD qxd 31 05 2010 15 15 Page 4...

Страница 51: ...RU 5 RU UTA Fib Air CIAT UTA UTA 11 12 2 CIAT 13 copie_de_NR0033B UTA STANDARD qxd 31 05 2010 15 15 Page 5...

Страница 52: ...RU 6 UTA UTA UTA UTA UTA UTA 7 UTA M6 x 20 6 UTA 370 02 22 03 04 44 8 UTA 370 05 14 15 16 5 17 copie_de_NR0033B UTA STANDARD qxd 31 05 2010 15 15 Page 6...

Страница 53: ...RU 7 RU 90 3 3 M6 x 40 CIAT 230 1 50 CIAT 2 4 18 19 20 F MK XB 21 copie_de_NR0033B UTA STANDARD qxd 31 05 2010 15 15 Page 7...

Страница 54: ...e M V MEDIUM SPEED Noir Black G V HIGH SPEED Ivoire Ivory Vert Jaune Green Yellow Rouge Red P V LOW SPEED Rouge Red Vert Jaune Green Yellow N 1 2 Q PE 1 2 3 4 5 5 6 6 7 7 PE 8 9 N N 1 XB MK R BSCA BSC...

Страница 55: ...RU 9 RU CIAT IEC 60364 CIAT IEC 60335 2 40 2 1 2 4 CIAT CIAT copie_de_NR0033B UTA STANDARD qxd 31 05 2010 15 15 Page 9...

Страница 56: ...ment always in mind CIAT reserves the right without notice to proceed with any technical modification Dieses Dokument ist keine Vertragsunterlage Da wir st ndig bem ht sind unser Material noch weiter...

Отзывы: