background image

6


ASSEMBLY / OPERATING INSTRUCTIONS

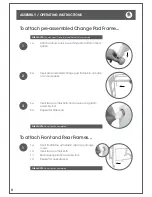
To attach pre-assembled Change Pad Frame...

To attach Front and Rear Frames...

1

1

2

3

Attach all four castors by pushing onto bottom of end 

panels.

Insert front frame with plastic clips as per image 

shown.
Insert two assembly bolts.
Secure using plastic assembly tool.
Repeat for opposite end.

Insert pre-assembled change pad frame into one side 

of an end panel.

Insert two assembly bolts and secure using plastic 

assembly tool.
Repeat for other end.

1a.

1a.

1b.
1c.
1d.

2a.

3a.

3b.

PLEASE NOTE: 

You may need the help of another adult for assembly.

PLEASE NOTE: 

Do not tighten completely.

PLEASE NOTE: 

Do not tighten completely.

Содержание Montana DL

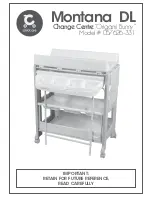
Страница 1: ...IMPORTANT RETAIN FOR FUTURE REFERENCE READ CAREFULLY Montana DL ChangeCentre Origami Bunny Model 057626 331...

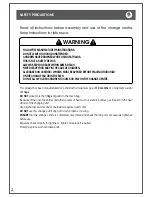
Страница 2: ...led and check that all parts are securely tightened before use Regularly check all parts for tightness tighten or replace if required Promptly replace worn or broken parts Read all instructions before...

Страница 3: ...ice as a result of our ongoing policy of product improvement Contents Assembly contents list Assembly Operating instructions How to care for your Montana DL Change Centre Congratulations on your purch...

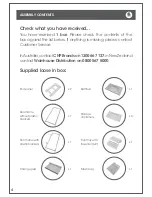
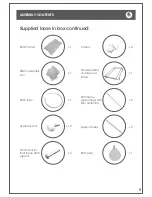
Страница 4: ...sing please contact Customer Service InAustralia contactCNPBrandson1300667137 inNewZealand contact Wainhouse Distribution on 0800 567 5000 Supplied loose in box End panel Storage containers Front tray...

Страница 5: ...tool Bath frame support legs with floor protectors Support tubes Bath plug x 1 x 2 x 2 x 1 x 1 x 12 x 4 x 1 Drain tube Assembly bolt 44mm bolt for front frame bath support Pre assembled change pad fr...

Страница 6: ...er image shown Insert two assembly bolts Secure using plastic assembly tool Repeat for opposite end Insert pre assembled change pad frame into one side of an end panel Insert two assembly bolts and se...

Страница 7: ...Frame 1 2 3 Insert bath frame support leg onto bath frame tube Ensure pop pins lock into hole Secure top support tubes as shown in image using 2 x 44mm bolts either end Repeat for bottom support tube...

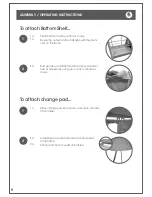
Страница 8: ...to position and clip to one side of top frame Fold up sides and attach end flaps around vertical bars of side panels using press studs to secure as shown Lower down and clip other side of change pad t...

Страница 9: ...lf in the centre of the unit Place the left component of the front tray into position then place the right component ensuring it clips into the left component as shown Ensure the front tray rests agai...

Страница 10: ...MBLY OPERATING INSTRUCTIONS To access Bath 1 2 To access bath slide bath outwards When finished slide bath back inwards ensuring the bottom of the slide out frame clips into the plastic clips as shown...

Страница 11: ...soap solution if necessary Do not use abrasive cleaners Always store product in a clean dry place Always check parts regularly for tightness of screws nuts and other fasteners tighten or replace if r...

Страница 12: ...vice 1300 667 137 W www cnpbrands com au E info cnpbrands com au F www facebook com CNPBrands I cnp_baby Distributed in New Zealand by Wainhouse Distribution 2 6 Argyle St Morningside PO Box 41 014 St...

Отзывы: