background image

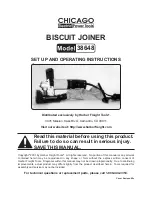
Biscuit joiner

38648

set up and operating instructions

distributed exclusively by Harbor Freight tools

®

.

3491 Mission Oaks Blvd., Camarillo, CA 93011

Visit our website at: http://www.harborfreight.com

 read this material before using this product. 

Failure to do so can result in serious injury. 

saVe tHis manual.

Copyright

©

 2001 by Harbor Freight Tools

®

.  All rights reserved.  No portion of this manual or any artwork 

contained  herein  may  be  reproduced  in  any  shape  or  form  without  the  express  written  consent  of 

Harbor Freight Tools.  Diagrams within this manual may not be drawn proportionally.  Due to continuing 

improvements,  actual  product  may  differ  slightly  from  the  product  described  herein.   Tools  required  for 

assembly and service may not be included.

For technical questions or replacement parts, please call 1-800-444-3353.

cover revised 09c

Содержание 38648

Страница 1: ...001 by Harbor Freight Tools All rights reserved No portion of this manual or any artwork contained herein may be reproduced in any shape or form without the express written consent of Harbor Freight Tools Diagrams within this manual may not be drawn proportionally Due to continuing improvements actual product may differ slightly from the product described herein Tools required for assembly and ser...

Страница 2: ...ment or reflexes are im paired while taking drugs If there is any doubt do not attempt to use this product USE EYE HEARING AND 5 BREATHING PROTECTION Wear ANSI approved safety impact eye glasses ANSI approved hearing protection and dust mask or respira tor when using this product ANSI approved safety impact eye glasses hearing protection and dust masks and respirators are available from Harbor Fre...

Страница 3: ...roduct When in use make sure this product is always plugged into a grounded 3 hole electrical receptacle with an appropriate breaker switch in line MAKE SURE THE POWER SWITCH 2 IS IN THE OFF POSITION BE FORE PLUGGING IN THE POWER CORD DO NOT ABUSE THE POWER 3 CORD Do not use the cord to pull the 3 prong plug from a power outlet Keep cord away from heat oil sharp edges and moving parts Replace dama...

Страница 4: ...CCA which can be toxic When cutting these materials extra care should be taken to avoid inhalation and minimize skin contact BEFORE USING THE BISCUIT 13 JOINER MAKE SURE THE CUT TING BLADE IS PROPERLY MOUNTED ON THE BLADE SPIN DLE Make sure the Cutting Blade 61 is balanced securely mounted and is not bent or cracked ALLOW THE CUTTING BLADE TO 14 SPIN UP TO FULL SPEED BEFORE FEEDING WOOD INTO IT Wh...

Страница 5: ...ety Code 25249 5 et seq WARNING Handling the cord on 22 this product will expose you to lead a chemical known to the State of California to cause cancer and birth defects or other reproductive harm Wash hands after handling Califor nia Health Safety Code 25249 5 et seq The warnings precautions and in 23 structions discussed in this instruction manual cannot cover all possible con ditions and situa...

Страница 6: ...h the lowest vibration 4 when there is a choice Include vibration free periods each 5 day of work Grip tool as lightly as possible while 6 still keeping safe control of it Let the tool do the work To reduce vibration maintain the tool 7 as explained in this manual If any abnormal vibration occurs stop use immediately Save these instructions REV 09c ...

Страница 7: ... 63 NOTE For efficient dust pickup empty the Dust Bag 45 frequently To Attach The Adjustable Fence Remove both Allen Screws 67 on the front of the Joiner Base 43 us ing the Hex Wrench provided Slide the Adjustable Fence 64 backward onto the Joiner Base and secure the Adjustable Fence with the two Allen Screws See Figures C and D To Attach The Spacer Turn the Biscuit Joiner upside down Simply push ...

Страница 8: ... the handle against a solid surface Grasp the front of the base plate and 4 pull rearward until it stops Rotate the exposed blade so that one 5 carbide tip is at maximum travel from the face of the base plate Figure D 6 Use a small scale to measure this distance then turn Depth Adjustment Dial 48 adjusting screw as needed The amount of exposed cutter should be one half of the biscuit width See Fig...

Страница 9: ...le with care Replace the Blade Bolt 62 and 7 tighten clockwise until secure Reassemble the Adjustable Fence 8 64 to the Joiner Base 43 using the two Allen Screws 67 To Use The Locking On Off Switch NOTE The Biscuit Joiner Switch 35 is located under the Hold Covers 28 29 The orange Switch Lock Button on the left side of the Cover locks the Switch in the ON position for long cutting operations See A...

Страница 10: ... the pencil mark on the wood See Figures B and C Hold the Biscuit Joiner firmly with 4 both hands Turn the power ON and push the Biscuit Joiner forward slowly and smoothly When the Joiner Base 43 has butt 5 ed completely against the wood sur face to be cut pull the Biscuit Joiner back and turn the power OFF To Mark Slot Locations For Other Types Of Cuts NOTE When making preparations for cutting sl...

Страница 11: ...condition that may af fect its safe operation If abnormal noise or vibration occurs turn off the Biscuit Joiner immediately and have the problem corrected before further use Do not use damaged equipment Included in the Biscuit Joiner kit are 8 two additional Motor Carbon Brushes 23 In the event the old Carbon Brushes need replacing it is recom mended that only a qualified techni cian perform this ...

Страница 12: ...Housing Assembly 1 28 Hold Cover 1 29 Hold Cover 1 30 Tapping Screw 2 31 Washer M4 8 32 Wire Assembly 2 33 Name Plate 1 34 Tapping Screw 4 35 Switch 1 36 Cord Armor 1 37 Cord Clip 1 Part Description Qty 38 Tapping Screw 2 39 Cord Assembly 1 40 Spring 1 41 Lock Pin 1 42 Washer 1 43 Joiner 1 45 Dust Bag 1 46 Depth Adjust Screw 1 47 Spring 1 48 Depth Adjusting Dial preset 1 49 Square Nut 1 51 Bolt M6...

Страница 13: ...38648 For technical questions please call 1 800 444 3353 Page 13 Note Some parts are listed and shown for illustration purposes only and are not available individually as re placement parts ASSEMBLY DIAGRAM ...

Страница 14: ...ntal or consequential damages so the above limitation of exclusion may not apply to you This warranty is express ly in lieu of all other warranties express or implied including the warranties of merchantability and fitness To take advantage of this warranty the product or part must be returned to us with transportation charges prepaid Proof of purchase date and an explanation of the com plaint mus...

Отзывы:

Похожие инструкции для 38648