


iGage
X9x User Manual
page 38 of 53
green check mark again to return to ‘GPS Rover:
RTK’:
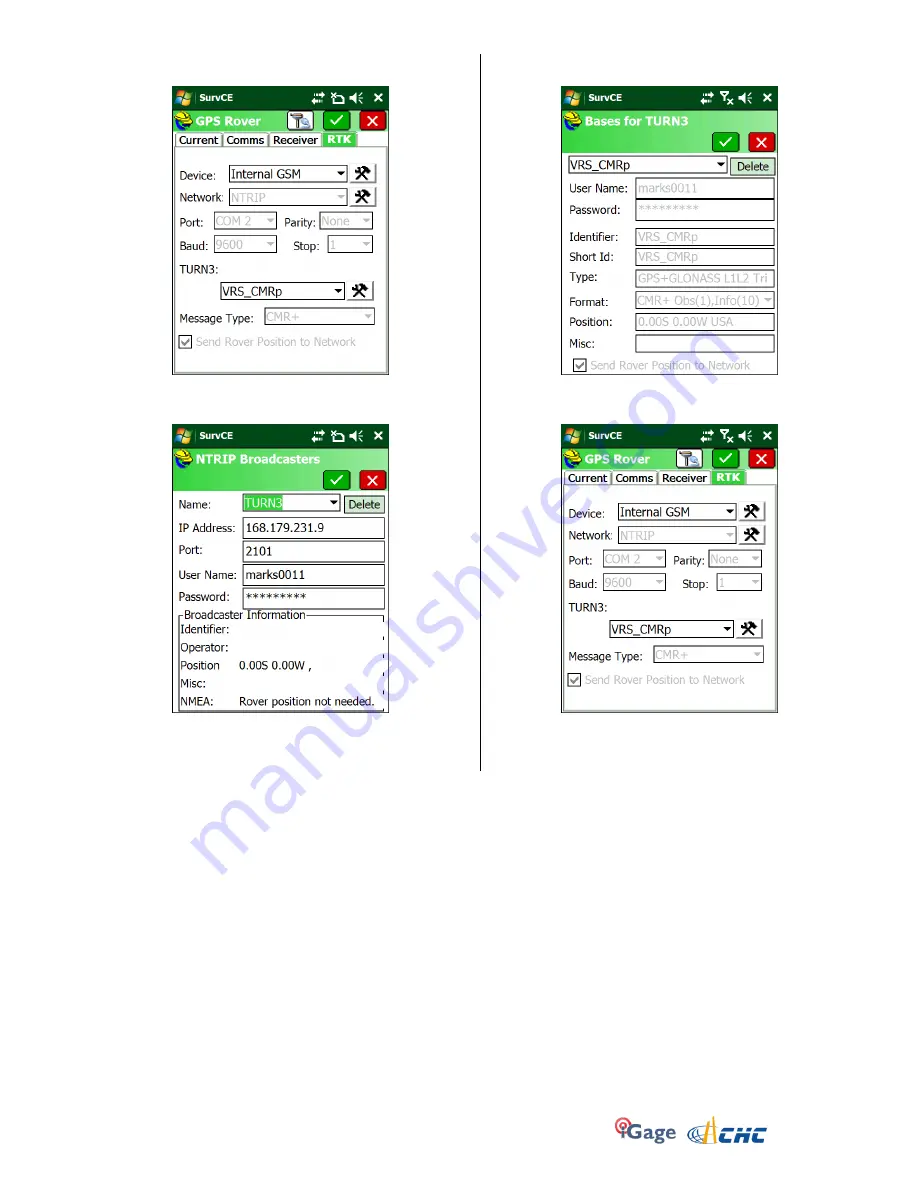
12.
The ‘Network’ will be fixed to ‘NTRIP’, click the
‘Hammer/Wrench’ button to the right of the
Network:
Configure as required for your network and user
name. Click on the green check mark.
13.
The GPS will load the available mount points from
the internet:
Choose the correct mount point and click the
green check mark.
14.
From the RTK menu:
Click the green check mark again. The rover will
connect to the correction source, the green ‘radio’
led on the receiver will start to flash.
Troubleshooting a Network Rover
1.
Are corrections being received by the rover? Check the green LED on the rover. It should blink once each second.
2.
There is no warning if the Username or Password is wrong. Double check these values and the IP/PORT if the
connection is not successful!
3.
Is the internet connection still working? You can check it by using the Internet Explorer to browse to a web page.
4.
If the Rover reports ‘Float’ corrections are being received. It can take up to 1-minute after connecting for the rover
to receive a base location. The position will remain autonomous until the base location is received.
5.
Are the HRMS and VRMS on the ‘Equip: Monitor Skyplot’ screen dropping?
6.
If the Rover is FLOAT, but never fixes, and the latency is 5 seconds or less, check the effective baseline from your
rover to the virtual base. On the ‘Equip: Monitor Skyplot’ screen, choose the ‘REF’ tab. Check the distance to base. Is
it what you expect (less than 25 miles?)
7.
Make sure the protocol matches on the base and rover “CMR+” or “RTCM3” are best, but must match exactly
(Warning, there is an RTCM2 and RTCM3.)