background image

Carton Inventory

Overview

The Gate Access Intercom can be used as either a 
primary or secondary door and gate access point. It 
can be used to control electric gates, entry doors, or 
pedestrian doors with electric strikes. The Intercom 
uses a secure digital connection that allows it to 
operate without interfering with other Intercom 
networks.
The Intercom is compatible with various Liftmaster 
Wireless Products.

Setup

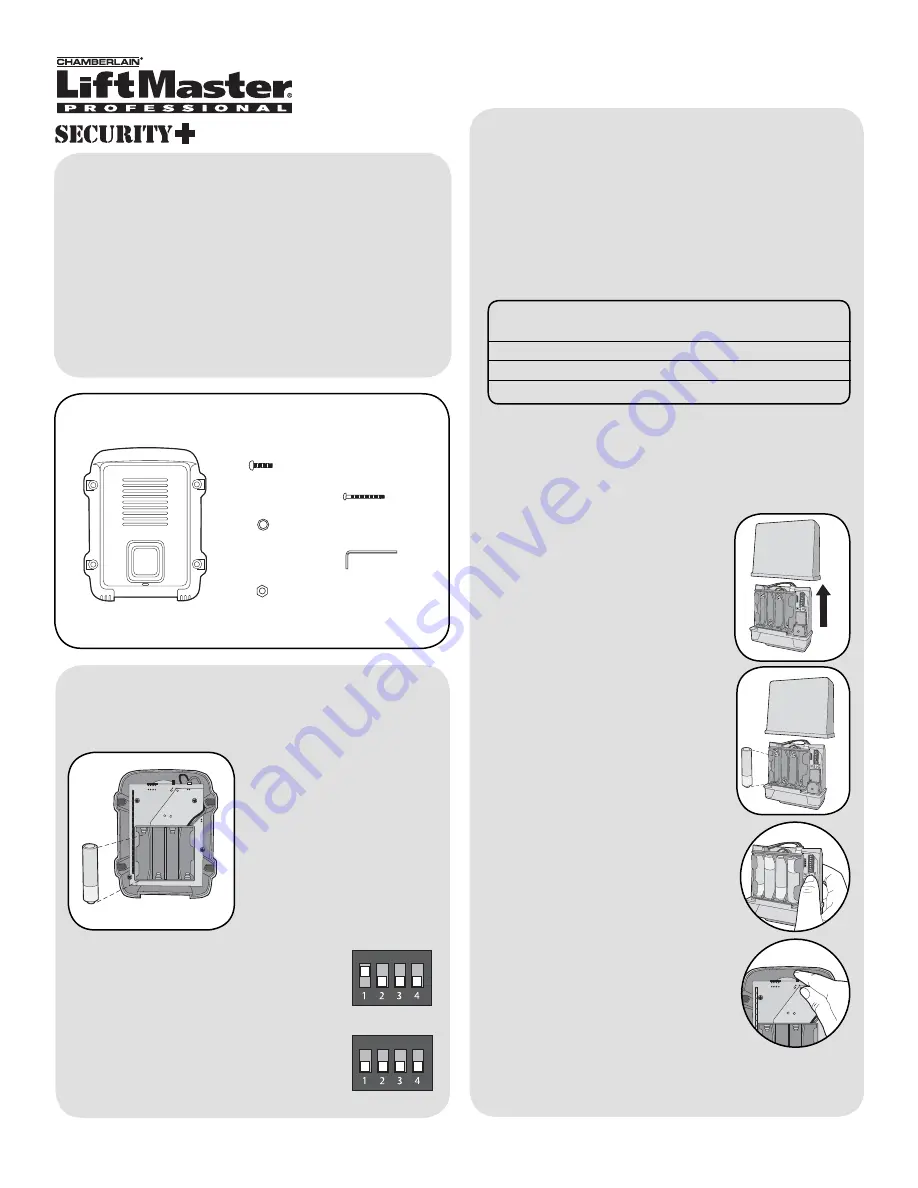
1

Intercom

Model GAILM

Gate Access Intercom

Bolt (4)

Washer (4)

Nut (4)

Screw (4)

Allen Wrench

Install 4 AA Alkaline 
batteries (not provided). 
(Lithium batteries 
recommended for colder 
environments.)

Install Batteries

Set Dipswitches

Primary Intercom:

 Switch #1 is set to 

the UP position (default).

Secondary Intercom:

 Switch #1 is set 

to the DOWN position.

Gate Control Unit (GCU) (not provided)

NOTE:

 This step applies only if Intercom is going to 

control a gate or electric strike. If not, proceed to 

Program Accessories.

Set the Dipswitches on the Intercom to match the 
GCU number to be controlled:

Control Dipswitch 

Dipswitch

 Gate # 

#1 

#2

 1 

DOWN 

DOWN

 2 

UP 

DOWN

 3 

DOWN 

UP

Refer to GCU manual for GCU Dipswitch settings.

Step 2: 

Install 4 AA Alkaline 

batteries (not provided). (Lithium 
batteries recommended for colder 
environments.)

Step 1:

 Remove GCU cover.

Step 3: 

Press the Learn button on 

the GCU for one second. The LED 
will light for 20 seconds.

Program Intercom to GCU

Step 4: 

Within 20 seconds, press 

and hold the Learn button for 10 
seconds.

The Intercom will beep and the GCU will 
cycle the relay and flash 3 times indicating 
programming is successful.

®

NOTE:

 If there is already an existing receiver proceed 

to 

Pre-Installed LiftMaster Receiver

 section.

NOTE:

 If there is already an existing receiver proceed 

to 

Pre-Installed LiftMaster Receiver

.

Содержание GAILM

Страница 1: ...trol Unit GCU not provided NOTE This step applies only if Intercom is going to control a gate or electric strike If not proceed to Program Accessories Set the Dipswitches on the Intercom to match the GCU number to be controlled Control Dipswitch Dipswitch Gate 1 2 1 DOWN DOWN 2 UP DOWN 3 DOWN UP Refer to GCU manual for GCU Dipswitch settings Step 2 Install 4 AA Alkaline batteries not provided Lith...

Страница 2: ...y press and hold both buttons Two beeps will be heard and the channel lights will begin to cycle Continue to hold until a third beep is heard about 15 seconds Step 1 Press and hold the Learn button on the Intercom until a beep is heard Step 2 Within 20 seconds press and hold both buttons on the Flush Mount Intercom for 3 seconds The LEDs will flash Intercom will beep indicating programming is succ...

Страница 3: ...Caller ID message of GAPLM low battery after a call from the gate is made Volume To increase the speaker volume set Dipswitch 4 to the UP position Sensitivity To increase microphone sensitivity set Dipswitch 3 to the UP position Clear Memory Set Dipswitch 1 to the DOWN position secondary device mode Press and hold the Learn button for 15 seconds during this time the Intercom may beep once or conse...

Страница 4: ...s not getting expected transmission range Metal surfaces can shorten the range of the Intercom If mounting on a metal surface and long range is required use a non metallic spacer to move the Intercom away from the metal surface When used in buildings with stucco or cement walls the range is greatly reduced Repeaters can be used close to the building to solve this problem Repeaters can also be used...

Отзывы: