CP30 User Manual
34
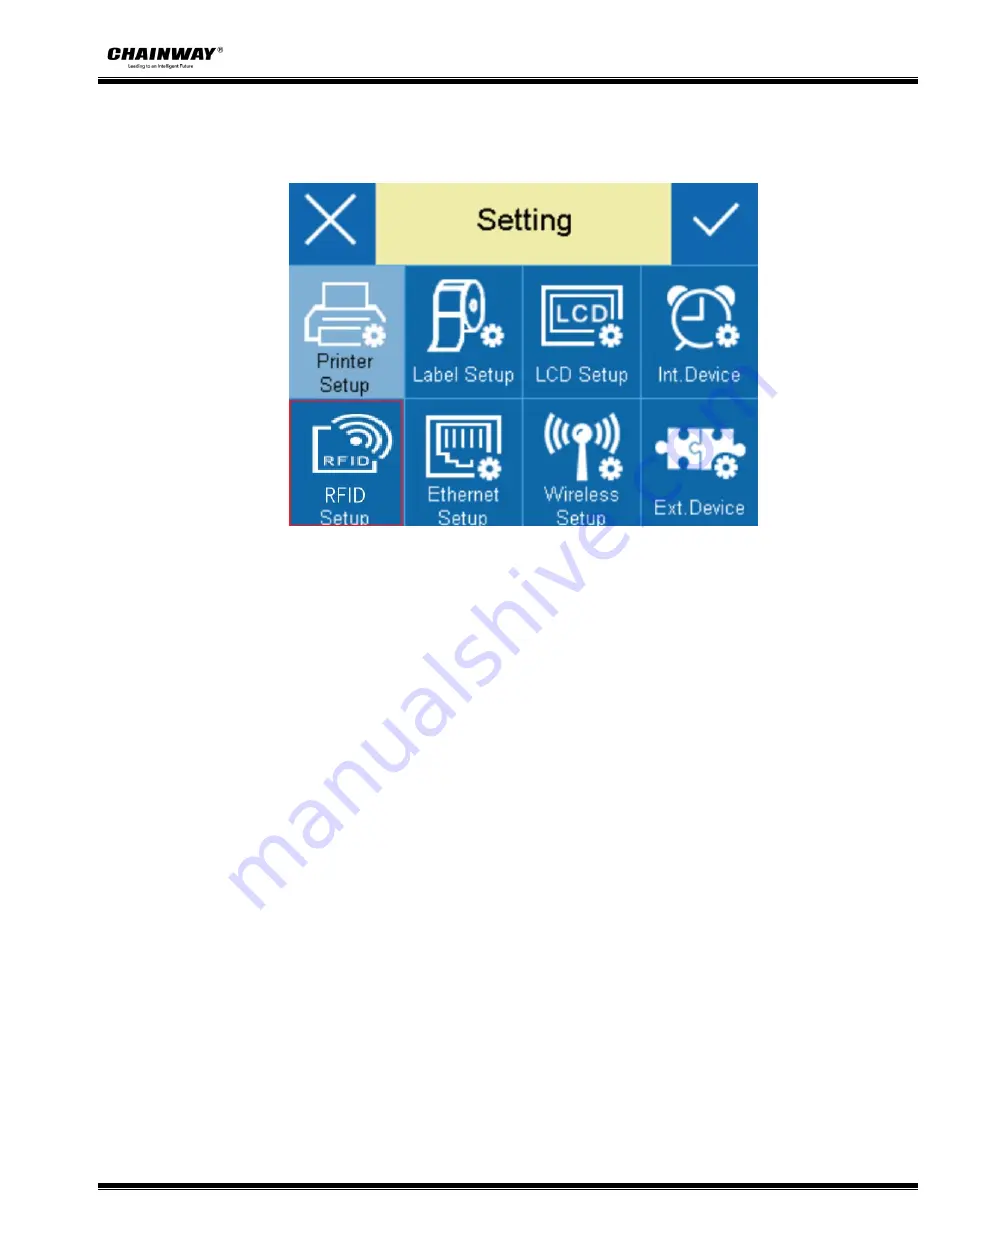
3.6.5 RFID Calibration
Click “RFID” Setup
,
then enter parameter setting
:
● RFID
Calibration
①
Choose “RFID Calibration”->“Open”
;
②
Screen display (calibration), then the printer starts to calibrate the RFID tag antenna
position and the antenna power at the same time
;
③
After the calibration is successful, the screen displays and returns to the menu setting
interface
;
If the calibration fails, the screen displays "RFID calibration error", and the [ready]
light and the [paper] light flash at the same time.
● Read RFID data
①
Choose “RFID data”
;
②
Enter RFID data reading mode
,
choose EPC or TID
;
③
Release the print module, move the RFID tag,when the RFID tag antenna is within the
readable and writable range of the RFID printer antenna, the printer will read the RFID tag data
and display the data on the screen
;
Содержание CP30
Страница 2: ...CP30 User Manual C h a n g e s R e c o r d Rev Date Description 1 0...
Страница 12: ...CP30 User Manual 8 Inside View...
Страница 13: ...CP30 User Manual 9 1 3 Dimension Unit mm...
Страница 24: ...CP30 User Manual 20 Figure 2 Left...
Страница 26: ...CP30 User Manual 22 Figure 5 Left...
Страница 41: ...CP30 User Manual 37 4 2 Ethernet Port PIN SIGNAL NAME 1 TX 2 TX 3 RX 4 5 6 RX 7 8...
Страница 45: ...CP30 User Manual 41 2 Click Get Printer Information and printer information will show in the above...
Страница 46: ...CP30 User Manual 42 3 Click Get Status and printer status will show in the above...
Страница 49: ...CP30 User Manual 45 6 Click Ethernet then click Get to gain the relevant values...
Страница 50: ...CP30 User Manual 46 7 Click WIFI then set up the name password and so on...
Страница 56: ...CP30 User Manual 52 4 You can set a magnification of the graphic as needed...
Страница 58: ...CP30 User Manual 54 6 Click System Click language and choose the language of printer utility...
Страница 61: ...CP30 User Manual 57 5 Choose the installation directory then click Next 6 Click Finish...
Страница 63: ...CP30 User Manual 59 9 Specify Port then click Next 10 Enter a name for this printer then click Next...
Страница 64: ...CP30 User Manual 60 11 Click Finish...
Страница 67: ...CP30 User Manual 63 2 According to different needs set up the page...
Страница 68: ...CP30 User Manual 64 Click Stock Name and choose the paper type...
Страница 69: ...CP30 User Manual 65 Click New Stock and set up a new stock Click Edit Stock and edit the stock...
Страница 70: ...CP30 User Manual 66 Click Delete Stock and delete the stock Choose Orientation or Effects showed in the Preview...
Страница 71: ...CP30 User Manual 67...
Страница 72: ...CP30 User Manual 68 Click Preset Name and back to the default settings...
Страница 73: ...CP30 User Manual 69 Click Manage and change the settings...
Страница 74: ...CP30 User Manual 70 3 Click Graphics and edit the pictures...
Страница 75: ...CP30 User Manual 71 4 Click Stock...
Страница 76: ...CP30 User Manual 72 Set up the print method...
Страница 77: ...CP30 User Manual 73 Set up the media type...
Страница 78: ...CP30 User Manual 74 Click Feed Mode Mode and choose the method of media handing...
Страница 79: ...CP30 User Manual 75 5 Click Option...
Страница 81: ...CP30 User Manual 77 Click Speed Settings Set up the printing speed...
Страница 83: ...CP30 User Manual 79 2 Click General Print Test Page and printer will print labels with current settings...
Страница 84: ...CP30 User Manual 80 3 Click Ports and choose the port needed...


