


•
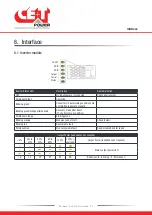
CE+T COM
port is dedicated to establish connection between Inview S and Bravo 10 - shelf.
•
ETH (
)
port is used for network connectivity and user can access the system information in the Web
Interface.
•
CAN / iso RS485
port is used to establish communication between Inview S and MBB.
(Note: In future version, user can use this port for RS485-Modbus communication)
•
USB
port is used to access the Inview S configuration and setup files.
•
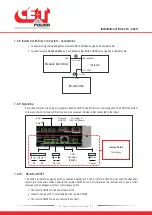
Digital Inputs (D1 and D2):
Two potential free Digital Inputs are available for customer connections.
Digital Input 1 is assigned for MBP operation if used.
Digital Input 2 is assigned for Surge Arrester if used.
•
Output Relays (K1 and K2):
Two output relays are available and can be used for Major and Minor Alarms.
•
Power:
The unregulated se12 V power supply is required for powering Inview S and this power should
not be shared with other devices. (CET can provide Auxiliary Power Supply converter and the part number is
T602004120).
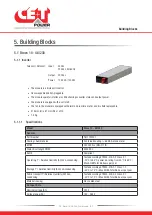
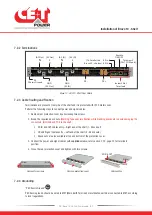
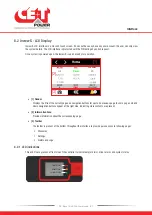
5.2.3 Inview S Slot
Inview S Slot
is an advanced monitoring and controller unit for Bravo
10 and Sierra 10 power systems. The product is specially designed
in 1U height to accommodate in the module shelf and reduces the
additional space in the cabinet.
It allows the user to easily access the system information through
inbuilt powerful LCD touch screen graphic display. In addition to the
touch screen display, the user can also access the system information
through the web interface.
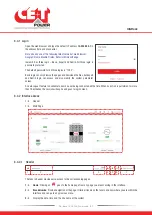
The Inview S Slot interface provides the user to access the configuration and setup files of the modules in the system.
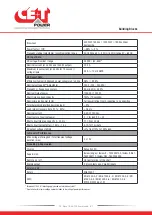
Inview S Slot can monitor up to 32 inverters/converters and featured with:
•
LCD touch screen display
•
2 Digital Inputs
•
2 Output Relay contacts
•
Records 1000 events as FIFO
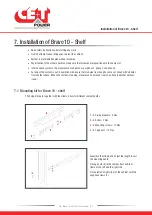
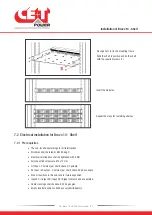
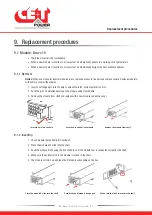
Note: In the Bravo shelf, signalling connections are present at
left first slot. So the Inview S Slot controller should be placed
only at the left side of the first slot in the shelf, while you are
looking from the front.
Building Blocks
15
- Bravo 10 - 48/230 - User manual - v1.2
Содержание Bravo 10 - 48/230
Страница 43: ......


