CDV-DDP
User Manual
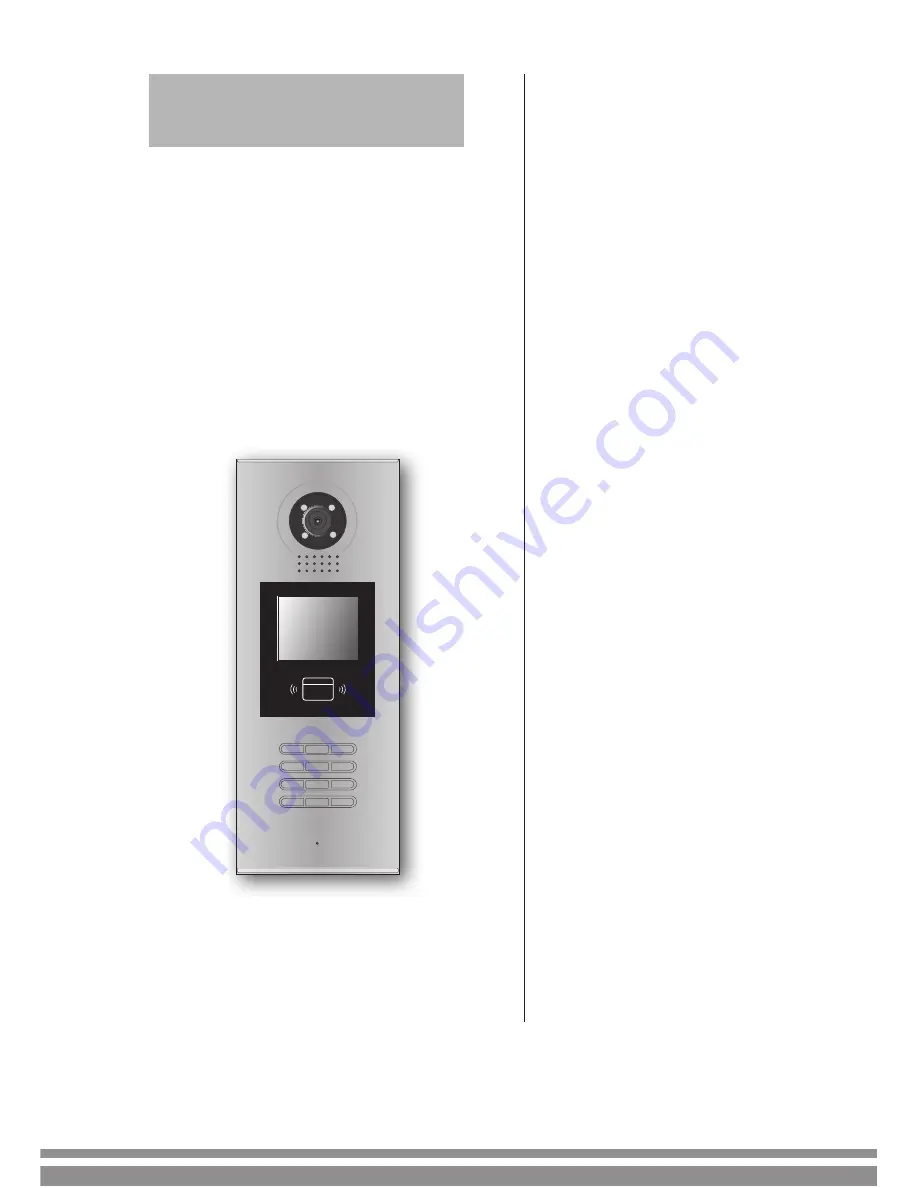
Door Station
1
2
3
6
5
4
7
8
9
#
0
*
RF CARD
Read this manual carefully before using the product, and keep it well for future use.
Страница 1: ...CDV DDP User Manual Door Station 1 2 3 6 5 4 7 8 9 0 RF CARD Read this manual carefully before using the product and keep it well for future use...
Страница 2: ...Contents 1 Parts and Functions 1 2 Terminal Descriptions 1 3 Door Station Mounting 2 4 System Connection 3 5 Door Lock Connections 6 6 Door Station Configurations 8 7 Specification 21...
Страница 3: ...N O LK LK 12V L2 1 2 3 1 2 3 12V 12VDC power output LK GND Power ground LK COM Common contact of the Relay NO Normally open contact of the Relay refer to DT technical guide for Lock connection detail...
Страница 4: ...to fix the metal box Attach the unit to the rainy cover correctlly Attach the baffle to protect the unit from droping The last view for all mounting The view for rainy cover after mounted Adjust the...
Страница 5: ...6 on 1 2 3 6 5 4 7 8 9 0 RF CARD 1 2 3 4 5 6 ON 1 2 3 4 5 6 ON 85 260AC DPS PS5 1 2 3 4 5 6 ON CALL UNLOCK TALK MON IN USE CALL UNLOCK TALK MON IN USE CALL UNLOCK TALK MON IN USE ID Code 0 Please refe...
Страница 6: ...Code 29 DIP 6 on Code 4 DIP 6 on Code 2 DIP 6 on Code 3 DIP 6 on Code 1 DIP 6 on CALL UNLOCK TALK MON IN USE CALL UNLOCK TALK MON IN USE CALL UNLOCK TALK MON IN USE CALL UNLOCK TALK MON IN USE CALL UN...
Страница 7: ...9 0 RF CARD ID Code 3 1 2 3 6 5 4 7 8 9 0 RF CARD ID Code 2 1 2 3 6 5 4 7 8 9 0 RF CARD 85 260VAC DPS PS5 Code 4 DIP 6 on CALL UNLOCK TALK MON IN USE Code 3 DIP 6 on Code 2 DIP 6 on Code 1 DIP 6 on C...
Страница 8: ...and the COM connect to the positive Jumper set to 1 2 position for Power off to Unlock safety type Normally closed mode set to 2 3 position for Power on to Unlock type Normally open mode If different...
Страница 9: ...nic lock is over 12 Vdc additional power supply for the lock is needed The power supply for the lock must be less than 48Vdc 1 5A The Jumper must be removed when using external power supply The defaul...
Страница 10: ...tation is in standby press key Press 2 key to exit out the debug state input 9008 then input the Admin Code 66666666 by default Debug State menu is launched 9 0 0 8 Please Input Password 1 2 3 6 5 4 7...
Страница 11: ...Code 1111 5 Display Mode 6 Clock 7 Setup Code 8 About 9 Default 3 Card Manage 1 Add Card 2 Delete By Card 3 Delete By M code 4 Cards Information 5 Format 4 Online Monitors To search the online monito...
Страница 12: ...d in door station If set to 1 the card is saved in DT IPC 0 Doorplate Mode To set the calling mode If set to 0 it s the auto mode that means the calling will be activated directly after inputting 2 di...
Страница 13: ...the same time If set to 0 unlock function is disabled Set to 1 unlock is enable Set to 2 unlock is enable and close at once Set to 3 unlock is enable and close in 5s 1 Ring Numbers To show ring times...
Страница 14: ...YY Time format if set to 0 time format is 24 hour standard If set to 1 time format is 12 hour standard Setup Code To change the Program Code 88888888 About 1 Hardware version To show the Door Station...
Страница 15: ...call the desired flat Residents can open the door by using their unique Unlock Code four digit PIN code If the door station is in standby mode press key then input the four digit unlock to open the d...
Страница 16: ...6 Vo l t a g e M e a s u r e Pres NO to select Back Tools Back Please Input Password Save 9 D e f a u l t Press Input 8002 then input Setup Code or Admin Code 88888888 or 66666666 by default Press 2 t...
Страница 17: ...p l a t e M o d e 6 A u d i o O p t i o n s 7 P a r a m e t e r s 9 D e f a u l t Press1 9 to select Back Installer Setup 1 To o l s 8 I n s t a l l e r C o d e 1 I n s t a l l e r S e t u p 2 S e t u...
Страница 18: ...ess to update 10 User Card Management This section explains how to configure the key fob function on DMR18 The key fob is used to open the lock Total 1000 key fobs can be registered with one door stat...
Страница 19: ...gistered again to become a valid User Card User Key Fob There are two ways to delete User Cards User Key Fobs 1 Delete by card show the unwanted card s when the Door station is in Delete Card Mode 2 D...
Страница 20: ...d 11 Change Door Station Language It s convenient to change the user interface for CDV DDP Just put the config files to the SD card and by means of the digital keypad of door station only 30 seconds i...
Страница 21: ...ch 8107 Portuguese 8108 S Chinese 8109 T Chinese 8110 Greek 8111 Turkish 8112 Polish 8113 Russian 8114 Slovakia 8115 Hungary 8116 Czech 12 Search online door stations and monitors Online Search is a v...
Страница 22: ...on is designed to have digital keypad and big TFT screen Its namelist was shown on the screen and customer can do the calling operation through the digital keypad guided by Namelist on the screen 2 ty...
Страница 23: ...V Powered by DPS Camera Lens 1 4 ACS 4T image sensor with DSP processor Power consumption Standby 3W Working status 9W Screen 3 5 inch TFT Resolution 320 R G B X240 pixels Video signal CCIR EIA Option...
Страница 24: ...Model CDV DDP The design and specifications can be changed without notice to the user Right to interpret and copyright of this manual are preserved...