


CBV383Z2 Cable Modem Quick Installation Guide
Package Contents
CBV383Z2 cable modem * 1
Quick Installation Guide * 1
RJ-45 CAT 5 cable * 1
12 V/1.5 A Power Adaptor * 1
6P4C Telephone cord * 1
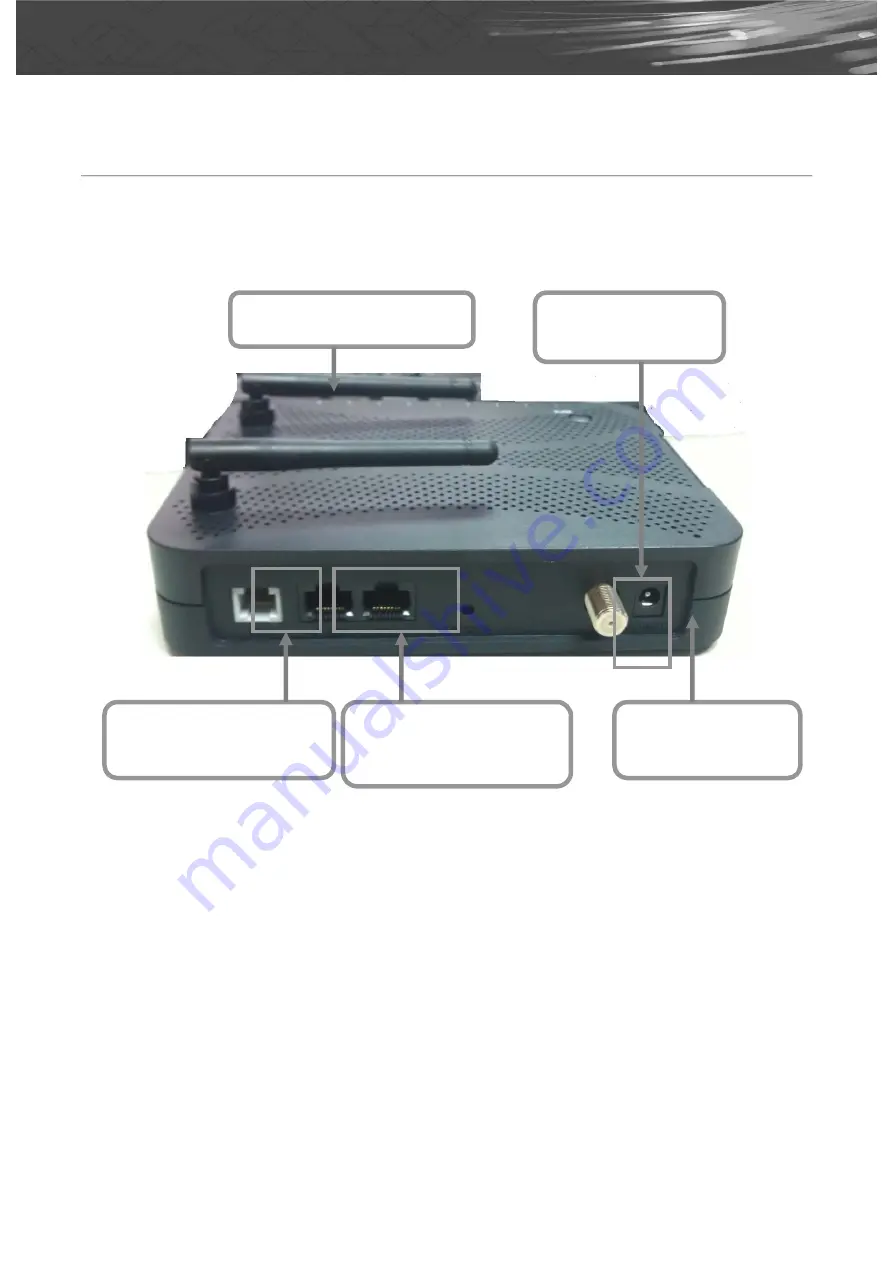
Rear Panel and Hardware Connection
This chapter describes the proper steps for connecting your cable modem. Please be sure to
follow the steps in the sequence outlined below. Failure to do so could result in improper
operation or failure of your cable modem.
Step 1:
Connect a cable by feeding the F-connector on the back of the cable modem. Ensure the
center conductor of the 75 ohm coaxial cable is inserted directly into the center of the
F-connector. Secure the coaxial cable by carefully threading the outer shell of the coaxial
cable connector onto the F-connector in a clockwise direction until tight. Be careful not to
over-tighten the connector or you may damage either the connector or the cable modem.
Step2: Connect the cable modem to an GbE Ethernet 10/100/1000 Mbps Network using a
RJ-45 male-terminated Ethernet cable. This cable modem equips with four Ethernet ports,
you can connect two PCs to the cable modem at the same time if necessary.
Step 3:
Connect the telephone sets to TEL. Use RJ-11 telephone line to connect TEL port on
the cable modem and telephone socket on telephone
Step 4:
Connect the AC Adapter to the cable modem by inserting the barrel-shaped
connector into the mating power connector on the back of the cable modem. Exercise
carefully to ensure the connectors are properly aligned prior to insertion and ensure the two
connectors engage completely. The cable modem is shipped with an AC adapter.
Remember to use only power adapter that came with the cable modem. Other power
adapters might have voltages that are not correct for your particular cable
modem. Using a power adapter with the wrong voltage can damage the cable modem.
Step 5:
Adjust the antenna if necessary.
Step 1
Connecting
the Coaxial Cable
Step 2
Connecting to a
Network Interface Cord
Step 3
Connecting the
Telephone cord
Step 4
Connecting
to the AC Adapter
Step 5
Adjust the Antenna


