137
Viewing Snapshots and Movies
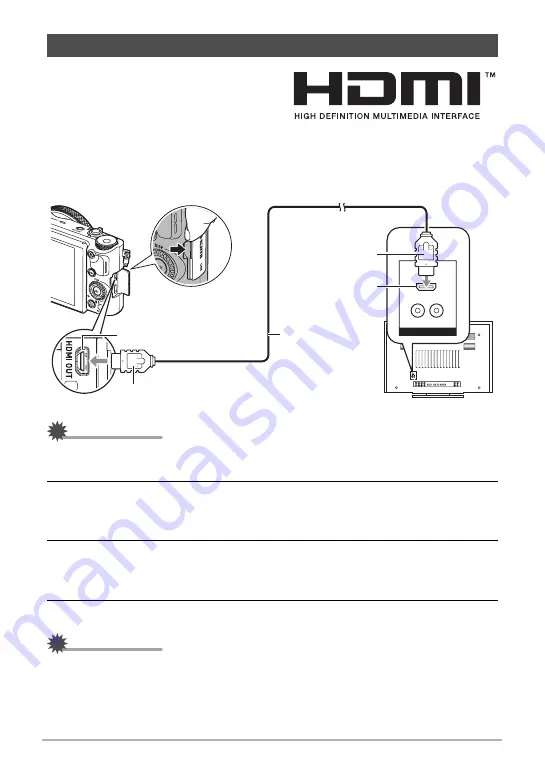
1.
Use a commercially available HDMI
cable to connect the camera to the
TV.
• Use a commercially available HDMI
cable that is marked with the logo shown to the right.
• Make sure that the camera is turned off before plugging in or unplugging the
cable. Check the user documentation that comes with the TV for information
about requirements before plugging into or unplugging from the TV.
IMPORTANT!
• Output to a TV is not supported while the camera is in the REC mode except for
“HDMI TV Output” (page 102).
2.
Turn on the TV and select its video input mode.
If the TV has more than one video input, select the one where the camera is
connected.
3.
Turn on the camera and press [
p
] (PLAY).
This will cause an image to appear on the TV screen, without anything appearing
on the camera’s monitor screen.
4.
Now you can display images and play back movies as you normally do.
IMPORTANT!
• Audio is initially output by the camera at maximum volume. When you first start
displaying images, set the TV volume control at a relatively low level and then
adjust it as required.
Viewing Snapshots and Movies on a TV Screen
HDMI connector
HDMI cable
(commercially
available)
HDMI micro connector
HDMI input
HDMI output (micro)


