


7–63
62-11785
02002
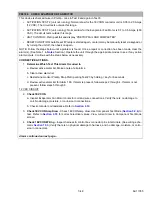
LOW DISCHARGE SUPERHEAT
• ACTIVATION: Compressor discharge superheat is less than 68°F (20°C) after 3 minutes of engaging the
Econ SH offset logic, the compressor is on, and Evaporator Flood back control hasn’t been active in the
last 3 minutes and suction superheat is greater than 40°F (4.4°C).
NOTE
This alarm can be caused by a stuck open ECXV or LIV, causing too much liquid to be sent into the
compressor at the economizer connection. An inaccurate pressure transducer or temperature sen-
sor reading (discharge or economizer) can also cause this alarm.
• UNIT CONTROL: Alarm only.
• RESET CONDITION: Discharge superheat is more than 72°F (22°C), or alarm may be manually reset via
keypad or by turning the unit off, then back on again.
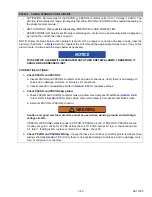
NOTE: Follow the steps below until a problem is found. Once a repair or correction has been made, the active
alarm should clear itself (refer to reset condition above). Operate the unit through the appropriate modes to see
if any active alarm occurs. Continue with the steps below as necessary.
CORRECTIVE ACTIONS:
1.
Check System Pressures
- Install manifold gauge set and check and compare compressor discharge,
suction and economizer pressures with those shown in Unit Data. The ECOP should read between the
CSP and the CDT, if not it indicated the ECOP has failed. Refer to
for instruction on com-
parison. If discharge pressure is in normal range, proceed to step 5.
2.
Check Suction, Discharge and Economizer Temperature Sensors
a. Check economizer temperature sensor insulation integrity, make sure insulation is properly
installed. Repair or replace any insulation if required. Loose or missing insulation will cause
inaccurate refrigerant temperature readings.
b. Inspect sensor & connectors. Verify there is no damage to sensor, and no damage, moisture, or
corrosion in connectors.
c. Check sensor resistance. (Refer to Note 3 in
Section.) 10,000 Ohms @ 77°F (25°C). Refer
to
for chart of resistances for different sensors.
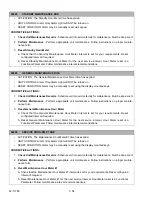
3.
Check Economizer Pressure Transducer
- Inspect sensor & connectors. Verify there is no damage to
sensor, and no damage, moisture, or corrosion in connectors.
4.
Perform Pretrip
- Clear Active Alarm list, then run Pretrip & check for any new alarms. Any active alarms
must be corrected and cleared before proceeding.
5.
Check Expansion Valves, EVXV, ECXV
a. Visually inspect valve. Verify there is no damage to valve, and no damage, moisture, or corrosion
in coil. Check coil is seated properly.
b. Check operation of valve. Refer to
.
6.
Check Liquid Injection Valve (LIV)
- Inspect valve & coil. Verify there is no damage to valve, and no
damage, moisture, or corrosion in coil. Refer
Содержание VECTOR 8100
Страница 2: ......
Страница 4: ......
Страница 12: ...62 11785 viii ...
Страница 16: ...62 11640 12 ...
Страница 18: ...62 11785 ...
Страница 24: ...62 11785 1 6 1 3 SAFETY DECALS ...
Страница 25: ...1 7 62 11785 ...
Страница 26: ...62 11785 1 8 ...
Страница 27: ...1 9 62 11785 ...
Страница 28: ...62 11785 1 10 ...
Страница 30: ...62 11785 ...
Страница 50: ...62 11785 ...
Страница 82: ...62 11785 ...
Страница 96: ...62 11785 4 14 ...
Страница 98: ...62 11785 ...
Страница 129: ...5 31 62 11785 ...
Страница 130: ...62 11785 5 32 ...
Страница 134: ...62 11785 6 4 ...
Страница 138: ...62 11785 ...
Страница 230: ...62 11785 ...
Страница 271: ...8 41 62 11785 ...
Страница 272: ...62 11785 8 42 ...
Страница 274: ...62 11785 ...
Страница 286: ......
Страница 287: ......
Страница 288: ...62 11785 10 8 ...
Страница 292: ......
Страница 293: ......