Cleaning and Inspection
1. Use a suitable solvent to clean the needle/electrode.
2. Examine the needle/electrode for damage or wear. Pay
special attention to the area where the wire electrode
extends from the main body. This is a sealing surface
that seats inside the fluid nozzle. If there are signs of
wear in this area, both the needle/electrode and fluid
nozzle must be replaced.
3. An electrical check of the needle/electrode must be
done prior to reinstalling it into the applicator assembly
(refer to "Needle/Electrode Resistance Testing" in the
"Maintenance" section).
Reinstall
1. Secure the needle shaft at the rear of the barrel and
screw the needle/electrode into place by hand.
2. Reinstall the fluid nozzle and air cap onto the barrel.
NEEDLE / ELECTRODE
RESISTANCE TESTING
The electrical resistance of the needle/electrode should be
tested periodically (typically on a weekly basis) or any time
it is removed from the applicator.
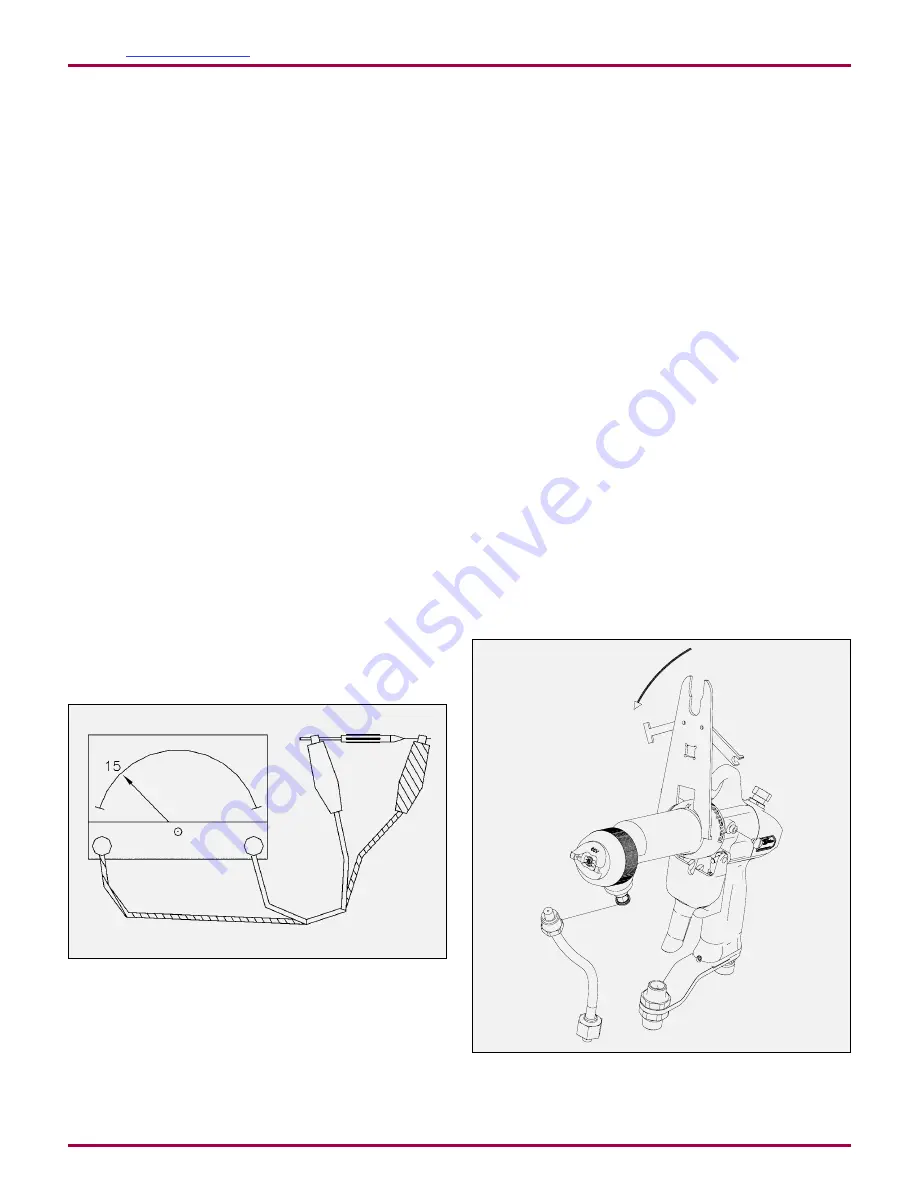
Figure 21: Testing Resistive Electrode
To Test
1. Install the needle/electrode onto the front end of an
available needle shaft. Be sure that the needle/electrode
is completely seated for proper contact between the
metal shaft and the threaded insert of the needle/
electrode.
2. Using a VOM meter that will read 15 megohms
accurately, connect the first meter lead to the metal
needle shaft and the second lead to the needle/electrode
wire. The needle/electrode resistance should be less
than 35 megohms at 9 volts or 12 to 17 megohms at
1000 volts. Needle/electrodes outside these ranges
must be replaced.
BARREL ASSEMBLY
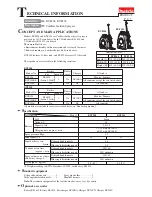
Removal
1. While holding the barrel with one hand, loosen the air
cap retaining nut using the other hand.
2. Unscrew the retaining nut completely and remove the
air cap.
3. Using a flat head screwdriver, loosen the two (2) shoulder
screws that retain the trigger to the applicator handle.
Figure 22: Barrel Assembly Removal
C C W
AH-06-01-R17 (08/2019)
42 / 79
www.carlisleft.com
MAINTENANCE
EN


