background image

1

CARL GOLDBERG PRODUCTS, LTD.

P.O. Box 88 Oakwood GA 30566  Phone #678-450-0085 Fax # 770-53-63  www.carlgoldbergproducts.com

© Copyright 1988 Carl Goldberg Products LTD.

Mirage 550

Содержание Mirage 550

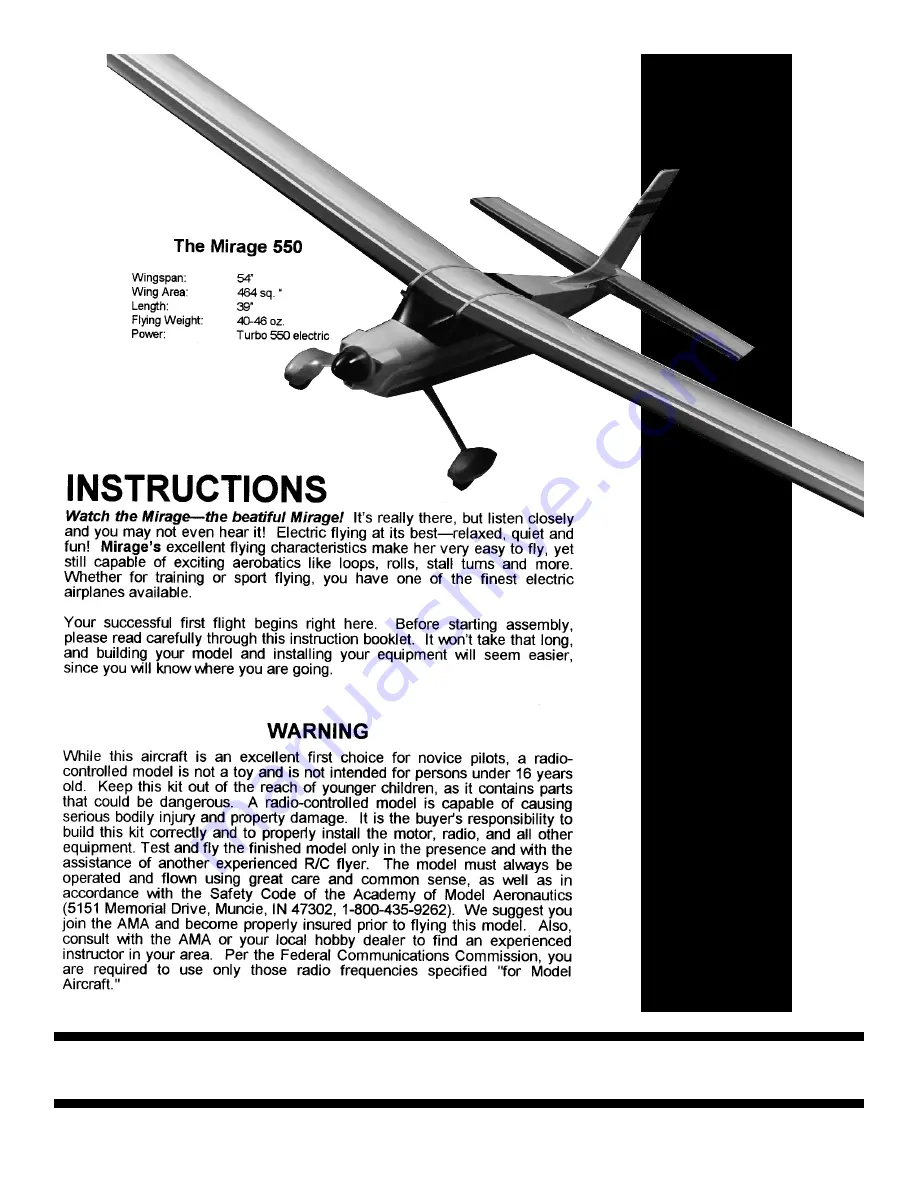
Страница 1: ... going WARNING While this aircraft is an excellent first choice for novice pilots a radio controlled model is not a toy and is not intended for persons under 16 years old Keep this kit out of the reach of younger children as it contains parts that could be dangerous A radio controlled model is capable of causing serious bodily injury and property damage It is the buyer s responsibility to build th...

Страница 2: ...IC SPEED CONTROL OPTION If you wll be using a three channel radio system an electronic speed control gives you variable motor speeds You can select any l C er setting ful pov er for take Off and dimb out half power for lazy cruising or cut power to glide in for landing The speed controller replaces the third servo that MXJld nonnally be connected to the motor orH ff swtch You also save some ight b...

Страница 3: ...battery powered with either dry cells small flash light type batteries or more reliable rechargeable nickel cadmium batteries ni cads Sets powered with ni cads come equipped with a recharging unit and are more expensive than dry cells sets However if you intend to do a lot of flying the cost of routinely replacing worn out dry cell batteries will be much greater than the higher initial cost of a r...

Страница 4: ...n we suggest you purchase three battery packs While one pack is cooling and waiting to be charged a second pack can be on charge and the third can be in your plane ready for use Of course you can fly with only one pack but you may have to wait up to 40 minutes between flights BATTERY CHARGERS There is qute a selection of chargers available and most work qute well For the best advice see YOU dealer...

Страница 5: ... are working on M1h waxed paper The paper the plan is printed on can expand or contract slig tly wi1h chcriges in temperatl re or humidty Because of this a pre formed part such as the notched ng traifing edge may not exactly match the plan This is no problem as slight deviations in the outline or size will not noticeably affect ffi perform rice Because the fuselage plugs together rid is self alig1...

Страница 6: ...upply good quality materials in your kit Wood parts are inspected with regard to the function they will serve If an imperfection is spotted in a scrap corner of a die cut sheet and doesn t affect actual parts the sheet is considered acceptable Also internal stresses in wood are relieved as it is cut into parts These relieved stresses may cause some parts to bow Bows in wood parts such as leading e...

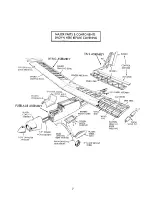
Страница 7: ...AJOR PARTS COMPONENTS SHOWN HERE BEFORE COVERING TAI LASSEMB i uor CENTER SHEET NG ATTERY ATCH COVER NYLON i HATCH FASTENER BALSA LANDING GEAR FAIRING MAIN LANDI NG GEAR STRUTS tf J PLASTIC WHEEL PANT 2 LIGHTWEIGHT WHEEL CONTROL SURFACES ES l ELEVATOR TAIL WHEEL ASSEMBLY IPS EBS ...

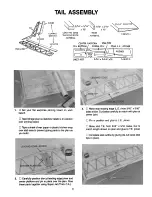
Страница 8: ...2 Carefully position die cut leading edge joiner and center platform and pin in place over the plan Glue these parts together using Super Jet Thick C A CENTER PLATFORM STAB TIPS Fl N B OM DORSAL Fl N STAB l E JOINER IC ill SHEET 4207 3 16 x 2 3 4 x18 1 REQ D LEADING EDGE 3 Make stab leading edge LE from 3 16 x 5 16 balsa sticks Cut balsa carefully to match with plan at center joint Pin in position...

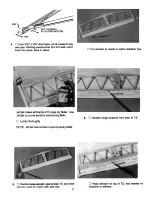
Страница 9: ...e dry faster Use Jet Set on comerjoints for extra strong fillets Let dry thoroughly NOTE Jet Set now comes in a pump spray bottle 5 Position balsa elevator against stab T E and mark AIAvator Ands for match with stab tios Cut elevator at marks to match stabilizer tips 6 Transfer hinge locations from plan to T E Place elevator on top of T E and transfer hir locations to elevator ...

Страница 10: ...t dry 8 Mark hinge locations on fin and rudder 9 Using the CG Center Line Marker provided mark center lines along edges of parts as shown Tilt marker so guide pegs touch the wood then lightly pass the marker back and forth Point will scribe center line ...

Страница 11: ...at hinge locations Try to keep drill centered not up down or off to a side The optional CG Hinge Drilling Guide not included makes these drilling alignments automatically 10b D After drilling use a razor knife to make clearance slits for hinge webs Temporarily insert hinges 11a D Repeat drilling and slitting for elevator Caution keep drill centered in elevator ELEVATOR END VIEW TO SHOW DRILL BEING...

Страница 12: ...ELING 1 am1 SHEET 4212 1 8 PLY x 3 9 16 x 9 7 8 1 REQ D KEEP SQUARE I LIKE THIS CUT ONE STRIP SANDPAPER THIS SIZE 14a First glue narrow strip to handle keeping them square as shown Then glue wide strip to handle and narrow strip again keeping things square 14b Cut one strip of 100 200 grit sandpaper to size shown above Glue sandpaper to tool 15 Tape T E of elevator and rudder to work surface Using...

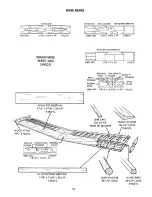
Страница 13: ...E TOP FUSE BOTT DOUBLER SHEET 4210 2 REQ D 1 8 PLY x 2 1 4 x 12 WI NG BOTTOM SHEET NG 1 16 X 1 5 811 X 26 1 4 2 REQ D WING BOTTOM SHEETING II f I II SHEET 4211 1 16 X 3 X 18 1 REQ D BEVELING SPAR SET BACK IO T ETAINERS PANT E eff 7 DOUBLERS DIHEDRAL BRACE SHEET 4212 1 11 _ WING CLAMP 1 11 PLY x 3 9 16 x 9 7 8 REQ D SPAR CAPS CUT TO FIT TRAILING EDGE 26 1 4 LONG 2 REQ D _ _ LEAD NG EDGE 26 1 411 LO...

Страница 14: ...ng center as shown Using no glue place the following four ribs in their respective T E notches ribs nos 2 3 3 3 hooking them over the spar as you go Place rib wood scrap under rib 2 as a shim to level Align T E and ribs over plan and pin in place Note If a part appears not to fit the plan exactly don t worry this is due to expansion and shrinkage of the plan paper Do not glue rib No 2 at this time...

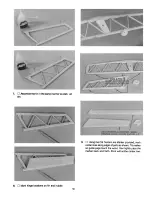
Страница 15: ...together apply SUPER JET to one rib stand them next to each other to check alignment then press together 7b Working one at a time glue remaining ribs No 3 to spar T E only Hold each rib up straight as it dries 8 The pins holding the bottom spar may obstruct the top spar so remove these pins Reposition the pins through wing ribs if necessary to keep wing flat Position the Set Back Gauge SBG touchin...

Страница 16: ... to L E 10a Install shear webs in wing at positions shown on the plan as follows Apply two lines of glue near top and bottom position webs equally on spars then press web up in place against spars until set Important the webs between ribs 2 2 and 2 3 must be raised slightly to provide clearance for bottom sheeting installed later use wing rib scrap for shims under these webs 1Oa Continued I CRAP B...

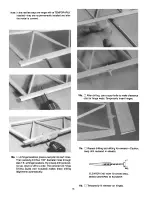
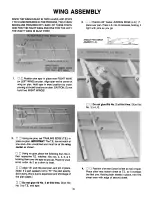
Страница 17: ... gauge top slot with spar 13 Study entire center joint all end parts of right wing should just touch those of the left tiny gaps are alright If the fit between most parts is a little loose because one part protrudes too much slightly sand only the protruding part for better fit When sanding it is better to take off too little than too much TEMPORARILY set dihedral joiners in place on each side of ...

Страница 18: ...ition one end of joiner in place and swing the other end up against spars hold momentarily Repeat for other joiner immediately reinstall clamps from step 13 to hold both joiners tight on spars 16 Position front half of rib No 1 so one side aligns with center line of wing Place rib wood scrap under rib No 1 Adjust rib to align with spar center joints and L E joints Glue in place Glue No 1 rib front...

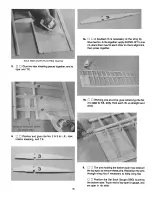
Страница 19: ...E sheeting in place matching inboard edge of sheet with joint between doubled ribs 1 Tape sheeting to LE IMPORTANT WHEN SHEETING KEEP WING PINNED FLAT Wing tip end of sheeting can overhang end of wing to be sanded flush with wing tip later Press sheeting down on top of ribs and mark sheeting rear edge location on top of all ribs This mark shows you how far back to apply glue for the sheeting ...

Страница 20: ...ge as a hinge lift the sheeting Apply glue along the entire top length of spar L E channel and every rib apply glue to every surface to contact top sheeting Proceed immediately to next step Press top sheeting down in contact with wing struc ture in a wiping motion to be sure all areas are glued until dry If you are using epoxy or aliphatic resin pin sheeting down until dry 17b Try top sheeting in ...

Страница 21: ...16 x 3 16 strips of balsa cut cap strips to cover the exposed top edges of all ribs Glue cap strips so they are centered over each rib 18 Continued 19 Remove all pins and gauges and repeat steps 17 and 18 and complete sheeting of the right wing ...

Страница 22: ...nd ribs as shown in sketch 20b Turn wing bottom side up Position wing so one panel lies on your work table Raise T E about 2 and support it so LE top sheeting lies flat on your work surface Carefully place weight on wing bottom to hold wing in place Phone book or similar works fine 20c Install bottom LE sheeting following same p cedure as in step 17 and 19 Install bottom sheeting in between LE and...

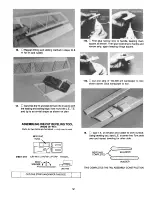
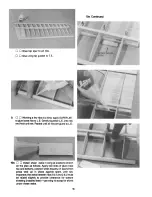
Страница 23: ...23 21 Carefully cut off and sand excess sheeting and spar material extending beyond the tip ribs TOP VIEW Working slowly carve the top of the tri strip until it almost matches the top contour of tip rib ...

Страница 24: ... for other wing tip 22 Using 240 grit fine sandpaper flat sand entire wing to blend surfaces and remove high spots 23 Cut 1 x 6 half hard aluminum sheet into 3 pieces Lightly sand aluminum surfaces for better gluing When dry apply glue to other half and then wrap it around T E ...

Страница 25: ...nylon is glued solidly to the balsa Apply a squiggle of glue to wing and pull nylon fabric into it Rub nylon into glue with your finger cover finger with a plastic bag or similar Repeat gluing procedure and apply nylon around L E across top of wing around T E and finally overlapping where you started on wing bottom After entire center joint has been wrapped with nylon apply another coat of glue an...

Страница 26: ... remove all fuselage fuse parts from die cut balsa and plywood sheets Lightly sand any rough edges BEFORE GLUING THE FUSELAGE TOGETHER THERE ARE A FEW SUB ASSEMBLIES TO MAKE 2 Position the die cut balsa parts for the forward bottom sheeting and the hatch as shown in the photo IMPORTANT Be sure to position parts as shown they have similar shapes but are different sizes 3 Glue the two front bottom s...

Страница 27: ...etween the rails and glue to hatch At the other hatch end flush 1 8 ply screw reinforcement Center it between rails and glue in place Sa REAR BOTTOM SHEETING D At punchmark locations drill two 1 16 diameter holes through 1 8 ply tail wheel mount Position tail wheel mount on rear bottom sheeting so the drilled holes are next to front edge of square opening there also is a die marked line in the she...

Страница 28: ...E 6 From 1 16 x 3 16 truss material cut and glue strips to match top and bottom of Formers D E and F as shown 7 Be sure sides are laid down left and right as shown USING NO GLUE temporarily position cabin top and bottom doublers on fuse sides Check fit and placement of parts before gluing Glue top doublers to body sides making sure to flush parts as shown Glue bottom doublers to body sides making ...

Страница 29: ...t are too tight or they may crush the balsa Tape fuse rear ends together 11 Spread fuse sides apart slightly and plug Former D into holes in body sides balsa strips facing forward Hold with a rubber band Install remaining Formers E and F in same manner using rubber bands to hold parts Slide one 1 4 square x 16 balsa pushrod under rubber band at Former C and slide it back under other rubber bands t...

Страница 30: ...a of the fuse is off adjust that portion in the direction required When satisfied with alignment permanently glue sides formers and sheet parts in place DO NOT GLUE the PUSHRODS they are used here TEMPORARILY and must be removed Apply a bead of Super Jet along all joints inside and outside or from both sides in the case of formers it will penetrate the joint and leave a slight reinforcing fillet G...

Страница 31: ...ces to sides THE LEFT FUSE SIDE HAS BEEN REMOVED 10 SHOW INTERIOR DETAILS 15b Position battery brace as follows match rear notches with LG braces and flush front edge with lower opening in Former B Glue brace to former and sides 15c Glue narrow strip to rear battery brace To locate battery brace insert two pins into the fuse sides at die marked locations See plan for details and locations Locate r...

Страница 32: ...op sheeting down to engage tabs with Former I slots Then rotate sheeting rear edge down into Former B Glue sheeting to formers and sides 19 Place windshield top doubler in position to match angle in top of Former B Also doubler should tilt backwards slightly as shown in plan side view Glue it in place 20 Glue two small screw reinforcement tabs to fuse sides at upper corners where Former A meets to...

Страница 33: ...rmer A Glue to formers and sides 23 Temporarily install wing hold down dowels in fuse Rubber band wing in place on fuse making sure it is centered Viewing model from rear see if stab sets level with respect to wing LEVEL STAB WITH RESPECT TO WING Sand stab platform area as may be necessary to provide a good level fit for stab Center stab on fuse measuring to obtain equal distance from side to side...

Страница 34: ...he cabin and tail areas EXCEPT VERY LIGHTLY TO REMOVE BURRS 26 HATCH INSTALLATION Position hatch tongue facing forwards in fuse bottom opening If hatch is too long sand slightly until it fits Position nylon fastener at center of fuse side action end over hatch the other half over the rear sheeting Mark the rear hole location on sheeting Drill 1 16 diameter hole and install nylon fastener on rear s...

Страница 35: ... one end of each 1 4 square x 16 balsa pushrod Drill a 1 16 diameter hole 1 4 deep at end of recess in both pushrods Glue rods into balsa pushrods as shown When dry taper ends of pushrods and round off corners Bind with strong thread coat with glue and let dry 27c Read this instruction carefully Complete the other end of the pushrods as follows for the bent rudder rod cut its balsa pushrod to abou...

Страница 36: ... small amounts of glue so glue does not run and smear out side the cowl 5 Carefully cut open the three cooling holes as follows First drill a 1 16 diameter hole at each of the four corners of the intended opening Then with a sharp blade make the opening by carefully cutting hole to hole Cut the holes slightly undersize then go back and shave off the remaining plastic until you have good looking sm...

Страница 37: ...t half without slot Adjust parts for good fit matching edge of outer pant with line around inner pant about 1 16 to 1 8 overlap Glue halves together with a few drops of Instant Jet around seam D Assemble other pant in same manner 4 Enlarge rough wheel opening by lightly tracing the raised outline with a sharp knife Work slowly making several passes making the cut deeper each time 5 Glue a pair of ...

Страница 38: ... of the fuselage or as desired The upper windshield area can be left clear or painted we recommend that the upper windshield area be painted black to match the side window decals as shown on the box label This really looks good Wash the area to be painted to remove dirt and dry thoroughly For clear windshield apply masking tape as required First apply a light mist coat of paint Follow the paint in...

Страница 39: ...nt one step epoxy to best coordinate with your favorite UltraCote colors For good paint adhesion make sure the area to be painted is washed clean dry and completely free of any oil or dust When painting on plastic covering you may wish to dull the surface to be painted with 000 steel wool Mask the design with vinyl tape COVERING THE WING Before starting carefully read the instruction that come wit...

Страница 40: ...sing medium heat Gently rub the covering with a oft cloth to set it in place J Fold the covering around the slanted side of the ng tip D Press the covering around the edges D Using your iron or a special covering heat gun using relatively high heat shrink the covering tight Neatly trim off any surplus ...

Страница 41: ...d be positioned and tacked in place at one end Then V Ork the iron dow the rest of the design smoothing out the design as you go Larger designs such as sunbursts should be positioned and the wdest end tacked dow first Then V Orking towards the narrow end iron the design dCM11 Truing the wing Is an Important step and should not be rushed or omitted IMPORTANT CHECK WING FOR WARPS EACH PANEL SHOULD L...

Страница 42: ... IN PLACE The procedure is to first glue the hinges into the major parts the wing stab and fin and then add the control sur faces Because hinge installaltion requires time for inser ting and adjusting each hinge quick setting SUPER JET is not recommended here Instead use epoxy aliphatic resin or equivalent glue Hinge elevator to stab When dry tug hard on each hinge to check bond Hinge rudder to fi...

Страница 43: ...al sheets apart in sections as needed Fold decal in half front to rear Open at fold and lay decal out straight the protective backing will bubble away from decal at fold location Using scissors cut backing along bubble remov ing about 1 wide strip of backing Carefully position decal on model and stick in place Working from center rub decal down while peeling off backing Cut holes through covering ...

Страница 44: ...RING FROM STAB FIN FUSE WHERE THEY MATE FOR WOOD TO WOOD GLUE JOINT LEAVE 1 8 TO 3 16 OF COVERING FIRMLY ATTACHED TO CENTER PLATFORM CAUTION WHEN TRIMMING COVERING AVOID CUTTING INTO WOOD STRUCTURE UNDERNEATH To provide a firm wood to wood glue joint strip covering from bottom of stab center where stab contacts fuse see sketch A Avoid cutting structure underneath Be certain to leave enough coverin...

Страница 45: ... Position nylon landing gear straps then mark drill and mount with 2 x 5 16 screws see sketches above and illustration on page 8 EYELET AXLE WHEEL SET SCREW WHEEL COLLAR FOR INITIAL FLIGHTS AND FLYING FROM GRASS DO NOT USE WHEEL PANTS Thread 1 8 set screw in wheel collar a few turns Place wheel pant on axle so that axle just protrudes inside pant Slip eyelet on axle flange toward wheel then slide ...

Страница 46: ...ncreasing the impact force and injury It is extremely important that you are aware of these dangers and take precautions to prevent accidental switching on of the motor This is especially important while working on the model and when storing it Always store the model away from small children or anyone not familiar with its safe operation The Carl Goldberg TURBO 550 motor system is designed with a ...

Страница 47: ... covered and painted wherever necessary Control surfaces are hinged in place Tail assembly is glued solidly to fuse Stab and rudder pushrods complete RUDDER PUSHROD MOTOR PUSHROD N SHOWN FOR CLARI MOTOR SWITCH WHEN HANDLING THE MOTOR SWITCH HARNESS TRY TO AVOID BENDING THE WIRES NEAR THE SOLDERED CONNECTIONS IF HANDLED CARELESSLY SOLDERED JOINTS CAN BE BROKEN MOTOR 8AT11 RY RADIO CONTROL EQUIPMENT...

Страница 48: ...hown on FUSELAGE SIDE VIEW on plan D From inside fuse push a pin through the mount hole to show its location on the fuse side Using a sharp razor knife cut a round opening through fuse side to match mount hole Install motor switch in fuse side 2d D Position cowl assembly on front of fuselage CAUTION DO NOT OVERTIGHTEN o 8 THIS SCREW OR IT MAY STRIP OUT S c NE UP PIN i 2e Thread 4 x 1 4 socket set ...

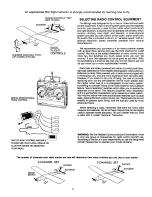
Страница 49: ...rvos 2 Channel Single Stick transmitter is like above but does not have motor control MOTOR ON 0 e RUDDER OFF ElEVATol HANNEL or more Transmitter with two sticks When used for 3 Channels it controls 3 Servos TRANSMITTER FUNCTION SKETCH Your transmitter is built like one of those illustrated below Each sketch shows how the sticks are moved to control various parts of the model Apply tape which you ...

Страница 50: ...ENTS As mentioned in the introduction on page 2 radio systems with servo reversing simplify radio instal lation With a regular non reversing system you must match each pushrod to its corresponding servo s rotation With servo reversing pushrods can be hooked up to either side of the servo s output wheel and after checking the control response a servo responding in the wrong direction is easily swit...

Страница 51: ... on plan and make bends as required Working from cabin feed rudder pushrod threaded end through fuse rear and out exit hole Use a loop of string or wire to pull threaded end up through exit hole Twist mini snap clevis onto threaded rod Hold pushrod wire with pliers while installing mini snap Connect to rudder horn ELEVATOR HORN Insert threaded end of elevator pushrod from cabin through fuse rear a...

Страница 52: ...le switch stem With bracket flange parallel to the switching action glue the bracket to the switch Be very careful not to get glue into switch SAND OR FILE A SLIGHT POINT SNAP A KEEPER Point one end of the 1 16 x 6 3 8 wire included Make a 1 4 90 bend at the opposite end PUSHROD CONNECTOR 3 o 0 BROKEN VIEW THROUGH u SERVO WHEEL 10 SHOW SNAP NUT INSTALLATION _ Remove servo wheel and install the CG ...

Страница 53: ...rod so that the elevator T E is centered with stab Allow additional 5 16 past servo wheel hole then cut and bend forward end of pushrod Roughen bend up wire with sandpaper remove servo wheel and insert wire and retain with snap nut Position rudder pushrod so that the rudder is aligned with fin Cut and bend forward end of pushrod as above and attach to rudder servo wheel 10 INSTALLING SWITCH AND CH...

Страница 54: ...ers to fuse sides as shown to hold battery When glue has dried rubber band battery in place 12 Receiver Rx Do not cut the antenna wire attached to the Rx Reconnect all cables so R C system is operational be sure that each servo is plugged into its respective Rx terminal Position Rx on left fuse side as shown on plan Lead the antenna wire up and back along cabin top doubler and then out through tai...

Страница 55: ...th the airplane you can always increase the throws as you prefer With elevator trim tab on Tx set in center adjust elevator Mini Snap until elevator T E is centered with stab as shown Move the elevator stick on Tx full up and down The elevator should move to match template angles up and down With rudder trim tab on Tx set in center adjust Mini Snap until rudder T E is centered with fin Nose wheel ...

Страница 56: ... The least weight is needed when added as far forward or back as possible Fasten weight permanently in place MARKED AT TOP OF _ C CABIN SIDES lO lr 511 _ l UI A 1r 4fl MODEL BALANCE STAND Make from dowels 12 long and ply or hard balsa base CORRECT BALANCE SLIGHT NOSE DOWN OR LEVEL DO NOT ATTEMPT to fly the model with the CG EVEN SLIGHTLY BEHIND the rearmost recommended position WRONG BALANCE UNSAF...

Страница 57: ...d lets the motor brushes wear in better than at full power and gives the motor a little more performance BATTERY This section is particularly important Onewayto lookat battery charging is to imagine the battery is a bucket and electricity is water What you are trying to do is fill up the battery but not to overfill At the very quick charge rate that is common with today s field chargers there is l...

Страница 58: ...t generally work very well TEMPERATURE SENSITIVE CHARGERS Like the Peak detectors the thermal chargers work very well but are more expensive They also will charge abattery pack in 20 minutes or less and it doesn t matter how full the pack is when you start Just follow the manufacturer s instructions carefully This charger senses when the battery temperature signals full charge and automatically st...

Страница 59: ...h or fully charged D Battery charger D Extra motor batteries D Radio transmitter DON T LEAVE IT AT HOME D Tools to tighten anything that can vibrate loose D Extra 64 rubber bands D Extra props D SUPER JET CHECK YOUR EQUIPMENT Prior to going to the flying field with radio batteries fully charged tum on both receiver Rx and transmitter Tx and actuate all controls many times until you are satisfied w...

Страница 60: ... until you have reach an altitude of about 150 feet 10 o You can expect a solid 4 or 5 mir IJtes of powered flight from a properly charged battery In this amount of time Mirage will gain several hundred feet of altitude allowing you time to get oriented and accustomed to control feel When the plane is pointing at you the steering will seem reversed When you give right rudder the plane turns to you...

Страница 61: ...d with the wind turns a little steeper LANDING 0 1MB OUT SHOWN HERE IS EXAGGERATED ACTUAL CLIMB OUT IS QUITE SHALLCM For your first landings don t be concerned about trying to land in a partiCIJar spot Just land safely without damage to your model At first concentrate on flying in wide circles as shown and then simply glide dc wn straight into the wind With a 2 chamel system when the battery begin...

Страница 62: ...f in a steep high speed dive immediately switch motor off level the wings and 9 y pull the stick back add up elevator to recover 3 SETTING ADJUSTMENTS As you get used to the controls you probably will notice the model turing somewhat or climbing or descending without any stick pressure on yol l part These tendencies can be corrected in the air by moving the trim tabs on the Tx After landing the se...

Отзывы: