background image

78

79

PT

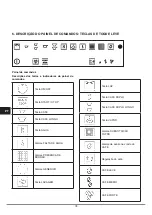
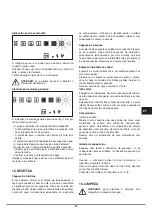
Particularidade exclusiva deste modelo é o uso 
da tecnologia dos comandos “toque leve”. Basta 
tocar  de  leve  a  área  marcada  com  o  símbolo 

de  interesse  para  que  a  máquina  execute  a  função 
correspondente.  Todavia,  notará  que  é  necessário 
exercitar uma leve pressão para accionar os comandos 
próprio  como  para  um  botão  normal;  isto  para  evitar 

accionamentos acidentais.

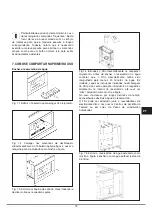
7. COMO SE COMPORTAR NO PRIMEIRO USO

Encher o reservaiório de água

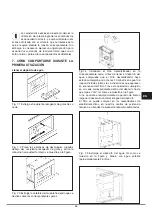
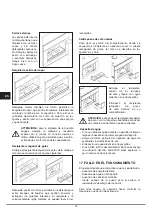
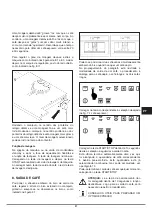
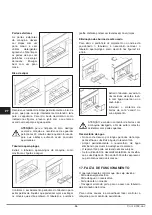
Fig. 7.1 Extrair o Tabuleiro apara-pingos do alojamento

Fig.  7.2  Carregar  nas  alavancas  de  desbloqueio 
situadas embaixo do Tabuleiro apara-pingos e puxar a 
máquina para si actuando como mostra a figura.


Fig. 7.3 Extrair a máquina de café do móvel fazendo-a 
deslizar sobre as respectivas guias.

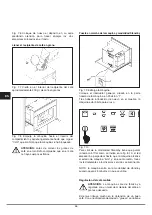
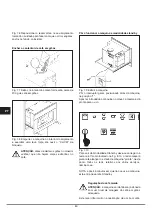
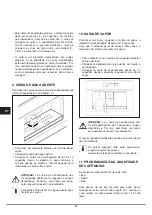
Fig.7.4  Introduzir  o  filtro  descalcificante  no  respectivo 
alojamento.  Antes  de  encher  o  reservatório  da  água 
controlar  que  o  filtro  descalcificante  tenha  sido 

mergulhado pelo menos 20 minutos na água fria 

(todavia, seguir as instruções indicadas na embalagem 
do filtro). Após esta operação introduzi-lo no respectivo 
alojamento,  no  interior  do  reservatório,  até  ouvir  um 
“click”, actuando como mostra a figura.
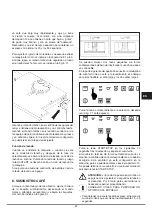
No  caso  de  desuso  por  longos  períodos  de  tempo, 
aconselha-se substituir a água do reservatório.
O  filtro  pode  ser  adquirido  junto  a  revendedores  de 
electrodomésticos, nos nossos Centros de Assistência 
Técnica  ou  em  Lojas  de  Peças  de  substituição 
Autorizadas.      

Fig. 7.5 Extrair o reservatório da água actuando como 
mostra a figura e enchê-lo com água potável (cerca de 

2,5 litros).

Содержание CM461

Страница 1: ...ion manual for n manual for n manual for n manual for built built built built in coffee in coffee in coffee in coffee machine machine machine machine Model code CM461 CM471SS WH Contact Caple on 0844 800 3830 or for spare parts www caple co uk ...

Страница 2: ......

Страница 3: ...UNA PERSONA RESPONSABILE PER LA LORO SICUREZZA I BAMBINI DEVONO ESSERE CONTROLLATI PER ASSICURARSI CHE NON GIOCHINO CON L APPARECCHIO Caro Cliente sentitamente La ringraziamo e ci congratuliamo per la scelta da Lei fatta Questo nuovo prodotto accuratamente progettato e costruito con materiali di primissima qualità e stato accuratamente collaudato per poter soddisfare tutte le Sue esigenze di una p...

Страница 4: ...OGRAMMAZIONE DELLA QUANTITÀ CAFFÈ MACINATO 12 PROGRAMMAZIONE DELLA QUANTITÀ ACQUA CAFFÈ Ripristino dei valori di fabbrica 13 ILLUMINAZIONE DEL VANO DI EROGAZIONE 14 SEGNALAZIONI E ALLARMI Segnalazione di mancanza acqua Segnalazione sostituzione filtro Segnalazione presenza fondi caffè Segnalazione guasto sonda caffè Segnalazione di allarme generico 15 RICETTE Cappuccino all italiana Cappuccino vie...

Страница 5: ... Gli elementi che costituiscono l imballo sacchetti di plastica polistirolo ecc non devono essere lasciati alla portata dei bambini perché potenziali fonti di pericolo Prima dell utilizzo verificare che i dati di tensione e di potenza riportati sulla targhetta caratteristica siano idonei alla linea dell impianto alla quale verrà collegata Verificare inoltre che l edificio sia dotato di una efficie...

Страница 6: ...nzionamento Componenti per l installazione della macchina La macchina deve essere installata in vani alti 460 mm e larghi tra i 560 mm e i 568 mm A corredo della macchina sono forniti i seguenti componenti per l installazione 1 Supporto fisso della macchina 2 N 13 viti autofilettanti 3 9X19 3 N 1 fissa cavo 4 N 2 guide laterali 5 N 2 piastre laterali da 1mm 6 N 2 piastre laterali da 2mm Installazi...

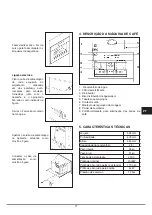
Страница 7: ...l cavo d alimentazione come da figura 4 DESCRIZIONE DELLA MACCHINA DA CAFFE 1 Serbatoio acqua 2 Filtro decalcificante 3 Erogatore 4 Beccuccio erogatore acqua vapore 5 Bacinella raccogli gocce 6 Contenitore caffè 7 Manopola regolazione macinatura 8 Pannello comandi 9 Sportello vaschetta per scarico fondi caffè 5 CARATTERISTICHE TECNICHE Larghezza 594 mm Profondità 475 mm Altezza 445 mm Capacità ser...

Страница 8: ...GO Tasto ACQUA Allarme MANCANZA ACQUA Allarme PRESENZA FONDI Allarme GENERICO Tasto LAVAGGIO Tasto LUCE Tasto DOPPIO CAFFÈ Tasto DOPPIO CAFFÈ LUNGO Tasto VAPORE Allarme SOSTITUZIONE FILTRO Allarme guasto sonda CAFFÈ Regolazione CAFFÈ CAFFÈ LEGGERO CAFFÈ MEDIO CAFFÈ FORTE 6 DESCRIZIONE DEL PANNELLO COMANDI TASTI A SFIORAMENTO ...

Страница 9: ...o come in figura Fig 7 3 Estrarre la macchina da caffè dal mobile facendola scorrere sulle apposite guide Fig 7 4 Inserire il filtro decalcificante nell apposita sede Prima di riempire il serbatoio dell acqua accertarsi che il filtro decalcificante sia stato immerso almeno 20 minuti in acqua fredda seguire comunque le istruzioni riportate nella confezione del filtro Dopo quest operazione inserirlo...

Страница 10: ...la macchina Portare l interruttore generale posizionato sul retro della macchina in posizione 1 Dopo aver inserito la macchina nel mobile essa è pronta all uso Fig 7 10 Per uscire dalla modalitàStand by si deve premere il tasto on off come indicato in fig 8 10 il led inizierà a lampeggiare fino al raggiungimento dello stato di macchina pronta a questo punto tutti i led relativi ai vari servizi si ...

Страница 11: ...ione bevanda il led del tasto lavaggio si spegne 8 EROGAZIONE CAFFÈ Posizionare la tazza sotto l erogatore regolare l altezza del beccuccio erogatore agendo sulla manopola ruotandola si alzano o si abbassano i beccucci come indicato in figura 9 1 Si possono posizionare due tazzine contemporaneamente sotto l erogatore quando si vuole un doppio caffè Nel prosieguo del paragrafo è illustrata la modal...

Страница 12: ...erogare quindi sarà necessario ripetere la procedura Si consiglia di non erogare acqua calda subito dopo aver effettuato un erogazione di vapore 10 EROGAZIONE VAPORE Per erogare il vapore premere il pulsante vapore la spia corrispondente lampeggerà per 15 secondi Non appena la spia smette di lampeggiare e rimane accesa la macchina è pronta a erogare il vapore Mettere il contenitore con il liquido ...

Страница 13: ... per ogni singola dose SOLO PER UTENTI ESPERTI PROGRAMMAZIONE DEL TEMPO DI MACINATURE Il tempo di macinatura del caffè forte è programmabile il caffè medio e leggero sono calibrati di conseguenza Per entrare in programmazione quando la macchina è in stand by premere per 5 secondi il tasto start stop si illuminano i led sulla riga superiore da sinistra a destra a indicare il tempo di macinatura per...

Страница 14: ...continuo allarme Si raccomanda di sostituire il filtro entro 3 mesi dal momento in cui il led resta acceso in modo continuo Per spegnere l allarme o il pre allarme mettere la macchina in stand by e premere il tasto START STOP per 5 secondi Il led di allarme si spegnerà e il conteggio dell acqua erogata verrà resettato Segnalazione lavaggio obbligatorio e presenza fondi caffè Dopo aver erogato 10 c...

Страница 15: ...rata di cacao sulla schiuma Cappuccino viennese La secolare tradizione austriaca ha prodotto questa variante Si prepara un espresso lungo 30 35 secondi d estrazione si aggiunge latte caldo e sopra panna montata si serve in una tazza di grandezza intermedia tra quella dell espresso e del cappuccino Si guarnisce con scaglie di cioccolato Espresso freddo shakerato Spumoso e molto rinfrescante è un ve...

Страница 16: ...sere lavate in lavastoviglie Scarico fondi caffè usato Estrarre la bacinella vuotarla dai residui di caffè e lavarla con acqua calda o in lavastoviglie Inserire la bacinella raccogli fondi caffè usato nel suo vano ATTENZIONE evitare di svuotare la bacinella raccogli fondi a macchina accesa onde evitare accidentale contatto con parti calde Serbatoio acqua In caso di mancato utilizzo per lunghi peri...

Страница 17: ... A PERSON RESPONSIBLE FOR THEIR SAFETY CHILDREN MUST BE SUPERVISED TO ENSURE THAT THEY DO NOT PLAY WITH THE APPLIANCE Dear Customer we would like to thank you and congratulate you on your choice This new product has been carefully designed and built using top quality materials and meticulously tested to ensure that it meets all your culinary requirements Please read and observe these simple instru...

Страница 18: ...NSING STEAM 11 PROGRAMMING THE QUANTITY OF GROUND COFFEE 12 PROGRAMMING THE QUANTITY OF HOT WATER Restoring the factory settings 13 ILLUMINATION OF THE DISPENSING COMPARTMENT 14 WARNINGS AND ALARMS No water warning Replace filter warning Coffee grounds warning Coffee probe broken warning Generic alarm warning 15 RECIPES Italian Cappuccino Viennese Cappuccino Cold Espresso Chilled in a Shaker Irish...

Страница 19: ... be performed by specialised personnel The manufacturer will not be liable if these rules are not followed 2 RECOMMENDATIONS FOR THE PROTECTION OF THE ENVIRONMENT Packing All packing materials used are safe for the environment and recyclable Please make your contribution to protecting the environment by disposing of the packing in the appropriate recycling bins Obsolete equipment Machines that are...

Страница 20: ...he surface of the furniture Insert the side plates needed to compensate for any empty spaces The width of the compartment that houses the machine is determined by the thickness of the sides of the furniture Four plates are supplied to compensate for the different measures obtainable two that are 2 mm thick and two that are 1 mm thick They are used to compensate for the internal width of the compar...

Страница 21: ...n in the figure 4 DESCRIPTION OF THE COFFEEMAKER 1 Water tank 2 Decalcifying filter 3 Dispenser 4 Water steam dispensing nozzle 5 Drip basin 6 Coffee container 7 Grind regulation knob 8 Control panel 9 Door tray for emptying the coffee grounds 5 TECHNICAL CHARACTERISTICS Width 594 mm Depth 475 mm Height 445 mm Tank capacity 2 5 l Net weight 26 kg Gross weight 31 kg Power supply voltage 230 V Rated...

Страница 22: ...n STRETCHED COFFEE button WATER button NO WATER alarm GROUNDS PRESENT alarm GENERIC ALARM WASH button LIGHT button DOUBLE COFFEE button DOUBLE STRETCHED COFFEE button STEAM button REPLACE FILTER alarm COFFEE probe broken alarm COFFEE regulation LIGHT COFFEE MEDIUM COFFEE STRONG COFFEE 6 DESCRIPTION OF THE CONTROL PANEL TOUCH BUTTONS ...

Страница 23: ...e by sliding it on its guides Fig 7 4 Insert the decalcifying filter in its seat Before filling the water tank make sure that the decalcifying filter was soaked in cold water for at least 20 minutes in any case follow the instructions on the filter package After soaking insert it in its seat inside the tank as shown in the figure until you hear a click If the machine has not been used in a long ti...

Страница 24: ...s shown in Fig 8 10 The LED will begin to flash until the machine is ready At this point all the LEDs for the various services will be lit NOTE If the machine is not used for 45 minutes it returns to standby mode REGULATION OF THE GROUND COFFEE ATTENTION The fineness of the coffee grind is calibrated at the factory This fineness has a strong influence on producing good coffee Too coarse a grind pr...

Страница 25: ...coffee to be dispensed Dispensing ends automatically when the quantity of coffee for the selection has been reached This quantity is preset in the machine but can be changed see paragraph 13 You can stop dispensing at any time by pressing the START STOP button ATTENTION if the START button is not pressed within 10 seconds the function is disabled If you wish to dispense a beverage you will have to...

Страница 26: ...indicator light stops flashing and remains steady on the machine is ready to dispense steam Place the container with the liquid to be heated below the steam nozzle Completely immerse the nozzle in the liquid to be heated Press the START button within 10 seconds from making your selection and wait for the steam to come out ATTENTION if the start button is not pressed within 10 seconds the function ...

Страница 27: ...ft line light up to indicate the grinding time to increase the time press the coffee regulation button and to decrease it the START STOP button At the end of the operation just press the on off button to exit and confirm the changes NOTE If the qauntity of coffee has been incorrectly adjusted preventing dispensing the coffee machine will perform checks until the correct dispensing is achived The m...

Страница 28: ...e LED will turn steady on alarm The replacement of the filter is recommended within 3 months from when the LED remains steady on To switch off the alarm or the pre alarm put the appliance in stand by condition hold the START STOP button for 5 seconds the alarm led will switch off and the counter of dispensed water will reset Mandatory washing and presence of coffee grounds After dispensing 10 cups...

Страница 29: ...hed espresso extracted for 30 35 seconds add warm milk and put whipped cream on top It is served in a cup of intermediate size between an espresso cup and a cappuccino cup Garnish with chocolate flakes Cold espresso chilled in a shaker Frothy and very refreshing its a real pleasure on hot days Prepareanespresso addsugar immediatelypouritin ashakerwithlargecubesoficeandshakeforseveral seconds It is...

Страница 30: ... in the dishwasher Put the used coffee ground tray back in its compartment ATTENTION avoid emptying the grounds collection tray with the machine on to avoid accidental contact with hot parts Water tank If the machine has not been used in a long time we recommend changing the water in the tank Periodically clean the water tank of any lime encrustations The tank can be washed in the dishwasher If us...

Страница 31: ...RITE ET EN MESURE DE COMPRENDRE LE MODE D EMPLOI DE L APPAREIL EST OBLIGATOIRE IL FAUT SURVEILLER LES ENFANTS POUR S ASSURER QU ILS NE JOUENT PAS AVEC L APPAREIL Cher Client Vous venez d acheter l un de nos produits et nous vous en remercions vivement Ce nouveau produit minutieusement conçu et construit avec des matériaux de tout premier choix a été soigneusement testé afin de satisfaire chacune d...

Страница 32: ...RIBUTION DE VAPEUR 11 PROGRAMMATION DE LA QUANTITÉ DE CAFÉ MOULU 12 PROGRAMMATION DE LA QUANTITÉ D EAU POUR LE CAFÉ Rétablissement des valeurs nominales 13 ÉCLAIRAGE DU COMPARTIMENT DE DISTRIBUTION 14 SIGNALEMENTS ET ALARMES Signalement du manque d eau Signalement de remplacement du filtre Signalement de la présence de marc de café Signalement de défaut sonde café Signalement d alarme générique 15...

Страница 33: ...tre l appareil en service Ne pas laisser les éléments qui constituent l emballage sacs en plastique polystyrène etc à la portée des enfants car ils représentent une source de danger potentiel Avant l utilisation vérifier que les données de tension et de puissance figurant sur la plaque des caractéristiques correspondent à la ligne à laquelle sera raccordée l installation Vérifier également que le ...

Страница 34: ... machine La machine doit être installée dans des compartiments d une hauteur de 460 mm et d une largeur de 560 mm à 568 mm On fournit avec la machine les composants suivants pour l installation 1 Support fixe de la machine 2 N 13 vis autotaraudeuses 3 9X19 3 N 1 élément de fixation du cordon 4 N 2 glissières latérales 5 N 2 plaques latérales de 1mm 6 N 2 plaques latérales de 2mm INSTALLATION DE LA...

Страница 35: ...ant d après la figure Brancher le cordon d alimentation d après la figure 4 DESCRIPTION DE LA MACHINE À CAFÉ 1 Réservoir à eau 2 Filtre décalcifiant 3 Distributeur 4 Bec distributeur d eau vapeur 5 Bac à gouttes 6 Récipient à café 7 Bouton de réglage de la mouture 8 Bandeau de commande 9 Capot bac pour le vidage du marc de café 5 CARACTÉRISTIQUES TECHNIQUES Largeur 594 mm Profondeur 475 mm Hauteur...

Страница 36: ...É Touche CAFÉ DILUÉ Touche EAU Alarme MANQUE D EAU Alarme PRÉSENCE MARC Alarme GÉNÉRIQUE Touche LAVAGE Touche ÉCLAIRAGE Touche CAFÉ DOUBLE Touche CAFÉ DILUÉ DOUBLE Touche VAPEUR Alarme REMPLACEMENT FILTRE Alarme défaut sonde CAFÉ Réglage CAFÉ CAFÉ LÉGER CAFÉ MOYEN CAFÉ FORT 6 DESCRIPTION DU BANDEAU DE COMMANDE TOUCHES À EFFLEUREMENT ...

Страница 37: ...ure Fig 7 3 Extraire la machine à café du meuble en la faisant coulisser sur les glissières Fig 7 4 Insérer le filtre décalcifiant dans son logement Avant de remplir le réservoir d eau s assurer que le filtre décalcifiant a été immergé pendant au moins 20 minutes dans de l eau froide toujours suivre les instructions figurant sur l emballage du filtre Ensuite l introduire dans son logement à l inté...

Страница 38: ...9 Extraire la machine Positionner l interrupteur général situé à l arrière de la machine sur 1 Après avoir inséré la machine dans le meuble celle ci est prête à l emploi Fig 7 10 Pour quitter la modalité Stand by enfoncer la touche on off d après la fig 8 10 le voyant commence à clignoter jusqu à ce que la machine soit en état de prête à présent tous les voyants relatifs aux différents services s ...

Страница 39: ...CAFÉ Positionner la tasse sous le distributeur régler la hauteur du bec distributeur en agissant sur le bouton en le tournant on soulève ou on abaisse les becs d après la figure 9 1 On peut positionner simultanément deux tasses sous le distributeur quand on souhaite un café double La suite du paragraphe illustre la modalité de distribution d un café la procédure est la même pour le café le café di...

Страница 40: ...tribuer il faudra donc répéter la procédure On conseille de ne pas distribuer d eau chaude immédiatement après avoir effectué une distribution de vapeur 10 DISTRIBUTION DE VAPEUR Pour distribuer de la vapeur enfoncer le bouton vapeur le voyant correspondant clignote pendant 15 secondes Dès que le voyant cesse de clignoter et reste allumé la machine est prête à distribuer de la vapeur Mettre le réc...

Страница 41: ...QUEMENT POUR LES UTILISATEURS CHEVRONNES PROGRAMMATION DU TEMPS DE MOUTURE Le temps de mouture du café fort est programmable le café moyen et léger sont donc calibrés Pour accéder à la programmation quand la machine est en stand by enfoncer pendant 5 secondes la touche start stop les voyants sur la ligne supérieure de gauche à droite s allument pour indiquer le temps de mouture pour augmenter le t...

Страница 42: ...a à clignoter pré alarme Fig 14 2 A 100 litres la diode restera allumée en continu alarme Il est recommandé de remplacer le filtre dans les 3 mois suivant l allumage continu de la diode Pour couper l alarme ou la pré alarme mettre la machine en pause et pousser sur la touche START STOP pendant 5 secondes La diode d alarme s éteindra et le décompte de la distribution d eau sera remis à zéro Signali...

Страница 43: ...ppuccino viennois Cette variante nous vient d une tradition autrichienne séculaire On prépare un espresso dilué 30 35 secondes d écoulement on ajoute du lait chaud et de la crème chantilly sur le dessus servez le dans une tasse dont la taille se situe entre celle de l espresso et du cappuccino Garnissez avec des éclats de chocolat Espresso froid frappé Mousseux et très rafraîchissant c est un véri...

Страница 44: ...s Le bac et la grille métallique peuvent être lavés au lave vaisselle Vidage du marc de café Extraire le bac éliminer les résidus de café et le laver à l eau chaude ou au lave vaisselle Insérer le bac du marc de café dans son compartiment ATTENZION éviter de vider le bac du marc lorsque la machine est sous tension pour éviter tout contact accidentel avec les parties chaudes Réservoir d eau En cas ...

Страница 45: ...RANTWORTLICHEN PERSON BEAUFSICHTIGT WERDEN KINDER MÜSSEN KONTROLLIERT WERDEN UM SICHERZUSTELLEN DASS SIE NICHT MIT DEM GERÄT SPIELEN Sehr verehrte Kundin sehr verehrter Kunde wir danken Ihnen und beglückwünschen Sie zu Ihrer Wahl Dieses neue sorgfältig konzipierte und aus erstklassigen Materialien hergestellte Produkt wurde akkurat kontrolliert um allen Ihren Bedürfnissen für das perfekte Kochen z...

Страница 46: ...ITUNG 10 DAMPFABGABE 11 PROGRAMMIERUNG DER GEMAHLENEN KAFFEEMENGE 12 PROGRAMMIERUNG DER KAFFEEWASSERMENGE Rückstellung der Werkseinstellungen 13 BELEUCHTUNG DES AUSFLUSSFACHS 14 HINWEISE UND ALARMMELDUNGEN Alarm keine Wasser Alarm Filter auswechseln Alarm Kaffeesatz Anzeige Defekt Kaffeesonde Allgemeine Alarmmeldung 15 REZEPTE Italienischer Cappuccino Wiener Cappuccino Geeister Espresso Irish coff...

Страница 47: ...le Plastiksäckchen Polystyrol usw dürfen niemals in Reichweite von Kindern gelassen werden da sie große Gefahrenquellen darstellen Prüfen Sie vor der Benutzung ob sich die angegebenen Spannungs und Leistungsdaten auf dem Typenschild der Leitung entsprechen an denen die Anlage angeschlossen wird Kontrollieren Sie ferner ob das Gebäude eine effiziente Erdleitung und einen angemessenen magnetothermis...

Страница 48: ...m breiten Fächern eingebaut werden Zur Maschine wurden Komponenten für den Einbau mitgeliefert 1 Fixe Maschinenhalterung 2 N 13 selbstschneidende Schrauben 3 9x19 3 N 1 Kabelbefestigung 4 N 2 seitliche Führungen 5 N 2 seitliche 1 mm dicke Platten 6 N 2 seitliche 2 mm dicke Platten Einbau der maschine Den U förmigen Teil auf die Möbelfläche legen Die seitlichen Platten zum Ausgleichen vorhandener F...

Страница 49: ... der Abbildung anschließen 4 BESCHREIBUNG DER ESPRESSOMASCHINE 1 Wasserbehälter 2 Entkalkungsfilter 3 Kaffeeauslauf 4 Wasser Dampflanze 5 Abtropfblech und behälter 6 Kaffeebohnenbehälter 7 Einstellknopf für Mahlstärke 8 Bedienfeld 9 Kaffeesatzbehälter und Entleerung 5 TECHNISCHE MERKMALE Breite 594 mm Tiefe 475 mm Höhe 445 mm Fassungsvermögen des Behälters 2 5 l Nettogewicht 26 kg Bruttogewicht 31...

Страница 50: ...ER Taste WASSER Alarm KEIN WASSER Alarm KAFFEESATZ ALLGEMEINER Alarm Taste REINIGUNG Taste LICHT Taste DOPPELTER ESPRESSO Taste DOPPELTER VERLÄNGERTER Taste DAMPF Alarm FILTER AUSWECHSELN Alarm Defekt KAFFEE Sonde Einstellung KAFFEESTÄRKE LEICHTER KAFFEE MITTELSTARKER KAFFEE STARKER KAFFEE 6 BESCHREIBUNG DES BEDIENFELDES BERÜHRUNGSTASTEN ...

Страница 51: ...ter drücken und die Maschine gemäß der Abbildung an sich ziehen Abb 7 3 Die Espressomaschine auf den Führungen herausziehen Abb 7 4 Den Entkalkungsfilter in seinem Sitz einsetzen Vor dem Auffüllen des Wasserbehälters muss der Entkalkungsfilter mindestens 20 Minuten in Kaltwasser getaucht werden siehe Anweisungen auf der Filterverpackung Danach den Filter gemäß Abbildung in seinen Sitz im Behälter ...

Страница 52: ...ausziehen Den Hauptschalter an der Rückseite der Maschine auf I stellen Nach dem Einbau im Möbelstück ist die Maschine betriebsbereit Abb 7 10 Zum Verlassen des Standby Modus die Taste EIN AUS gemäß Abb 8 10 drücken Das LED blinkt bis die Maschine betriebsbereit ist Danach leuchten alle LEDs der verschiedenen Funktionen auf ANMERKUNG Wenn die Maschine für 45 Minuten nicht benutzt wird geht sie in ...

Страница 53: ...durchzuführen Wird eine Taste zur Getränkzubreitung gedrückt erlischt das LED der Taste REINIGUNG 8 KAFFEEZUBEREITUNG Die Tasse unter den Kaffeeauslauf stellen und den Drehknopf gemäß Abb 9 1 verstellen um die Höhe des Kaffeeauslaufs einzustellen Für einen doppelten Espresso können auch zwei Kaffeetassen gleichzeitig unter den Kaffeeausfluss gestellt werden Im folgenden Teil des Abschnitts wird di...

Страница 54: ...ür die Wasserzubereitung muss daher der Vorgang wiederholt werden Es wird empfohlen nicht sofort nach einer Dampfabgabe heißes Wasser zuzubreiten 10 DAMPFABGABE Zur Abgabe von Dampf die Taste DAMPF drücken Die betreffende Anzeigeleuchte wird für 15 Sekunden blinken Sobald die Anzeigeleuchte zu blinken aufhört und fix aufleuchtet ist die Maschine bereit für die Dampfabgabe Den Behälter mit der zu e...

Страница 55: ...de einzelne Dosis NUR FÜR ERFAHRENE BENUTZER PROGRAMMIERUNG DER KAFFEEBOHNENMAHLZEIT Die Kaffeebohnenmahlzeit für starken Espresso ist programmierbar Die Mahlzeit für mittelstarken und leichten Kaffee wird dementsprechend eingestellt Für die Programmierung bei Maschine im Standby Modus Die Taste START STOP für 5 Sekunden drücken Die LEDs in der obersten Reihe von links nach rechts leuchten auf und...

Страница 56: ...arm Es wird empfohlen den Filter innerhalb von 3 Monaten ab dem Zeitpunkt auszuwechseln an dem die LED fix leuchtet Um den Alarm oder Voralarm auszuschalten setzen Sie die Maschine in Standby und drücken Sie die 5 Sekunden lang die Taste START STOP Die Alarm LED schaltet sich aus und die Messung des ausgegebenen Wassers wird auf Null gesetzt Anzeige Spülvorgang erforderlich und Kaffeesatz entleere...

Страница 57: ...puccino Diese Kaffeevariante beruht auf der jahrhundertealten österreichischen Kaffeetradition Es wird ein Espresso Ausflusszeit 30 35 Sekunden zubereitet dem warme Milch und ein Sahnehäubchen zugefügt wird Serviert wird der Wiener Cappuccino in einer mittelgroßen Tasse deren Größe zwischen der Espresso und Cappuccino Tasse liegt Verziert wird der Wiener Cappuccino zuletzt mit Schokoladeraspeln Ge...

Страница 58: ...s Metallgitter können im Geschirrspüler gewaschen werden Entleerung des kaffeesatzes Den Behälter herausziehen den Kaffeesatz entfernen und den Behälter mit warmem Wasser oder im Geschirrspüler waschen Danach den Kaffeesatzbehälter wieder in sein Fach schieben ACHTUNG Den Kaffeesatzbehälter nicht bei eingeschalteter Maschine entleeren um einen ungewünschten Kontakt mit heißen Teilen zu vermeiden W...

Страница 59: ...ECESARIAS SOBRE EL USO DEL APARATO POR PARTE DE UNA PERSONA RESPONSABLE DE SU SEGURIDAD LOS NIÑOS TIENEN QUE ESTAR CONTROLADOS PARA ASEGURARSE QUE NO JUEGAN CON EL APARATO Estimado cliente Le agradecemos sinceramente y nos complace que haya escogido uno de nuestros productos Este nuevo producto cuidadosamente diseñado y construido con materiales de primera calidad se ha verificado cuidadosamente p...

Страница 60: ... CAFÉ MOLIDO 12 PROGRAMACIÓN DE LA CANTIDAD DE AGUA Y CAFÉ Restablecimiento de los valores de fábrica 13 ILUMINACIÓN DEL COMPARTIMIENTO DE SUMINISTRO 14 INDICACIONES Y ALARMAS Indicación de falta de agua Indicación de sustitución del filtro Indicación de presencia de posos de café Indicación avería sonda café Indicación de alarma general 15 RECETAS Capuchino al estilo italiano Capuchino vienés Exp...

Страница 61: ...elementos que constituyen el embalaje bolsas de plástico poliestireno etc no tienen que dejarse al alcance de los niños porque representan fuentes de peligro potenciales Antes de la utilización del equipo compruebe que los datos de tensión y de potencia que aparecen en la placa de características sean adecuados para la línea de la instalación a la que se conectará Compruebe además que el edificio ...

Страница 62: ...quina La máquina tiene que instalarse en compartimientos de 460 mm de altura y entre 560 mm y 568 mm de ancho Junto con la máquina se suministran los siguientes componentes para la instalación 1 Soporte fijo de la máquina 2 13 tornillos autorroscantes 3 9X19 3 1 fijador para el cable 4 2 guías laterales 5 2 placas laterales de 1mm 6 2 placas laterales de 2mm Instalación de la máquina Coloque la pa...

Страница 63: ...te el cable de alimentación tal como se muestra en la figura 4 DESCRIPCIÓN DE LA CAFETERA 1 Depósito de agua 2 Filtro descalcificador 3 Dosificador 4 Boquilla dosificadora de agua vapor 5 Recipiente recogedor de gotas 6 Recipiente del café 7 Mando rotativo de regulación de la moledura 8 Panel de comandos 9 Portillo cubeta para la descarga de posos de café 5 CARACTERÍSTICAS TÉCNICAS Anchura 594 mm ...

Страница 64: ... Tecla CAFÉ LARGO Tecla AGUA Alarma FALTA DE AGUA Alarma PRESENCIA POSOS Alarma GENERAL Tecla LAVADO Tecla LUZ Tecla CAFÉ DOBLE Tecla CAFÉ DOBLE LARGO Tecla VAPOR Alarma SUSTITUCIÓN FILTRO Alarma avería sonda CAFÉ Regulación CAFÉ CAFÉ LIGERO CAFÉ MEDIO CAFÉ FUERTE 6 DESCRIPCIÓN DEL PANEL DE COMANDOS TECLAS DE ACCIONAMIENTO AL TACTO ...

Страница 65: ...a Fig 7 3 Extraiga la cafetera del mueble haciendo que se deslice sobre las correspondientes guías Fig 7 4 Introduzca el filtro descalcificador en la correspondiente sede Antes de llenar el depósito del agua compruebe que el filtro descalcificador haya estado sumergido por lo menos 20 minutos en agua fría seguir de todas formas las instrucciones que aparecen en el envase del filtro Tras esta opera...

Страница 66: ...Extraiga la máquina Coloque el interruptor general situado en la parte trasera de la máquina en Posición 1 Tras haberla introducido de nuevo en el mueble la máquina estará lista para el uso Fig 7 10 Para salir de la modalidad Stand by tiene que pulsar la tecla on off tal como se indica en la fig 8 10 el led empezará a parpadear hasta que la máquina alcance el estado de máquina lista y en ese momen...

Страница 67: ...istro de bebida el led de la tecla de lavado se apaga 8 SUMINISTRO CAFÉ Coloque la taza debajo del dosificador ajuste la altura de la boquilla suministradora accionando el mando rotativo girándola se levantan o se bajan las boquillas tal como se indica en la figura 9 1 Se pueden colocar dos tazas pequeñas de forma contemporánea debajo del dosificador cuando se desea un café doble En la parte sigui...

Страница 68: ... tanto para suministrar será necesario repetir el procedimiento aconsejamos no suministrar agua caliente justo después de haber efectuado un suministro de vapor 10 SUMINISTRO VAPOR Para suministrar el vapor pulse el botón vapor el piloto correspondiente parpadeará durante 15 segundos En cuanto el piloto deja de parpadear y permanece encendido la máquina está lista para suministrar el vapor Coloque...

Страница 69: ...a cada dosis SÓLO PARA USUARIOS EXPERTOS PROGRAMACIÓN DEL TIEMPO DE MOLEDURA El tiempo de moledura del café fuerte se puede programar el café medio y ligero se calibra según el fuerte Para entrar en la programación cuando la máquina se encuentra en modalidad de stand by pulse durante 5 segundos la tecla start stop se iluminan los led en la línea superior de izquierda a derecha para indicar el tiem...

Страница 70: ...equivalente a 100 litros el led permanece encendido de forma continua alarma Se recomienda sustituir el filtro antes de que pasen 3 meses a partir del momento en el que el led permanece encendido de forma continua Para apagar la alarma o la prealarma colocar la máquina en stand by y pulsar la tecla START STOP durante 5 segundos El led de alarma se apagará y el cómputo del agua suministrada se rese...

Страница 71: ...na poco de cacao en polvo sobre la espuma Capuchino vienés La secular tradición austriaca ha producido esta variante Se prepara un expreso largo 30 35 segundos de extracción se añade leche caliente y encima nata montada se sirve en una taza de tamaño intermedio entre la del expreso y la del capuchino Se decora con raspaduras de chocolate Expreso frío shakerado Espumoso y muy refrescante es un verd...

Страница 72: ...lavar en el lavavajillas Salida posos de café usados Extraiga el recipiente vacíelo de los residuos de café y lávelo con agua caliente o en el lavavajillas Introduzca el recipiente recogedor de posos de café usados en su compartimiento ATENCIÓN evite vaciar el recipiente recogedor de posos con la máquina encendida para evitar un contacto accidental con partes calientes Depósito de agua Si no se ut...

Страница 73: ...OAS RESPONSÁVEIS PELO DISPOSITIVO DE SEGURANÇA DAS MESMAS AS CRIANÇAS DEVEM SER CONTROLADAS PARA SE TER CERTEZA DE QUE NÃO BRINQUEM COM O APARELHO Prezado Cliente Agradecemos e congratulamo nos pela sua escolha Este novo produto cuidadosamente projectado e fabricado com materiais de primeiríssima qualidade foi meticulosamente testado para poder satisfazer todas as suas exigências para uma perfeita...

Страница 74: ...MOÍDO 12 PROGRAMAÇÃO DA QUANTIDADE DE ÁGUA NO CAFÉ Restabelecimento dos valores de fábrica 13 ILUMINAÇÃO DO ALOJAMENTO DE SAÍDA DO CAFÉ 14 SINALIZAÇõES E ALARMES Sinalização de falta de água Sinalização de substituição do filtro Sinalização de presença de borras de café Sinalização de avaria na sonda do café Sinalização de alarme genérico 15 RECEITAS Cappuccino à italiana Cappuccino vienense Expre...

Страница 75: ...evem ser deixados ao alcance das crianças enquanto potenciais fontes de perigo Antes do uso verificar que os dados de tensão e de potência indicados na placa de características correspondem com a linha da instalação na qual será conectada Verificar também que no edifício haja uma eficiente linha de terra e um adequado interruptor magnetotérmico Qualquer tipo de operação deve ser realizada por pess...

Страница 76: ...a a instalação da máquina A máquina deve ser instalada em espaços altos 460 mm e largos entre 560 mm e 568 mm A máquina é fornecida com os seguintes componentes para a instalação 1 Suporto fixo da máquina 2 N 13 parafusos auto roscantes 3 9X19 3 N 1 Fixa cabo 4 N 2 guias laterais 5 N 2 placas laterais de 1 mm 6 N 2 placas laterais de 2 mm Instalação da máquina Posicionar a parte fixa fornecida jun...

Страница 77: ... cabo de alimentação como mostra a figura 4 DESCRIÇÃO DA MÁQUINA DE CAFÉ 1 Reservatório de água 2 Filtro descalcificante 3 Distribuidor 4 Bico distribuidor de água vapor 5 Tabuleiro apara pingos 6 Contentor café 7 Manípulo de regulação da moagem 8 Painel de comandos 9 Portinhola Gaveta para eliminação das borras de café 5 CARACTERÍSTICAS TÉCNICAS Largura 594 mm Profundidade 475 mm Altura 445 mm Ca...

Страница 78: ...la CAFÉ LONGO Tecla ÁGUA Alarme FALTA DE ÁGUA Alarme PRESENÇA DE BORRAS Alarme GENÉRICO Tecla LAVAGEM Tecla LUZ Tecla CAFÉ DUPLO Tecla CAFÉ DUPLO LONGO Tecla VAPOR Alarme SUBSTITUIÇÃO FILTRO Alarme de avaria na sonda do CAFÉ Regulação do café CAFÉ LEVE CAFÉ MÉDIO CAFÉ FORTE 6 DESCRIÇÃO DO PAINEL DE COMANDOS TECLAS DE TOQUE LEVE ...

Страница 79: ...r a máquina de café do móvel fazendo a deslizar sobre as respectivas guias Fig 7 4 Introduzir o filtro descalcificante no respectivo alojamento Antes de encher o reservatório da água controlar que o filtro descalcificante tenha sido mergulhado pelo menos 20 minutos na água fria todavia seguir as instruções indicadas na embalagem do filtro Após esta operação introduzi lo no respectivo alojamento no...

Страница 80: ...a máquina e modalidade stand by Fig 7 9 Extrair a máquina Pôr o interruptor geral posicionado atrás da máquina na posição 1 Após ter introduzido a máquina no móvel a mesma está pronta para o uso Fig 7 10 Para sair da modalidade Stand by deve se carregar na tecla on off como indicado na fig 8 10 o led começará piscar até alcançar o estado de máquina pronta neste ponto todos os leds relativos aos vá...

Страница 81: ...um ciclo de lavagem da máquina Ao carregar numa tecla de saída do café o led da tecla de lavagem desliga se 8 SAÍDA DE CAFÉ Posicionar a chávena embaixo do bico de saída de café regular a altura do bico actuando no manípulo girando o elevam se ou abaixam se os bicos como indicado na figura 9 1 Podem se posicionar duas chávenas simultaneamente embaixo do bico quando se quer um café duplo No prosseg...

Страница 82: ... dentro de 10 segundos a função desabilita se Portanto para fazer sair água será necessário repetir o procedimento Aconselha se não fazer sair água quente após ter feito sair vapor 10 SAÍDA DE VAPOR Para fazer sair vapor carregar no botão do vapor o indicador correspondente piscará por 15 segundos Logo que o indicador parar de piscar e ficar aceso a máquina está pronta para fazer sair vapor Pôr o ...

Страница 83: ...ria para cada única dose SÓ PARA UTILIZADORES EXPERIENTES PROGRAMAÇÃO DO TEMPO DE MOAGENS O tempo de moagem do café forte é programável o café médio e leve são calibrados por consequência Para entrar na programação quando a máquina estiver em stand by carregar durante 5 segundos na tecla start stop iluminam se os leds na linha superior da esquerda para a direita para indicar o tempo de moagem para...

Страница 84: ...tidade de água atingir 100 litros o LED permanece aceso continuamente alarme Recomenda se substituir o filtro antes de passados 3 meses do momento em que o LED permanece aceso de forma contínua Para fazer desaparecer o alarme ou pré alarme coloque a máquina no modo stand by e prima o botão START STOP durante 5 segundos O LED de alarme apaga e a contagem da água fornecida é ajustada a zero Indicaçã...

Страница 85: ...a Cappuccino vienense A secular tradição austríaca produziu esta variante Prepara se um expresso longo 30 35 segundos de extracção acrescenta se leite quente e por cima chantilly serve se numa chávena de tamanho intermédio entre a do expresso e a do cappuccino Decora se com lascas de chocolate Expresso frio batido no shaker Espumoso e muito refrescante é um autêntico prazer nos dias mais quentes P...

Страница 86: ...s borras de café usado Extrair o tabuleiro esvaziá lo dos resíduos de café e lavá lo com água quente ou na Lava loiças Introduzir o contentor de borras de café usado no suo alojamento ATENÇÃO esvaziar o contentor de borras com a máquina desligada a fim de evitar contactos acidentais com partes quentes Reservaiório de água No caso de desuso por longos períodos de tempo aconselha se substituir a águ...

Страница 87: ......

Страница 88: ...Caple Fourth Way Avonmouth Bristol BS11 8DW www caple co uk ...

Отзывы: