45
Projection Procedure
Bas
ic G
uide
Pr
oje
ction
Pr
oced
ur
e
Step 3 Select an Input Signal
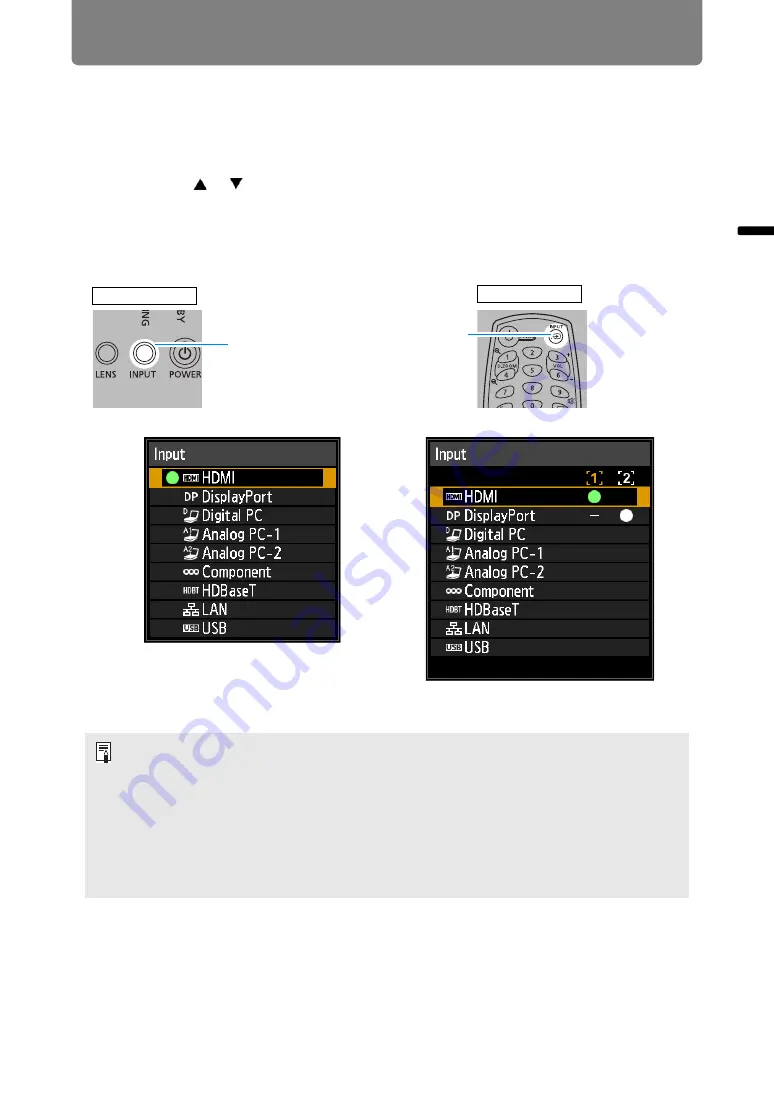
To switch between signals from connected devices, select an input signal in the
[Input] menu.
The selected signal changes each time you press the
INPUT
button, or each time
you press the [ ] / [ ] buttons when the [Input] window is shown.
The currently active input signal is marked with a green circle and enclosed by a
orange border.
Names of input signals available for projection are displayed in white, and
unavailable signal names are grayed out.
• [Digital PC] and [Analog PC-1] may be grayed out even when available.
• Screens of computers connected to the projector over a network can be projected
when you have selected [LAN] as the input signal. For details, refer to the NMPJ user’s
manual.
• Images on USB flash drives can be projected when you have selected [USB] as the
input signal. For details, see “Projecting Images on a USB Flash Drive” (
• In split-screen mode, the side without control rights is identified by a white circle.
• Input signals can also be selected by using the
INPUT A-C
buttons on the remote
control, depending on settings. For details, see “[INPUT A-C] button settings” (
INPUT
button
INPUT
button
Remote control
Projector
In split-screen mode
In single-image mode
Содержание WUX7500
Страница 41: ...41 Basic Guide ...
Страница 60: ...60 Installation Guide Before setting up the projector be sure to read Before Installation P24 ...
Страница 116: ...116 Menu Guide ...
Страница 206: ...206 Maintenance Product Specifications Troubleshooting ...


