144
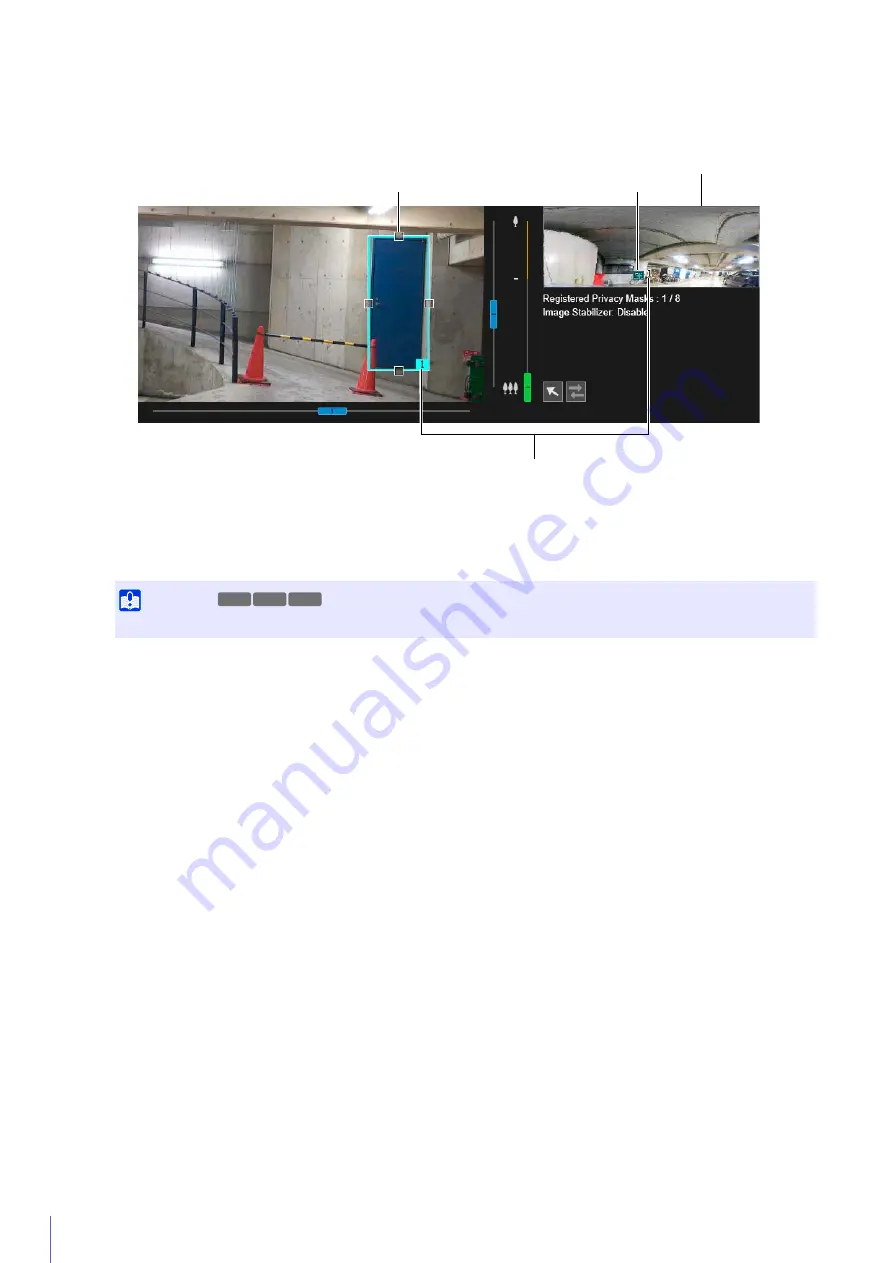
The preview frame attached with the area number is displayed on the video display area. The privacy mask area
for the corresponding number is also displayed on the privacy mask registration area.
Drag the preview frame displayed in the video display area to the position you want to mask.
Change the size of the preview frame by dragging the handles (
) positioned on its four sides.
The settings for the privacy mask area is enabled.
Set [Mask area] to [Disable] to temporarily disable a privacy mask area without deleting it. The disabled privacy
mask area of the registration area will be displayed with a crossed out frame.
The color selected here is reflected to all the preview frames and privacy mask areas.
You can save up to eight privacy masks.
The privacy mask area is saved to the camera.
Saved privacy mask areas are shown in the video display area and the privacy mask registration area.
2
In [Add mask area], click [Add].
3
Set the size and position for the preview frame in the video display area.
Important
Set the privacy mask area to a slightly larger size than the area you want to hide.
4
Set [Mask area] to [Enable].
5
Change the color for the privacy mask area with [Color] as necessary.
6
To add privacy mask areas, repeat steps 1 to 5.
7
Click [Apply].
Preview Frame
Privacy Mask Registration Area
Area Number
Privacy Mask Area
M50
R12
R13
Содержание VB-R13VE
Страница 18: ...18 ...
Страница 28: ...28 ...
Страница 44: ...44 ...
Страница 86: ...86 ...
Страница 224: ...224 ...
Страница 263: ...BIE 7128 000 CANON INC 2016 ...


