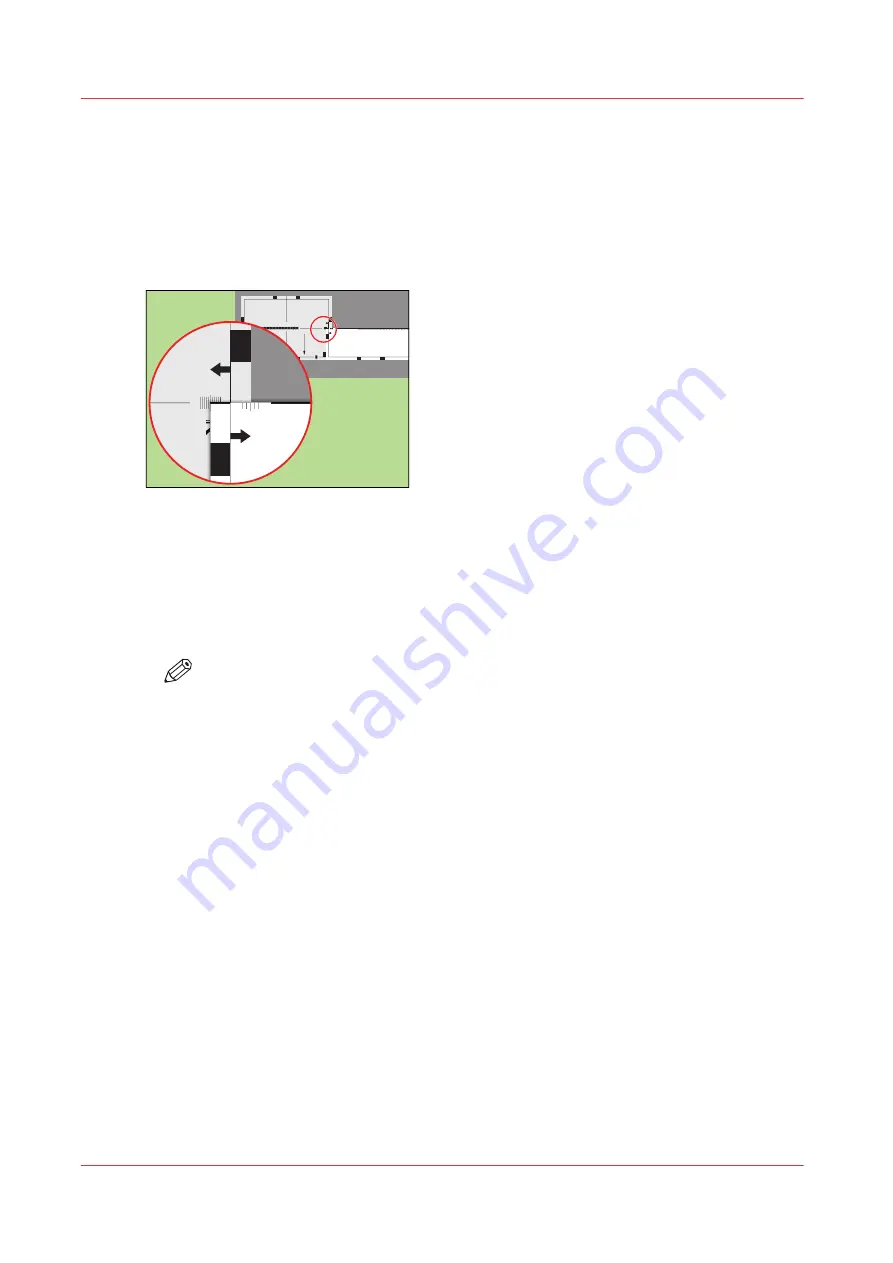
Perform a media registration for standard-size media - Adjust the
Z-position of side 2
Procedure
1.
Take the first test sheet.
2.
Align the start of the ruler with point 'K' of the test sheet.
Tes
t b
it
map: R
EGISTR
ATION
Siz
e: 2
1
0 x 297 mm
2006-
10-
09
/ 1
4:
08:
36
Pag
e 2
2
Sec
ondary i
mage
0
5
-
0
0
5
+
2 e
p
a
h
S d
n
o
m
a i D y r a
d
n
o
c
e
S
2
0
5
-
0
0
5
+
1 e
p
a
h
S d
n
o
m
a i D y r a
d
n
o
c
e
S
1
0
5
-
0
0
5
+
n
o i t i s
o
p e
g
a
m
i
X y r a
d
n
o
c
e
S
5
-50
0
+50
Secon
dary Z
image p
osition
4
-50
0
+50
Prima
ry X im
age p
osition
Prima
ry Z im
age p
osition
1000
1050
1100
1150
1200
1250
1300
1350
1400
1450
1500
1550
1600
1650
1700
1750
1800
1850
1900
1950
2000
2050
2100
2150
2200
2250
2300
2350
2400
2450
2500
2550
2600
2650
2700
2750
2800
Prima
ry diam
ond sh
ape
X len
gth
K
N
L
P
100
0
105
0
1100
1150
120
0
125
0
130
0
135
0
140
0
145
0
150
0
155
0
160
0
165
0
170
0
175
0
180
0
185
0
190
0
195
0
200
0
205
0
210
0
215
0
2200
2250
230
0
235
0
240
0
245
0
250
0
255
0
260
0
265
0
-50
0
+50
Prima
ry X
imag
e po
sitio
n
Prima
ry Z i
mag
e po
sitio
n
Prima
ry d
iamon
d sh
ape
X len
gth
L
Secon
dary Z
image p
ositio
-50
0
+50
K
-50
0
+50
[95] Align the ruler with 'K'
3.
Read the value at the edge of the test sheet.
4.
Enter the value.
5.
Take the second test sheet.
6.
Repeat the steps 2 - 4.
7.
Take the third test sheet.
8.
Repeat the steps 2 - 4.
NOTE
After step 8, the machine prints another 3 test sheets to measure the X-position of side
1 and side 2.
Perform a media registration for standard-size media - Adjust the Z-position of side 2
270
Chapter 11 - Media handling
VarioPrint 6000 line
Содержание VarioPrint 6000 Series
Страница 1: ...VarioPrint 6000 line Operation guide VarioPrint 6180 6220 6270 6330 2020 Canon Production Printing ...
Страница 8: ...Contents 8 VarioPrint 6000 line ...
Страница 9: ...Chapter 1 Introduction ...
Страница 14: ...Information in this operation guide 14 Chapter 1 Introduction VarioPrint 6000 line ...
Страница 15: ...Chapter 2 Explore the print system ...
Страница 31: ...Chapter 3 Explore the ease of operation ...
Страница 46: ...Transaction printing workflow 46 Chapter 3 Explore the ease of operation VarioPrint 6000 line ...
Страница 47: ...Chapter 4 Start the print system ...
Страница 56: ...Log in to the printer 56 Chapter 4 Start the print system VarioPrint 6000 line ...
Страница 63: ...Chapter 5 Prepare the print system ...
Страница 101: ...Chapter 6 Prepare the print jobs ...
Страница 110: ...Print a page number via PRISMAsync 110 Chapter 6 Prepare the print jobs VarioPrint 6000 line ...
Страница 111: ...Chapter 7 Plan the workload remotely ...
Страница 114: ...Use the Remote Control app to monitor printing 114 Chapter 7 Plan the workload remotely VarioPrint 6000 line ...
Страница 115: ...Chapter 8 Plan the jobs ...
Страница 127: ...6 Touch OK Move jobs to another destination Chapter 8 Plan the jobs 127 VarioPrint 6000 line ...
Страница 139: ...5 Touch OK Create a note for the operator Chapter 8 Plan the jobs 139 VarioPrint 6000 line ...
Страница 165: ...Chapter 9 Carry out print jobs ...
Страница 232: ...Make an intermediate check print 232 Chapter 9 Carry out print jobs VarioPrint 6000 line ...
Страница 233: ...Chapter 10 Keep the system printing ...
Страница 246: ...Status indicators 246 Chapter 10 Keep the system printing VarioPrint 6000 line ...
Страница 247: ...Chapter 11 Media handling ...
Страница 289: ...Chapter 12 Maintain the print system ...
Страница 316: ...Close the doors and covers 316 Chapter 12 Maintain the print system VarioPrint 6000 line ...
Страница 317: ...Chapter 13 PRISMAlytics Dashboard ...
Страница 319: ...Chapter 14 Troubleshooting ...
Страница 334: ...Create and download a log file 334 Chapter 14 Troubleshooting VarioPrint 6000 line ...
Страница 335: ...Chapter 15 Specifications ...
Страница 353: ......


