Canon PIXMA E481 Скачать руководство пользователя страница 508

Sending a Fax after Speaking on Telephone

If you want to speak to the recipient before sending a fax, or if the recipient does not have a fax machine
that can receive faxes automatically, send a fax manually after speaking to the recipient on the telephone to
check whether the recipient can receive faxes.

Important

• It may be possible that faxes will reach unintended recipients due to the misdialing or incorrect

registration of fax/telephone numbers. When you send important documents, we recommend that you
send them after speaking on the telephone. See below for the procedure to send a fax manually.

• With manual transmission, you cannot use the platen glass to load documents. Load the documents in

the ADF.

When loading document on the platen glass, send a fax with automatic transmission.

Sending Faxes by Entering Fax/Telephone Number

• To speak to the recipient before sending a fax, you need to connect a telephone to the machine.

For details on how to connect the telephone to the machine:

Basic Connection

Note

• For details on the basic sending operations:

Sending Faxes by Entering Fax/Telephone Number

1.

Make sure that the machine is turned on.

2. Press the 

FAX

 button.

The Fax standby screen is displayed.

3.

Load documents in the ADF.

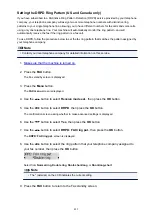
4. Adjust the scan contrast and resolution as necessary.

Setting Items for Sending Faxes

5. Lift the handset of the telephone connected to the machine.

6. Use the telephone to dial the recipient's fax/telephone number.

7. Speak to the recipient.

When you hear a high-pitched signal instead of the recipient's voice, you cannot check whether the
recipient can receive faxes. If you want to stop sending the fax, replace the handset. If you want to send
the fax, go to step 9.

8. Ask the recipient to set the recipient's fax machine to receive faxes.

9. When you hear a high-pitched signal, press the 

Color

 button or the 

Black

 button.

508

Содержание PIXMA E481

Страница 1: ...E480 series Online Manual Read Me First Useful Functions Available on the Machine Overview of the Machine Printing Copying Scanning Faxing Troubleshooting English...

Страница 2: ...artphone Tablet or Computer 41 Before Using Canon Inkjet Cloud Printing Center 42 Requirements for Canon Inkjet Cloud Printing Center operation 43 Preparations Before Using Canon Inkjet Cloud Printing...

Страница 3: ...for Unplugging the Power Cord 119 LCD and Operation Panel 120 Entering Numbers Letters and Symbols 122 Loading Paper Originals 124 Loading Paper 125 Loading Plain Paper Photo Paper 126 Loading Envelo...

Страница 4: ...ition from Your Computer 179 Aligning the Print Head Position Automatically from Your Computer 183 Cleaning the Machine 185 Cleaning the Exterior of the Machine 186 Cleaning the Platen Glass and Docum...

Страница 5: ...233 Canon IJ Network Tool Menus 235 Changing the Settings in the Wireless LAN Sheet 237 Changing the WEP Detailed Settings 241 Changing the WPA WPA2 Detailed Settings 243 Changing the Settings in the...

Страница 6: ...ting 296 Scaling the Printing to Fit the Paper Size 299 Scaled Printing 301 Page Layout Printing 302 Setting Paper Dimensions Custom Size 304 Changing the Print Quality and Correcting Image Data 306 S...

Страница 7: ...Printer Driver 348 Printing Using the Operation Panel of the Machine 349 Printing Template Forms Such As Lined Paper or Graph Paper 350 Paper setting for Printing 353 Copying 356 Making Copies 357 Se...

Страница 8: ...460 Updating the Scanner Driver 461 Obtaining the Latest Scanner Driver 462 Before Installing the Scanner Driver 463 Installing the Scanner Driver 464 Useful Information on Scanning 465 Adjusting Cro...

Страница 9: ...tion 527 Printing a List of the Registered Destinations 528 Registering Recipients Using Speed Dial Utility 529 Starting Up Speed Dial Utility 530 Speed Dial Utility Dialog 531 Saving Registered Infor...

Страница 10: ...ot Detect the Machine during Wireless LAN Setup Check 6 581 The Machine Cannot Be Detected in the Wireless LAN 582 Problems with the Machine while Using with Network 584 The Machine Stopped Working Su...

Страница 11: ...s Receiving Faxes 635 Cannot Receive a Fax Cannot Print a Fax 636 Machine Does Not Switch Automatically between Voice and Fax Calls 638 Quality of Received Fax is Poor 639 Cannot Receive a Color Fax 6...

Страница 12: ...annot Communicate with the Machine with USB Connection 668 LCD Cannot Be Seen At All 669 An Unintended Language Is Displayed on the LCD 670 FINE Cartridge Holder Does Not Move to the Position for Repl...

Страница 13: ...1702 710 1703 711 1704 712 1705 713 1712 714 1713 715 1714 716 1715 717 1871 718 1890 719 2110 720 2120 723 2700 724 2802 725 2803 726 2900 729 2901 730 4100 731 4103 732 5011 733 5012 734 5040 735 5...

Страница 14: ...6500 748 6800 749 6801 750 6900 751 6901 752 6902 753 6910 754 6911 755 6930 756 6931 757 6932 758 6933 759 6936 760 6937 761 6938 762 6939 763 693A 764 6940 765 6941 766 6942 767 6943 768 6944 769 6...

Страница 15: ...B204 776...

Страница 16: ...stoppage of disclosure of this guide Although the contents of this guide have been prepared with utmost care please contact the service center if you find any incorrect or missing information In princ...

Страница 17: ...personal injury or material damage caused by incorrect operation of the equipment These must be observed for safe operation Important Instructions including important information To avoid damage and i...

Страница 18: ...erved Redistribution and use in source and binary forms with or without modification are permitted provided that the following conditions are met 1 Redistributions of source code must retain the above...

Страница 19: ...bind by name to the interfaces of the Work and Derivative Works thereof Contribution shall mean any work of authorship including the original version of the Work and any modifications or additions to...

Страница 20: ...notices cannot be construed as modifying the License You may add Your own copyright statement to Your modifications and may provide additional or different license terms and conditions for use reprod...

Страница 21: ...fee for acceptance of support warranty indemnity or other liability obligations and or rights consistent with this License However in accepting such obligations You may act only on Your own behalf an...

Страница 22: ...this guide will be considered for the search If you want to narrow down the search results add your product s model name or your application s name to the keywords Searching for Functions Enter your...

Страница 23: ...e search window and perform a search Searching for Reference Pages Enter your model name and a reference page title You can find reference pages more easily by entering the function name as well Examp...

Страница 24: ...Notes on Operation Explanations In this guide most of the operations are described based on the windows displayed when OS X Mavericks v10 9 is used 24...

Страница 25: ...n Connection Methods Available on the Machine Using PIXMA Cloud Link Printing with Google Cloud Print Printing from AirPrint Compliant Device Checking Printer Information Online Storage Integration Fu...

Страница 26: ...uter or smartphone even in an environment without a wireless LAN router Switch to access point mode with simple steps to enjoy scanning and printing wirelessly When you use the machine with the access...

Страница 27: ...otos easily when you search for them later on Calendar View People View Display Recommended Items in Slide Shows Based on the information registered to photos Quick Menu automatically selects the phot...

Страница 28: ...tful items are created easily as the selected photos are placed automatically according to the theme Other Various Functions My Image Garden has many other useful functions Refer to What You Can Do wi...

Страница 29: ...TIVE PARK PREMIUM A service where customers using models that support PREMIUM Contents can download exclusive printing materials PREMIUM Contents can be downloaded easily via My Image Garden Downloade...

Страница 30: ...ng Easy PhotoPrint on the web from a computer or tablet By using Easy PhotoPrint you can create items in the latest environment without going through the trouble of installation Moreover you can use v...

Страница 31: ...od described in Connection Using a Wireless Router When connecting another device while a device is already connected to the printer connect it using the same connection method as the connected device...

Страница 32: ...e connection of the device may switch to a mobile data connection automatically depending on your device Transmission fees for connecting to the Internet using a mobile data connection apply In access...

Страница 33: ...n a new window 1 Press the Setup button A on the printer 2 Use the or button B to select Device settings then press the OK button 3 Select LAN settings then press the OK button 4 Select Change LAN the...

Страница 34: ...Select Security protocol then press the OK button 9 Check the Password network key then press the Back button You will use the Password network key in the subsequent steps 10 Select Start setup then p...

Страница 35: ...the network name SSID you want to use then click Connect 13 Enter the Password Network key then click Connect 14 When connection is complete click Back until the screen below appears Proceed with the...

Страница 36: ...of this guide until the setup is complete For office use consult your network administrator Take added care when connecting to a network that is not protected with security measures as there is a ris...

Страница 37: ...each other Firmware updates for the printer are not available while using the access point mode When a device has been connected to the printer without using a wireless router and you want to set it...

Страница 38: ...rd for the photo sharing site are saved in the machine s memory not encrypted If you hand over the machine to anyone or dispose of it delete your login name and password from the machine s memory in a...

Страница 39: ...ht of each material photos illustrations logos or documents hereinafter referred to as the materials provided on the web template printing service belongs to their respective owners Issues pertaining...

Страница 40: ...low ink levels In addition you can use various functions by adding and registering apps that are linked with various cloud services Using PIXMA Cloud Link from Your Smartphone Tablet or Computer Impo...

Страница 41: ...puter Before Using Canon Inkjet Cloud Printing Center Preparations Before Using Canon Inkjet Cloud Printing Center Using Canon Inkjet Cloud Printing Center Adding a Printer Adding a PIXMA Cloud Link U...

Страница 42: ...the web service to print documents be sure to check these precautions beforehand Printer specification Check that Canon Inkjet Cloud Printing Center supports the printer Network environment The printe...

Страница 43: ...use Internet Explorer 8 the web pages may not display correctly Canon recommends that you upgrade to Internet Explorer 9 or later or use another browser Smartphone or tablet OS Browser Resolution iOS...

Страница 44: ...select Web service setup Connection setup IJCloudPrintingCtr Register w service 2 In the registration confirmation window Select Yes 3 In the print settings select the display language 4 Follow the i...

Страница 45: ...ddress and other necessary information Important Do not use the Back button of the web browser while an operation is processing The screen may not transition properly 1 Use the web browser on your PC...

Страница 46: ...tiated Multibyte characters cannot be used You will get an error if the e mail address you enter contains a character that cannot be used If you registered a different e mail address by mistake you ca...

Страница 47: ...address Access the URL in the e mail register the information and complete the user registration 1 When an e mail with the subject Information on Canon Inkjet Cloud Printing Center is sent to the e m...

Страница 48: ...e Canon Inkjet Cloud Printing Center Important There are character restrictions for the Password as shown below The password must be between 8 and 32 characters long using single byte alphanumeric cha...

Страница 49: ...are case sensitive 5 Specify the Time zone setting and select Next Select your region on the list If you cannot find your region on the list select the one closest to your region Apply daylight savin...

Страница 50: ...e The Security code entry field has the following character restrictions Up to 8 single byte numbers The registration is complete A registration completion message is displayed When you select the OK...

Страница 51: ...On the printer operation panel select the Setup button and then select Web service setup Connection setup IJCloudPrintingCtr Register w service 3 In the registration confirmation window Select Yes 4 I...

Страница 52: ...able to log in for about the next hour You remain logged in for an hour after the last access Language Select the language you will be using E mail address Enter the e mail address that you entered i...

Страница 53: ...iption of the Main screen When you log in to the Canon Inkjet Cloud Printing Center the Main screen appears Important With this service the functions available to Standard user of the printer are diff...

Страница 54: ...u can check or update printer information registered to the Canon Inkjet Cloud Printing Center copy apps change printer names delete printers and add printers For the Standard user From the Select pri...

Страница 55: ...a screen to change the printer name appears Follow the instructions on the screen to change the name Important The printer name entry has the following character limitation Up to 128 characters Upperc...

Страница 56: ...t delete yourself To delete yourself cancel your membership from the user information screen Adding a user Administrator only Select Add user The user registration screen appears Changing Administrato...

Страница 57: ...sort registered apps You can use the buttons to change the display order of apps When you finish sorting press the Done button to confirm the order Latest notices This displays the latest notices The...

Страница 58: ...g out screen of the Canon Inkjet Cloud Printing Center 4 Display area The display changes based on the menu you select 5 Menu area The following 4 menu buttons are displayed Apps This displays the lis...

Страница 59: ...ayed by category When you select the details of the app are displayed When you select you can choose to register or unregister the app Note Description of displayed icons Cannot be used because it is...

Страница 60: ...g on the printer status Manage jobs This screen displays the print or scan status and history You can check the print or scan status by looking at Status list and the print or scan history by looking...

Страница 61: ...rmation registered to the Canon Inkjet Cloud Printing Center copy apps change printer names delete printers and add printers For the Standard user From the Select printer screen you can check or updat...

Страница 62: ...printer Then select OK Change the printer name Administrator only When you select a screen to change the printer name appears Follow the instructions on the screen to change the name Important The pri...

Страница 63: ...heck user information registered to the Canon Inkjet Cloud Printing Center delete users add users and change the Administrator and Standard user settings User deletion Administrator only Select the ch...

Страница 64: ...order When you finish sorting press the Set sort order button and confirm the order Config Administrator only This displays the Register apps screen in the Display area The display can be toggled bet...

Страница 65: ...eck how much ink is remaining or details about an error that occurred You can also access the ink purchasing site and the Online Manual Important The Properties displayed may differ from the actual st...

Страница 66: ...up to 40 items 6 Information area This display other information including the privacy statement and other companies licensing information 7 Global navigation area The User information Instructions an...

Страница 67: ...67...

Страница 68: ...ep login info When you select the check box the login screen is skipped for 14 days since the last day that the service screen was accessed Important If you fail to log in five straight times you will...

Страница 69: ...ormats that can be printed differ depending on the app Before you print check that printer is on and is connected to the network Then start This is available if you are using a smartphone or tablet No...

Страница 70: ...4 In the displayed image list select the image that you want to print and then select Next 5 Make the necessary print settings and then select Print 70...

Страница 71: ...nting select Apps The screen returns to the apps list screen Important If a print job is not printed within 24 hours after the print job is issued the print job will expire and cannot be printed With...

Страница 72: ...registration information from the printer to be added 2 From the browser on your smartphone tablet or computer access the authentication site URL 3 When the printer registration screen is displayed se...

Страница 73: ...vice from Remote UI the Printer registration ID is entered automatically Printer addition is completed If a printer added message is not displayed follow the instructions on the displayed screen Addin...

Страница 74: ...r privileges Adding a user 1 On the service screen select Manage users 2 Select Add user Note When you select Add user the service first checks whether the maximum number of users has been reached If...

Страница 75: ...registration is then sent to the entered e mail address 4 Access the URL reported in the e mail 5 Read the terms displayed in the License agreement and Privacy statement screens If you agree to the t...

Страница 76: ...32 characters long using single byte alphanumeric characters and symbols _ Alphabets are case sensitive 7 Enter the User Name Enter the name that identifies the user Important The User Name entry fie...

Страница 77: ...light saving time in the Time zone that you selected Select whether or not to apply the daylight saving time 9 Enter the Security code and select Done Enter the code for authenticating the user Import...

Страница 78: ...ach user is categorized as the Administrator or a Standard user Note The user who is registered first becomes the Administrator The administrator can change the privileges of users from the Manage use...

Страница 79: ...t updated when you press the Update button Because the Properties screen requires network connection with this product the information may not be reflected immediately Please wait awhile and then try...

Страница 80: ...submitted the print job is automatically canceled If this happens check the printer power and the Internet connection and then re submit the print job Printing starts on its own even if you do not do...

Страница 81: ...or services supporting Google Cloud Print 1 Preparations for Printing with Google Cloud Print 2 Printing from Computer or Smartphone with Google Cloud Print Important LAN connection with the printer a...

Страница 82: ...Google Cloud Print with the web browser on the computer or the mobile device then register the required information The screen above may change without prior notice Registering the Printer with Googl...

Страница 83: ...se the authentication URL is printed from printer when the authentication process is performed prepare A4 size or Letter size or Legal size plain paper 1 Make sure that the printer is turned on 2 From...

Страница 84: ...age to print the authentication URL is displayed print the authentication URL then perform the authentication process on the computer again Deleting the Printer from Google Cloud Print To change the p...

Страница 85: ...3 Select Web service setup Connection setup GoogleCloudPrint Delete from service 4 When the confirmation screen to delete the printer is displayed select Yes 85...

Страница 86: ...ation for printing with Google Cloud Print is complete and when the printer is turned on the printer receives the print data and prints it automatically Note Depending on the communication status it m...

Страница 87: ...le Cloud Print immediately When the printer cannot receive the print data or you want to start printing immediately you can check whether there is a print job on the Google Cloud Print and start print...

Страница 88: ...vices running the latest version of iOS iPad all models iPhone 3GS or later iPod touch 3rd generation or later Network Environment The Apple device iPad iPhone or iPod touch and this printer must be c...

Страница 89: ...del that you are using Important Because some app does not support AirPrint Printer Options may not be displayed If an app does not let you use printer options you cannot print from that app Note The...

Страница 90: ...eing used on the Apple device and the region in which AirPrint is used When Apple s photo app is used the default paper size is L size in Japan and 4 x6 or KG in other countries and regions When docum...

Страница 91: ...does not print check the following 1 Check that the printer power is on If the printer power is on turn it off and then back on again and check whether the issue is resolved 2 Check that the printer i...

Страница 92: ...connection Confirm that the printer is connected to the wireless LAN and then try printing If Bonjour on the printer is disabled AirPrint cannot be used Check the LAN settings on the printer and enab...

Страница 93: ...ce settings LAN settings Print LAN details IPv4 address printing starts Check the IPv4 address that was printed 3 Check that the printer is connected to the same Wi Fi network Then from your smartphon...

Страница 94: ...oud Print or delete the printer IJ Cloud Printing Center setup Allows you to register to IJ Cloud Printing Center or to delete a registration Security Allows you to set the Administrator s password an...

Страница 95: ...e uploaded images can be browsed from other computers smartphones etc To use Evernote you need to create an account See the CREATE ACCOUNT page of Evernote for account creation Settings In the Setting...

Страница 96: ...PIXMA Printing Solutions to easily print photos saved on a smartphone or tablet wirelessly You can also receive scanned data PDF or JPEG directly on a smartphone or tablet without using a computer PI...

Страница 97: ...jsetup for using this product from your computer smartphone or tablet device When the connection is complete the Canon Inkjet Print Utility software which allows you to specify detailed print settings...

Страница 98: ...achine Settings Changing Machine Settings from Your Computer Changing the Machine Settings on the LCD Information about Network Connection Useful Information about Network Connection About Network Com...

Страница 99: ...Safety Guide Safety Precautions Regulatory and Safety Information 99...

Страница 100: ...the On screen Manual Do not place any object on the machine Especially do not place metal objects paper clips staples etc or containers of flammable solvents alcohol thinners etc on top of the machin...

Страница 101: ...humide ou pr s d une piscine 2 viter d utiliser l appareil pendant un orage lectrique Ceci peut pr senter un risque de choc lectrique caus par la foudre 3 Ne pas utiliser l appareil pour signaler une...

Страница 102: ...d or operated with any other antenna or transmitter Canon U S A Inc One Canon Park Melville New York 11747 1 800 652 2666 Pre Installation Requirements Order Information When ordering service from the...

Страница 103: ...equipment When such changes are necessary the telephone company is required to give adequate prior notice to the user However if advance notice is not possible the telephone company will notify the c...

Страница 104: ...interface t l phonique La terminaison d une interface peut consister en une combinaison quelconque de dispositifs la seule condition que la somme d indices d quivalence de la sonnerie de tous les dis...

Страница 105: ...n kada kupujete sli an novi proizvod ili ovla enom centru za prikupljanje za recikla u istro ene elektri ne i elektronske opreme EEE Nepravilno rukovanje ovom vrstom otpada mo e da ima mogu e negativn...

Страница 106: ...gly Paper types This product can be used to print on both recycled and virgin paper certified to an environmental stewardship scheme which complies with EN12281 or a similar quality standard In additi...

Страница 107: ...Main Components and Basic Operations Main Components About the Power Supply of the Machine LCD and Operation Panel Entering Numbers Letters and Symbols 107...

Страница 108: ...Main Components Front View Rear View Inside View Operation Panel 108...

Страница 109: ...ocument tray Open to load a document in the ADF You can load two or more sheets of document of the same size and thickness Load the document with the side you want to scan facing up 6 document output...

Страница 110: ...med paper inside the machine 15 POWER lamp Lights after flashing when the power is turned on 16 FAX Memory lamp Lights when there are received or unsent documents stored in the machine s memory 17 Ala...

Страница 111: ...nnect the telephone line 4 external device jack Connect an external device such as telephone or answering machine 5 USB port Plug in the USB cable to connect the machine with a computer Important Do n...

Страница 112: ...ge should be installed into the left slot and the black FINE cartridge should be installed into the right slot Note For details on replacing a FINE cartridge see Replacing a FINE Cartridge Important T...

Страница 113: ...ith this menu you can perform machine maintenance and change machine settings 7 Black button Starts black white copying scanning faxing etc 8 Color button Starts color copying scanning faxing etc 9 an...

Страница 114: ...ing temporarily if your machine is connected to a rotary pulse line 14 Stop button Cancels operation when print copy scan or fax transmission reception job is in progress Note The machine makes the be...

Страница 115: ...About the Power Supply of the Machine Confirming that the Power Is On Turning the Machine On and Off Notice for the Power Plug Power Cord Notice for Unplugging the Power Cord 115...

Страница 116: ...a while for the machine to start printing immediately after you turn on the machine The LCD will turn off if the machine is not operated for about 5 minutes To restore the display press any button ex...

Страница 117: ...lamp stops flashing the machine is turned off Important When you unplug the power cord after turning off the machine be sure to confirm that the POWER lamp is off Note The machine cannot send or rece...

Страница 118: ...is hot The power plug power cord is rusty The power plug power cord is bent The power plug power cord is worn The power plug power cord is split Caution If you find anything unusual with the power pl...

Страница 119: ...drying or clogging of the print head and print quality may be reduced If the power cord is unplugged the date time settings will be reset and all documents stored in the machine s memory will be lost...

Страница 120: ...various functions or settings Selecting a Menu or Setting Item On the menu screen or settings screen use the or button C to select an item or option then press the OK button D to proceed with the pro...

Страница 121: ...Select Scan contrast press the OK button D Use the or button C to change the contrast then press the OK button D 121...

Страница 122: ...cters To insert a space Press the button five times To delete the last entered character Press the Back button Editing Entered Numbers Letters and Symbols Press the or button to move the cursor under...

Страница 123: ...3 3 gh i GH I 4 4 jkl JKL 5 5 mno MNO 6 6 pqrs PQRS 7 7 tuv TUV 8 8 wxyz WXYZ 9 9 0 0 _ SP 1 2 2 Switch the input mode 1 SP indicates a space 2 Displayed only when entering characters in the LAN setti...

Страница 124: ...Loading Paper Originals Loading Paper Loading Originals 124...

Страница 125: ...Loading Paper Loading Plain Paper Photo Paper Loading Envelopes Media Types You Can Use Media Types You Cannot Use Printing Area 125...

Страница 126: ...per If paper is curled flatten it Note Align the edges of paper neatly before loading Loading paper without aligning the edges may cause paper jams If paper is curled hold the curled corners and gentl...

Страница 127: ...l the way out 5 Load the paper in the center of the cassette WITH THE PRINT SIDE FACING DOWN Push the paper stack all the way to the back of the cassette The above figure shows the machine with the pa...

Страница 128: ...ly The above figure shows the machine with the paper output tray raised Note Do not load sheets of paper higher than the load limit mark F Keep the paper stack height below the tabs G of the paper gui...

Страница 129: ...cover is aligned with the edge of the machine After pushing the cassette back properly the machine makes an electronic sound and the paper information registration screen is displayed on the LCD Note...

Страница 130: ...ttings Paper setting for Printing 10 Use the or button to select the type of the loaded paper in the cassette then press the OK button 11 Pull the paper output support H out from the paper output tray...

Страница 131: ...flaps are already moistened and adhesive 1 Prepare envelopes Press down on all four corners and edges of the envelopes to flatten them If the envelopes are curled hold the opposite corners and gently...

Страница 132: ...o slide both paper guides all the way out 5 Load the envelopes in the center of the cassette WITH THE ADDRESS SIDE FACING DOWN The folded flap of the envelope will be faced up on the left side D Rear...

Страница 133: ...t be fed properly The above figure shows the machine with the paper output tray raised Note Do not load envelopes higher than the load limit mark F Keep the envelope stack height below the tabs G of t...

Страница 134: ...larm to be silent in Sound control of Dev user settings the alarm will not beep even if the cassette is pushed back Dev user settings 8 Press the OK button 9 Use the or button to select the size of th...

Страница 135: ...n the cassette then press the OK button 11 Pull the paper output support H out from the paper output tray 12 Open the output tray extension I Note When printing select the size and type of the loaded...

Страница 136: ...Canon genuine paper access our website Note You may not be able to purchase some Canon genuine papers depending on the country or region of purchase Paper is not sold in the US by Model Number Purchas...

Страница 137: ...an use paper in the following weight range 17 to 28 lb 64 to 105 g m2 plain paper except for Canon genuine paper Do not use heavier or lighter paper except for Canon genuine paper as it could jam in t...

Страница 138: ...ets 4 x 6 10 x 15 cm Photo Paper Plus Glossy II PP 201 3 10 sheets A4 Letter 5 x 7 13 x 18 cm and 8 x 10 20 x 25 cm 20 sheets 4 x 6 10 x 15 cm Photo Paper Pro Luster LU 101 3 10 sheets A4 and Letter P...

Страница 139: ...3 When loading paper in stacks the print side may become marked as it is fed or paper may not feed properly In this case load one sheet at a time 139...

Страница 140: ...28 lb 105 g m2 except for Canon genuine paper Paper thinner than a postcard including plain paper or notepad paper cut to a small size when printing on paper smaller than A5 Picture postcards Postcar...

Страница 141: ...Printing Area Printing Area Other Sizes than Letter Legal Envelopes Letter Legal Envelopes 141...

Страница 142: ...ed image is enlarged to fill the whole page For Borderless Printing use the following paper Photo Paper Pro Platinum PT 101 Glossy Photo Paper Everyday Use GP 501 GP 601 Photo Paper Glossy GP 601 Phot...

Страница 143: ...90 x 9 80 inches 175 2 x 249 0 mm 4 x 6 10 x 15 cm 3 73 x 5 69 inches 94 8 x 144 4 mm 5 x 7 13 x 18 cm 4 73 x 6 69 inches 120 2 x 169 8 mm 8 x 10 20 x 25 cm 7 73 x 9 69 inches 196 4 x 246 0 mm Recomm...

Страница 144: ...tter 8 00 x 10 69 inches 203 2 x 271 4 mm Legal 8 00 x 13 69 inches 203 2 x 347 6 mm Recommended printing area A 1 28 inches 32 5 mm B 1 32 inches 33 5 mm Printable area C 0 12 inch 3 0 mm D 0 20 inch...

Страница 145: ...ting Area width x height Envelope DL 3 88 x 7 20 inches 98 8 x 183 0 mm Envelope Com 10 3 68 x 8 04 inches 93 5 x 204 3 mm Recommended printing area A 0 31 inch 8 0 mm B 1 14 inches 29 0 mm C 0 22 inc...

Страница 146: ...Loading Originals Position to Load Originals Loading Originals on the Platen Glass Loading Documents in the ADF Auto Document Feeder How to Load Originals for Each Function Originals You Can Load 146...

Страница 147: ...o load the original according to the size type or usage Originals You Can Load Loading Documents Photos or Book on the platen glass Loading Two or More Sheets of Document of the Same Size and Thicknes...

Страница 148: ...nal on the platen glass Do not place any objects weighing 4 4 lb 2 0 kg or more on the platen glass Do not put any pressure of 4 4 lb 2 0 kg or more on the platen glass such as pressing down the origi...

Страница 149: ...beep sound Load the document WITH THE SIDE TO SCAN FACING UP in the document tray Originals You Can Load Note When you set the alarm to be silent in Sound control of Dev user settings the alarm will n...

Страница 150: ...size A4 Letter etc for Scan size to scan originals With a software application on a computer scan text documents magazines or newspapers select a standard size A4 Letter etc to scan originals Place th...

Страница 151: ...and specify Auto scan A Multi for Scan size to scan two or more originals Scan two or more printed photos postcards or business cards with a software application on a computer Place the originals WIT...

Страница 152: ...opy Quantity A4 or Letter size Max 20 sheets 20 lb 75 g m2 paper up to 0 08 inch 2 mm in height Legal size Max 5 sheets 20 lb 75 g m2 paper up to 0 02 inch 0 5 mm in height Thickness 0 003 to 0 005 in...

Страница 153: ...Photo or thick paper 153...

Страница 154: ...Replacing a FINE Cartridge Replacing a FINE Cartridge Checking the Ink Status 154...

Страница 155: ...Note For precautionary notes on handling FINE cartridges see Notes on FINE cartridges Replacing Procedure When you need to replace a FINE cartridge follow the procedure below 1 Make sure that the pow...

Страница 156: ...ts or other parts inside the machine If the paper output cover is left open for more than 10 minutes the FINE cartridge holder may move and the Alarm lamp light In this case close the paper output cov...

Страница 157: ...r hands and the surrounding area with ink on the removed protective tape Do not reattach the protective tape once you have removed it Discard it according to the local laws and regulations regarding d...

Страница 158: ...ert the FINE cartridge gently so that it does not hit the electrical contacts on the FINE cartridge holder 8 Push the FINE cartridge in and up firmly until it snaps into place You hear an electronic s...

Страница 159: ...alled Be sure to install both cartridges Note When you set the alarm to be silent in Sound control of Dev user settings the alarm will not beep even if the FINE cartridge is attached Dev user settings...

Страница 160: ...will cause the FINE cartridge to dry out and the machine may not operate properly when it is reinstalled To maintain optimal printing quality use a FINE cartridge within six months of first use Note...

Страница 161: ...Checking the Ink Status Checking the Ink Status with the LCD on the Machine You can also check the ink status on the computer screen Checking the Ink Status from Your Computer 161...

Страница 162: ...Message Is Displayed 1 Make sure that the power is turned on then press the Setup button The Setup menu screen will appear 2 Use the or button to select Ink information then press the OK button LCD a...

Страница 163: ...Maintenance When Printing Becomes Faint or Colors Are Incorrect Performing Maintenance from a Computer Cleaning the Machine 163...

Страница 164: ...Becomes Faint or Colors Are Incorrect Maintenance Procedure Printing the Nozzle Check Pattern Examining the Nozzle Check Pattern Cleaning the Print Head Cleaning the Print Head Deeply Aligning the Pr...

Страница 165: ...the protective tape on the bottom of the FINE cartridge is removed If an error message appears on the LCD see A Message Is Displayed Increasing the print quality in the printer driver settings may im...

Страница 166: ...resolved turn off the power and clean the print head deeply again after 24 hours Do not unplug the power cord when turning off the power If the problem is still not resolved Step5 Replace a FINE cart...

Страница 167: ...t of A4 or Letter sized plain paper in the cassette After pushing the cassette back the paper information registration screen is displayed on the LCD Select A4 or Letter for Size and Plain paper for T...

Страница 168: ...r of sheets printed so far If there are missing lines in the pattern A Cleaning the print head is required D Good E Bad lines are missing If there are horizontal white streaks in the pattern B Cleanin...

Страница 169: ...s the Setup button use the or button to select Maintenance then press the OK button LCD and Operation Panel 3 Use the or button to select Cleaning then press the OK button The machine starts cleaning...

Страница 170: ...elect Deep cleaning then press the OK button The machine starts cleaning the print head deeply Do not perform any other operations until the machine completes the deep cleaning of the print head This...

Страница 171: ...sides 1 Make sure that the power is turned on 2 Load a sheet of A4 or Letter sized plain paper in the cassette After pushing the cassette back the paper information registration screen is displayed o...

Страница 172: ...ss the Stop button then redo this procedure from the beginning 6 Confirm the message then load the print head alignment sheet on the platen glass Load the print head alignment sheet WITH THE PRINTED S...

Страница 173: ...alignment sheet on the platen glass until adjusting the print head position is complete If the error message appears on the LCD press the OK button to release the error then take appropriate action A...

Страница 174: ...ds from Your Computer Use Your Computer to Print a Nozzle Check Pattern Aligning the Print Head Aligning the Print Head Position Automatically from Your Computer Aligning the Print Head Position from...

Страница 175: ...e Nozzle Check dialog opens after the confirmation message 5 Check the results To check whether the print quality has improved click Print Check Pattern To cancel the check process click Cancel If cle...

Страница 176: ...Check Pattern To cancel the check process click Cancel Important Deep Cleaning consumes a larger amount of ink than Cleaning Cleaning the print head frequently will rapidly deplete your printer s ink...

Страница 177: ...ette Note If the cassette paper information registered on the printer is not set to A4 size and plain paper an error may occur For instructions on what to do if an error occurs see Paper setting for P...

Страница 178: ...djustment position are corrected and conditions such as color and line streaking are improved If the print results appear uneven because of line shifts or other conditions adjust the position of the p...

Страница 179: ...e Canon IJ Printer Utility 5 Click the Print Head Alignment icon A message is displayed 6 Load paper in the printer Load three sheets of A4 size or Letter size plain paper into the cassette Note If th...

Страница 180: ...ast noticeable vertical streaks A Least noticeable vertical streaks B Most noticeable vertical streaks 9 Confirm the displayed message and click OK The second pattern is printed Important Do not open...

Страница 181: ...ertical streaks B Most noticeable vertical streaks 11 Confirm the displayed message and click OK The third pattern is printed Important Do not open the paper output cover while printing is in progress...

Страница 182: ...ceable horizontal stripes A Least noticeable horizontal stripes B Most noticeable horizontal stripes Note After head alignment is completed you can print and check the current setting To do so click t...

Страница 183: ...er into the cassette Note The number of sheets to be used differs when you select the manual head alignment If the cassette paper information registered on the printer is not set to A4 size and plain...

Страница 184: ...Note After head alignment is completed you can print and check the current setting To do so click the Print Head Alignment icon and when the message is displayed click Print Alignment Value 184...

Страница 185: ...hine Cleaning the Exterior of the Machine Cleaning the Platen Glass and Document Cover Cleaning the ADF Auto Document Feeder Cleaning the Paper Feed Roller Cleaning the Inside of the Machine Bottom Pl...

Страница 186: ...e power cord The machine cannot send or receive faxes when the power is turned off If the power cord is unplugged the date time settings will be reset and all documents stored in the machine s memory...

Страница 187: ...necessary document before unplugging the power cord Do not use tissue paper paper towels rough textured cloth or similar materials for cleaning so as not to scratch the surface Paper tissue powder or...

Страница 188: ...s turned off If the power cord is unplugged the date time settings will be reset and all documents stored in the machine s memory will be lost Send or print a necessary document before unplugging the...

Страница 189: ...o leave any residue especially on the glass surface Important If any foreign substances such as glue ink or correction fluid are adhered to the glass of the ADF B as shown in the figure above some bla...

Страница 190: ...and Operation Panel 4 Use the or button to select Roller cleaning then press the OK button The paper feed roller will rotate as it is cleaned 5 Make sure that the paper feed roller has stopped rotatin...

Страница 191: ...f A4 or Letter sized plain paper in half widthwise then unfold the paper 3 Fold one side of the opened paper in another half aligning the edge with the center crease then unfold the paper 4 Load only...

Страница 192: ...protrusions inside the machine may be stained Wipe off any ink from the protrusions using a cotton swab or the like Important Be sure to turn off the power and unplug the power cord before cleaning t...

Страница 193: ...Changing the Machine Settings Changing Machine Settings from Your Computer Changing the Machine Settings on the LCD 193...

Страница 194: ...m Your Computer Checking the Ink Status from Your Computer Registering a Changed Printing Profile Setting the Ink Cartridge to be Used Managing the Printer Power Reducing the Printer Noise Changing th...

Страница 195: ...ustration of the ink types and their status is displayed If a warning or error related to the remaining ink level occurs the printer driver displays an icon to let you know 2 If necessary click Ink De...

Страница 196: ...t the necessary items 2 Select Save Current Settings as Preset from the Presets 3 Save the settings In the displayed dialog enter a name in Preset Name and if necessary set Preset Available For Then c...

Страница 197: ...esets in the Presets section Then in the dialog that appears select the name of the printing profile to be deleted 2 Delete the printing profile Click Delete and click OK The selected printing profile...

Страница 198: ...rtridge to be used Select the FINE cartridge you use for printing and click Apply 3 Complete the setup Click OK when the confirmation message appears The specified FINE cartridge will be used from the...

Страница 199: ...function automatically turns off the printer when there are no operations from the printer driver or the printer for a specified period of time 1 Select Power Settings from the pop up menu on the Can...

Страница 200: ...cases you can set Auto Power Off but the power will not be turned off automatically When you use the printer by connecting it to a network When you use the printer by connecting it to a telephone lin...

Страница 201: ...necessary specify one of the following items Do not use quiet mode Select this option when you wish to use the printer with volume of normal operating noise Always use quiet mode Select this option w...

Страница 202: ...hat the printer is on and click Apply Click OK when the confirmation message appears The settings are enabled hereafter Note The effects of the quiet mode may be less depending on the print quality se...

Страница 203: ...nt head and the paper during high density printing to prevent paper abrasion Check this check box to prevent paper abrasion Prevent paper double feed Select this check box only if the printer is feedi...

Страница 204: ...on the LCD Changing the Machine Settings on the LCD Fax settings Output settings LAN settings Dev user settings Firmware update Cassette settings Reset setting About Quiet setting Using the Machine w...

Страница 205: ...n to select Device settings then press the OK button When you change the fax settings press the Setup button then select Fax settings 4 Use the button to select Output settings then press the OK butto...

Страница 206: ...ividually or the advanced setting For details on how to specify the setting Preparing for Faxing TEL no registration You can register the recipient s fax telephone number to the machine Registering Re...

Страница 207: ...ength of pause time for each when you enter P pause TTI position Selects the position of the sender information outside or inside the image area Remote RX Enables disables remote reception If you sele...

Страница 208: ...4800 bps The asterisk on the LCD indicates the current setting The fax reception start speed will be faster as the value is bigger Some of settings are not available depending on the country or region...

Страница 209: ...umber twice By using this setting you can avoid the mistransmission of faxes Check RX FAX info If you select ON the machine checks whether the recipient s fax machine information matches the dialed nu...

Страница 210: ...Slight cropping may occur at the edges since the copied image is enlarged to fill the whole page You can change the width to be cropped from the borders of the original image as needed Cropped area wi...

Страница 211: ...method Follow the on screen instructions during setup Cableless setup Select if you specify the settings of the access point information to the machine directly from a device such as a smartphone with...

Страница 212: ...the computer using WSD Timeout setting Specifies the timeout length Bonjour settings Setting items for LAN using Bonjour for Mac OS Enab disab Bonjour Selecting Active allows you to use Bonjour to per...

Страница 213: ...e country or region of purchase Sound control Selects whether the beep sound in operations is enabled or not Keypad sound Selects whether the beep sound is enabled or not when pressing the buttons on...

Страница 214: ...n server Auto power off The machine turns off automatically if no operation is made or no printing data is sent to the machine for a specified period of time Select OFF if you want the machine not to...

Страница 215: ...pdate of the machine Current version You can check the current firmware version Update notification When ON is selected and the firmware update is available the screen to inform you of the firmware up...

Страница 216: ...an specify by the printer driver or on the LCD Paper Settings on the Printer Driver and the Printer Media Type Paper Settings on the Printer Driver and the Printer Paper Size Det paper mismatch If you...

Страница 217: ...h as the paper size media type or other setting items back to the default The LAN settings and the telephone fax number are not returned back to the default Device info sending Returns only the device...

Страница 218: ...g noise while printing is in progress When Use in specified hrs is selected The screen to specify starting ending time is displayed Use the button to move the cursor under the desired position use the...

Страница 219: ...s point mode for the long time we recommend that you change the default access point name and the default password to the combination of numbers and letters from the point of view of security How to e...

Страница 220: ...an external device such as a computer or a smartphone via wireless LAN refer to the device s or application s instruction manual How to terminate the Access Point Mode In environments that the machine...

Страница 221: ...e the machine as an access point 7 Press the OK button to finish entering the name 8 Use the button to select the security setting then press the OK button WPA2 PSK AES Specifies the security setting...

Страница 222: ...Information about Network Connection Useful Information about Network Connection 222...

Страница 223: ...Set at Factory Network Connecting the Machine to the Computer Using a USB Cable When Detecting the Printers Have the Same Name Connecting to Other Computer with LAN Changing the Connection Method fro...

Страница 224: ...s IPv4 IPv6 Enable disable IPv6 Active Enable disable WSD Active Timeout setting 1 minute Enab disab Bonjour Active Service name Bonjour settings Canon E480 series LPR setting Active DRX setting Activ...

Страница 225: ...Connecting the Machine to the Computer Using a USB Cable Connect the machine and the computer using a USB cable as the illustration below The USB port is located on the rear of the machine 225...

Страница 226: ...played as the printer name specified by Bonjour Select a printer with checking the MAC address the printer name specified by Bonjour or the serial number set to the printer against that on the detecti...

Страница 227: ...according to the instructions on our website Connecting to Other Computer with LAN To add the computer connecting the machine with LAN perform setup according to the instructions on our website Chang...

Страница 228: ...machine s network setting is printed out Item Explanations of the item Setting Wireless LAN Wireless LAN Enable Disable Connection Connection status Active Inactive MAC Address MAC Address XX XX XX X...

Страница 229: ...min LPR Protocol LPR protocol setting Enable Disable Bonjour Bonjour setting Enable Disable Bonjour Service Name Bonjour service name Bonjour service name Up to 52 alphanumeric characters DNS Server G...

Страница 230: ...About Network Communication Changing and Confirming Network Settings Appendix for Network Communication 230...

Страница 231: ...e Settings in the Wireless LAN Sheet Changing the WEP Detailed Settings Changing the WPA WPA2 Detailed Settings Changing the Settings in the Wired LAN Sheet Changing the Settings in the Admin Password...

Страница 232: ...Canon software is attempting to access the network If the warning message appears set the security software to always allow access Starting up IJ Network Tool 1 Select Applications from the Go menu of...

Страница 233: ...ified 3 Update Performs printer detection again Click this button if the target printer is not displayed Important To change the printer s network settings using IJ Network Tool it must be connected v...

Страница 234: ...ration Enabled when Utilities is selected Click to display the Configuration screen to configure settings of the selected printer Note This item has the same function as Configuration in the Settings...

Страница 235: ...on a network is not detected make sure that the printer is turned on then select Refresh It may take several minutes to detect printers If the printer is not yet detected connect the machine and the...

Страница 236: ...creen If you change the Encryption Method setting and the Password setting on the Set up printer s access point mode screen the changed settings are applied to the printer settings Note You can use th...

Страница 237: ...n the Wireless LAN sheet 1 Start up IJ Network Tool 2 Select the printer in Printers When the printer is connected to the computer with a USB cable temporarily select the printer with USB appearing in...

Страница 238: ...Routers Screen Note When IJ Network Tool runs over a LAN the button is grayed out and cannot be selected Connect the printer and the computer with a USB cable temporarily to change the settings 4 Enc...

Страница 239: ...ings 6 TCP IP Setting Sets the IP address of the printer to be used over the LAN Specify a value appropriate for your network environment Get IP address automatically Select this option to use an IP a...

Страница 240: ...ious screen and enter the network name SSID in Network SSID Note Make sure that the wireless router is turned on 3 Set Click to set the network name SSID in Network SSID on the Wireless LAN sheet Note...

Страница 241: ...er with a USB cable temporarily select the printer with USB appearing in the Connected to column 3 Click the Configuration button 4 Click the Wireless LAN button 5 Select Use Password WEP in Encryptio...

Страница 242: ...Base Station Select 1 for Key ID Otherwise your computer will not be able to communicate with the printer via the wireless router 5 Authentication Select the authentication method to authenticate the...

Страница 243: ...ion button 4 Click the Wireless LAN button 5 Select Use WPA WPA2 in Encryption Method and click Configuration 6 Enter the passphrase then click OK 1 Passphrase Enter the passphrase set to the wireless...

Страница 244: ...Note This machine supports WPA WPA2 PSK WPA WPA2 Personal and WPA2 PSK WPA2 Personal 244...

Страница 245: ...ion before the settings are sent to the printer If you click OK the settings are sent to the printer and the Transmitted Settings screen is displayed 1 TCP IP Setting Sets the IP address of the printe...

Страница 246: ...Change the settings or confirm 1 Use admin password Sets an administrator password with privileges to set up and change detailed options To use this feature select this check box and enter a password...

Страница 247: ...to the printer Admin Password Enter the administrator password that was set For security purposes your password is not displayed as you type it Important If you forget the administrator password you s...

Страница 248: ...Follow the instructions on the screen to start measuring and display the status Measurement takes a few minutes When is displayed in Connection performance between the printer and the wireless router...

Страница 249: ...routers Check that the printer and the wireless router face each other Connection performance may depend on the orientations of the wireless devices Replace the wireless router and the printer in ano...

Страница 250: ...ll the network settings of the printer to factory default 4 Click Initialize The Setting Initialization screen is displayed Click OK to initialize the network settings of the printer Do not turn off t...

Страница 251: ...d after you modified the printer settings on the Configuration screen When you click OK on the Confirmation screen the following screen is displayed for confirming the modified settings 1 Settings A l...

Страница 252: ...Appendix for Network Communication Using the Card Slot over a Network About Technical Terms Restrictions 252...

Страница 253: ...erver 4 Input smb xxxxxxxxxxxx canon_memory then click Connect For example if the current printer name is 123ABC000000 then input smb 123ABC000000 canon_memory 5 Make sure that the card slot is mounte...

Страница 254: ...he operation in the memory card may be impossible or slow Operate after the Access lamp of the machine is lit When you access the network drive for the card slot over the network file names consisting...

Страница 255: ...communication occurs on a peer to peer basis i e all clients in with the same SSID network name communicate directly with each other No wireless router is required This machine does not support ad hoc...

Страница 256: ...set for encryption B Bonjour A service built into Mac OS X operating system to detect the connectable devices on a network automatically C Channel Frequency channel for wireless communication In the i...

Страница 257: ...be influenced by the connected apparatus At the maximum transfer rate of 600 Mbps it is possible to communicate with multiple computer terminals within a dozen or so metre radius Compatible with 802 1...

Страница 258: ...resented such as a network name or a wireless router name SSID distinguishes one wireless LAN from another to prevent interference The printer and all clients on a wireless LAN must use the same SSID...

Страница 259: ...s network name Stealth In the stealth mode a wireless router hides itself by not broadcasting its SSID The client must specify the SSID set to the wireless router to detect it The stealth mode is call...

Страница 260: ...and rebroadcasts it Required in an infrastructure network WPA Security framework announced by the Wi Fi Alliance in October 2002 The security has been strengthened more than WEP Authentication WPA de...

Страница 261: ...l value WPS Wi Fi Protected Setup WPS is a standard for easy and secure establishment of a wireless network There are 2 primary methods used in the Wi Fi Protected Setup PIN entry a mandatory method o...

Страница 262: ...s you should set a network key WEP or WPA WPA2 to the wireless router to encrypt wireless transmission Wireless communication with a product that does not comply with the Wi Fi standard cannot be guar...

Страница 263: ...oints to Successful Printing Be Sure to Check Paper Settings before Printing Be Sure to Set Cassette Paper Information after Loading Paper Canceling a Print Job Storing Printed Images Key to Enjoying...

Страница 264: ...ing quality The machine has the function to automatically clean the ink jet nozzles to prevent clogging In the cleaning procedure used ink for nozzle cleaning is limited to a small amount Does black a...

Страница 265: ...ies of paper or performing borderless printing the area where papers go through may get smeared with ink Clean the inside of your machine with Bottom Plate Cleaning Check how to load the paper correct...

Страница 266: ...hotos at optimal quality and paper suitable for documents Each media type has specific preset settings how ink is used and sprayed distance from nozzles etc that allow you to print to that type with o...

Страница 267: ...achine has a function that detects whether the information set for the paper loaded in the cassette matches the paper settings Before printing make paper settings in accordance with the cassette paper...

Страница 268: ...press the ON button If you press the ON button while printing is in progress the print data sent from the computer queues in the machine and you may not be able to continue to print Press the Stop bu...

Страница 269: ...d Images Store printed images in albums clear photo sleeves or glass frames to protect them from direct exposure to air Note Storing printed images without sufficient drying may cause blurring or disc...

Страница 270: ...prevent from drying If you unplug the power cord from the wall outlet before the POWER lamp is turned off the print head will not be capped properly and this will cause drying or clogging When unplugg...

Страница 271: ...ne with its bottom facing down Mark also with FRAGILE or HANDLE WITH CARE 1 Turn the machine off 2 Confirm that the POWER lamp is off and unplug the power cord Important Do not unplug the machine whil...

Страница 272: ...272...

Страница 273: ...y orders Certificates of deposit Postage stamps canceled or uncanceled Identifying badges or insignias Selective service or draft papers Checks or drafts issued by governmental agencies Motor vehicle...

Страница 274: ...o 90 RH no condensation The performance of the printer may be reduced under certain temperature and humidity conditions Recommended conditions Temperature 59 to 86 F 15 to 30 C Humidity 10 to 80 RH no...

Страница 275: ...resolution max 19200 x 19200 dpi 2 1 Optical Resolution represents the maximum sampling rate based on ISO 14473 2 Increasing the scanning resolution will limit the maximum possible scanning area Grad...

Страница 276: ...report after every 20 transactions Sequential broadcasting max 21 destinations Rejected numbers max 10 destinations Network Specifications Communication protocol TCP IP Wireless LAN Supported Standard...

Страница 277: ...inting Capability Apple AirPrint Google Cloud Print PIXMA Cloud Link An internet connection is required to use all the Online Manual Windows Operation can only be guaranteed on a computer with Windows...

Страница 278: ...In an in house network environment the 5222 port must be open Contact the network administrator for details Information in this guide is subject to change without notice 278...

Страница 279: ...tools may not be available depending on the printer you are using operation panel of the printer IJ Network Tool printer information screen displayed on some Canon application software When you chang...

Страница 280: ...series P series iP series iX series iB series PRO series MG series Model name Card slot MG7530F MG7500 MG7100 MG6730 MG6600 MG6500 MG6400 MG5600 MG5500 MG3500 MG2900 MG2500 MG2400 MX series Model nam...

Страница 281: ...ies Model name Card slot E610 E560 E480 E460 E400 P series Model name Card slot P200 iP series Model name Card slot iP8700 iP2800 iP110 iX series Model name Card slot iX6800 iX6700 iB series Model nam...

Страница 282: ...PRO 10S 282...

Страница 283: ...Printing Printing from a Computer Printing Using the Operation Panel of the Machine Paper setting for Printing 283...

Страница 284: ...Printing from a Computer Printing with Application Software that You are Using Printer Driver 284...

Страница 285: ...ation Software that You are Using Printer Driver Printing with Easy Setup Basic Various Printing Methods Changing the Print Quality and Correcting Image Data Overview of the Printer Driver Updating th...

Страница 286: ...rned on 2 Load paper on the printer 3 Select the printer Select your model from the Printer list in the Print Dialog Note Click Show Details to switch the Setup window to the detailed display 4 Select...

Страница 287: ...edia from the pop up menu 6 Select the media type For Media Type select the same paper type loaded in the printer 7 Select the print quality For Print Quality select High Standard or Draft according t...

Страница 288: ...ection click Save Current Settings as Preset to register the specified settings Note If the paper settings on the print dialog differ from the cassette paper information registered on the printer an e...

Страница 289: ...Paper Settings on the Printer Driver and the Printer Paper Size 289...

Страница 290: ...papers Photo Printing Media name Model No Media Type in the printer driver Cassette paper information registered on the printer Photo Paper Plus Glossy II PP 201 Photo Paper Plus Glossy II PlusGlossy...

Страница 291: ...l help you achieve the best print results You can use the following paper sizes on this printer Paper Size in the printer driver Cassette paper information registered on the printer US Letter Letter U...

Страница 292: ...Setting the Number of Copies and Printing Order Setting the Stapling Margin Execute Borderless Printing Scaling the Printing to Fit the Paper Size Scaled Printing Page Layout Printing Setting Paper Di...

Страница 293: ...rint Dialog 2 Select Paper Handling from the pop up menu 3 Check the Collate pages check box when you are specifying multiple copies in the Copies box Check the Collate pages check box to print all th...

Страница 294: ...has the same function specify the settings on the printer driver However if the print results are not acceptable specify the function settings on the application software When you specify the number...

Страница 295: ...ary set the Margin width and select a stapling position from the Stapling Side list Note The printer automatically reduces the print area depending on the staple position margin 3 Complete the setup C...

Страница 296: ...The procedure for performing borderless printing is as follows Setting Borderless Printing 1 Select the size of the paper for borderless printing Select XXX borderless from the Paper Size in the Prin...

Страница 297: ...rinted depending on the size of the media used In this case crop the image data with an application software according to the paper size When scaled printing or page layout printing is enabled you can...

Страница 298: ...Note When the Amount of Extension slider is set to the leftmost position image data will be printed in the full size 298...

Страница 299: ...andling from the pop up menu 3 Set the print paper size Check the Scale to fit paper size check box Then from the Destination Paper Size pop up menu select the paper size that is actually loaded in th...

Страница 300: ...Click Print When you execute print the document will be enlarged or reduced to fit to the page size 300...

Страница 301: ...nd click OK Note Depending on the Scale value that you set an error message may be displayed 3 Complete the setup On the Print Dialog click Print When you execute print the document will be printed wi...

Страница 302: ...original you print on one page In Pages per Sheet specify the number of page you print on one page 3 If necessary set the following items Layout Direction To change the page placement order select an...

Страница 303: ...4 Complete the setup Click Print When you execute print the specified number of pages will be arranged on each sheet of paper in the specified order 303...

Страница 304: ...tering the custom paper size Click OK The custom size is registered Important If the application software that created the document has a function for specifying height and width values use the applic...

Страница 305: ...about the cassette paper information to be registered on the printer see the following Paper Settings on the Printer Driver and the Printer Media Type Paper Settings on the Printer Driver and the Pri...

Страница 306: ...Color Correction Optimal Photo Printing of Image Data Adjusting Colors with the Printer Driver Printing with ICC Profiles Specifying an ICC Profile from the Application Software Printing with ICC Prof...

Страница 307: ...or Print Quality 3 Setting the print quality level Move the Quality slider to select the print quality level 4 Complete the setup Click Print When you execute print the image data is printed with the...

Страница 308: ...m the pop up menu on the Print Dialog 2 Set grayscale printing Check the Grayscale Printing check box 3 Complete the setup Click Print When you execute print the document is converted to grayscale dat...

Страница 309: ...elect Color Matching from the pop up menu of the Print Dialog 2 Select color correction Select the item below that matches your purpose ColorSync Perform color correction using ColorSync Canon Color M...

Страница 310: ...Printing with ICC Profiles Specifying an ICC Profile from the Application Software Printing with ICC Profiles Specifying an ICC Profile from the Printer Driver 310...

Страница 311: ...ftware to be used There are two typical printing methods Check the color space Adobe RGB or sRGB of the image data and the application software to be used and then select the printing method suited to...

Страница 312: ...ng colors with the printer driver is as follows 1 Select Color Matching from the pop up menu of the Print Dialog 2 Select color correction Select Canon Color Matching 3 Set the other items From the po...

Страница 313: ...image data Even if you print using a printing ICC profile that you created yourself from your application software be sure to select color management items from your application software For instruct...

Страница 314: ...Adjusting Brightness Adjusting Intensity Adjusting Contrast 314...

Страница 315: ...lect ColorSync You can leave Profile set to Automatic Important If you choose a Profile setting other than Automatic the printer will not be able to print with the correct colors 3 Complete the setup...

Страница 316: ...all colors are more uniform No adjustment Adjust color balance The procedure for adjusting color balance is as follows 1 Select Color Options from the pop up menu of the Print Dialog 2 Adjust color ba...

Страница 317: ...lity Media the color balance Cyan Magenta Yellow appear grayed out and are unavailable If you select ColorSync for Color Matching then the color balance Cyan Magenta Yellow appear grayed out and are u...

Страница 318: ...ed Dark is selected The procedure for adjusting brightness is as follows 1 Select Color Options from the pop up menu of the Print Dialog 2 Specify the brightness Select Light Normal or Dark for Bright...

Страница 319: ...Related Topics Setting the Print Quality Level Custom Specifying Color Correction Adjusting Color Balance Adjusting Intensity Adjusting Contrast 319...

Страница 320: ...Print Dialog 2 Adjust intensity Moving the Intensity slider to the right intensifies darkens the colors and moving the slider to the left dilutes brightens the colors You can also directly enter a va...

Страница 321: ...Related Topics Setting the Print Quality Level Custom Specifying Color Correction Adjusting Color Balance Adjusting Brightness Adjusting Contrast 321...

Страница 322: ...ct Color Options from the pop up menu of the Print Dialog 2 Adjust the contrast Moving the Contrast slider to the right increases the contrast and moving the slider to the left decreases the contrast...

Страница 323: ...Related Topics Setting the Print Quality Level Custom Specifying Color Correction Adjusting Color Balance Adjusting Brightness Adjusting Intensity 323...

Страница 324: ...Window Page Setup Dialog Print Dialog Quality Media Color Options Borderless Printing Margin Canon IJ Printer Utility Opening the Canon IJ Printer Utility Maintenance of this Printer Display the Prin...

Страница 325: ...to the printer Because different models support different print data formats you need a printer driver for the specific model you are using Using Help of the Printer Driver You can display Help funct...

Страница 326: ...e Setup Dialog Use this procedure to set the page paper settings before printing 1 Select Page Setup from the File menu of the application software The Page Setup Dialog opens Opening the Print Dialog...

Страница 327: ...and then select the following items Page Attributes Set the paper size or scaled printing Save as Default You can save the attributes of the displayed page as the default settings Format For Select th...

Страница 328: ...printed Note You can set collated printing by choosing Paper Handling from the pop up menu Pages You can set the range of pages to be printed Paper Size Select the size of the paper to be used for pri...

Страница 329: ...et basic print settings that match the printer Color Options You can adjust the print colors as you desire Borderless Printing You can adjust the amount of document that extends off the paper when per...

Страница 330: ...nd the purpose When one of the radio buttons is selected the appropriate quality will be set automatically High Gives priority to print quality over printing speed Standard Prints with average speed a...

Страница 331: ...Related Topics Setting the Print Quality Level Custom Printing a Color Document in Monochrome 331...

Страница 332: ...s produced by color adjustment When you want to display the sample image with a color pattern check this check box When you want to display the sample image with one that you selected with Sample Type...

Страница 333: ...differences between the light and dark portions of images greater and more distinct increase the contrast On the other hand to make the differences between the light and dark portions of images small...

Страница 334: ...borderless printing is performed Amount of Extension Use the Amount of Extension slider to adjust the amount of the document that extends off the paper Moving the slider to the right makes the amount...

Страница 335: ...value between 0 inch 0 mm to 1 2 inches 30 mm Stapling Side Specify the stapling side Long side stapling Left Long side stapling Right Select this option to staple the long side of the paper Choose le...

Страница 336: ...perate the power of this printer from the printer driver Ink Level Information Check the remaining ink levels Ink Cartridge Settings Selects the FINE cartridge you use for printing Quiet Settings You...

Страница 337: ...eck Pattern Aligning the Print Head Position from Your Computer Checking the Ink Status from Your Computer Setting the Ink Cartridge to be Used Managing the Printer Power Reducing the Printer Noise Ch...

Страница 338: ...ollow the steps below 1 Open System Preferences and select Printers Scanners Print Scan 2 Start the Canon IJ Printer Utility Select your model from the printer list and click Options Supplies Click Op...

Страница 339: ...e Your Computer to Print a Nozzle Check Pattern Aligning the Print Head Position from Your Computer Checking the Ink Status from Your Computer Setting the Ink Cartridge to be Used Managing the Printer...

Страница 340: ...nters Scanners Print Scan To display the printing status screen select the name of your printer model from the printer list and then click Open Print Queue 2 Checking the printing status You can check...

Страница 341: ...umes printing the specified document Displays the print job information Stops printing all documents Displayed only when printing of all documents is being stopped and resumes printing all documents N...

Страница 342: ...ng Delete unnecessary print jobs from the print status check screen 1 Open System Preferences and select Printers Scanners Print Scan 2 Select your model and then click Open Print Queue The print stat...

Страница 343: ...computers Duplex Printing Booklet Printing Tiling Poster Printing Depending on the application software that you are using a preview may not be displayed on the left side of the Print dialog Do not st...

Страница 344: ...Updating the Printer Driver Obtaining the Latest Printer Driver Delete the Unnecessary Canon IJ Printer from the Printer List Before Installing the Printer Driver Installing the Printer Driver 344...

Страница 345: ...olved problems may be solved You can access our website and download the latest printer driver for your model Important You can download the printer driver for free but any Internet access charges inc...

Страница 346: ...nless you are logged in as a user with the administrative right For information about an administrative user refer to the user s manual for the Mac OS 1 Open System Preferences and select Printers Sca...

Страница 347: ...as a user who has the administrator account The installer will prompt you to enter the name and password of the administrative user When multiple users are using Mac OS log on with the account of the...

Страница 348: ...Agreement you cannot install this software 4 Selecting the install destination If necessary select where you want to install the printer driver and then click Continue 5 Executing the installation Cli...

Страница 349: ...Printing Using the Operation Panel of the Machine Printing Template Forms Such As Lined Paper or Graph Paper 349...

Страница 350: ...vailable Notebook paper You can select three line spacing formats Setting on the LCD Notebook paper 1 8 mm spacing Notebook paper 2 7 mm spacing Notebook paper 3 6 mm spacing Note You cannot print Not...

Страница 351: ...chedule Monthly schedule You can print a monthly schedule form Setting on the LCD Monthly schedule Printing template forms Print template form following the procedure below 1 Make sure that the machin...

Страница 352: ...LCD indicates the current setting 7 Make sure that Plain paper is selected then press the OK button 8 Use the button or the Numeric buttons to specify the number of copies 9 Press the OK button to st...

Страница 353: ...e proper combination of paper settings you can specify by the printer driver or on the LCD Paper Settings on the Printer Driver and the Printer Media Type Paper Settings on the Printer Driver and the...

Страница 354: ...ing for printing or copying is B5 and the cassette paper information registered to the machine is A4 you load B5 sized paper in the cassette before you start printing or copying The cassette paper inf...

Страница 355: ...l of the machine the message which prevents misprinting is enabled by default To change the setting for printing or copying using the operation panel of the machine Cassette settings When you print us...

Страница 356: ...Copying Making Copies Basic Reducing or Enlarging a Copy About Special copy Menu Collated Copying 356...

Страница 357: ...ss the COPY button to reset the magnification to 100 6 Use the button or the Numeric buttons to specify the number of copies 7 Press the Color button for color copying or the Black button for black wh...

Страница 358: ...u add the copying job the number of copies or the settings such as the page size or media type cannot be changed If you press the Stop button while reserve copying is in progress the screen to select...

Страница 359: ...in combination with the setting of other setting items or the copy menu The settings of the page size media type etc are retained even if the machine is turned off Enlarge Reduce Select the reduction...

Страница 360: ...ect High to copy in grayscale Grayscale renders tones in a range of grays instead of black or white 4 on 1 layout Select the layout when copying four original pages onto a single sheet of paper by red...

Страница 361: ...ratio to match the size of your original document and printing paper then press the OK button Magnification You can specify the copy ratio as a percentage to reduce or enlarge copies Use the button or...

Страница 362: ...y two original pages onto a single sheet of paper by reducing each image Copying Two Pages to Fit onto a Single Page 4 on 1 copy You can copy four original pages onto a single sheet of paper by reduci...

Страница 363: ...opying is selected the LCD displays the following message 1 Use the button to select the page size then press the OK button 2 Use the button to select the media type then press the OK button 7 Load th...

Страница 364: ...ment has been loaded in the ADF The machine starts scanning the next sheet of document automatically after one sheet of document finishes being scanned Note If Memory is full appears on the LCD when s...

Страница 365: ...ayout When Layout 4 is selected for 4 on 1 layout 1 Make sure that the machine is turned on 2 Load paper 3 Press the COPY button The Copy standby screen is displayed 4 Press the Menu button The Copy m...

Страница 366: ...the document has been loaded on the platen glass When the machine finishes scanning the first to the third page the message below is displayed If you have the next page to scan load it on the platen g...

Страница 367: ...en glass Note When you use this function load the original on the platen glass 8 Use the button or the Numeric buttons to specify the number of copies Change the print settings as necessary Setting It...

Страница 368: ...or a media type setting that cannot be used in borderless copying is selected the LCD displays the following message 1 Use the button to select the page size then press the OK button 2 Use the button...

Страница 369: ...page You can change the width to be cropped from the borders of the original image as needed However the cropped area will be larger if the extension amount is large For details Extended copy amt For...

Страница 370: ...In addition you can copy originals on both sides of paper When ON is selected When OFF is selected Note When you use this function load the original in the ADF The number of pages the machine can read...

Страница 371: ...Scanning Scanning from a Computer Scanning from the Operation Panel of the Machine 371...

Страница 372: ...Scanning from a Computer Scanning with IJ Scan Utility Scanning with Scanner Driver Useful Information on Scanning Placing Items When Scanning from a Computer 372...

Страница 373: ...s Scanning Photos Scanning with Favorite Settings Scanning Items Larger than the Platen Image Stitch Scanning Multiple Items at One Time Scanning Multiple Documents at One Time from the ADF Auto Docum...

Страница 374: ...etter readability or Photo to scan with settings suitable for photos according to the item type or your purpose Note Refer to IJ Scan Utility Main Screen for details on the IJ Scan Utility main screen...

Страница 375: ...Important Some functions are available only when My Image Garden is installed Note Refer to Settings Dialog for how to set the applications to integrate with 375...

Страница 376: ...rom USB connection to network connection set up the network environment from IJ Scan Utility Network Scan Settings From the Go menu of Finder select Applications then double click the Canon Utilities...

Страница 377: ...or printer is turned on 2 Place items on the platen or ADF of your scanner or printer Placing Items When Scanning from a Computer 3 Start IJ Scan Utility 4 Click Auto Scanning starts Note Click Cancel...

Страница 378: ...ttings then set the paper size resolution etc in the Settings Document Scan dialog as required When setting is completed click OK 4 Click Document Scanning starts Note Click Cancel to cancel the scan...

Страница 379: ...k Settings then set the paper size resolution etc in the Settings Photo Scan dialog as required When setting is completed click OK 4 Click Photo Scanning starts Note Click Cancel to cancel the scan Sc...

Страница 380: ...ttings Custom Scan dialog as required When setting is completed click OK Note Once the settings are made you can scan with the same settings from the next time 3 Place the item on the platen Placing I...

Страница 381: ...e The following explains how to scan from the item to be placed on the left side 1 Start IJ Scan Utility 2 Click Settings then set the item type resolution etc in the Settings Scan and Stitch dialog a...

Страница 382: ...ide of the screen face down on the platen 7 Click Start Scanning Image 1 The first item is scanned and appears in 1 Note Click Cancel to cancel the scan 8 Place the item that is to be displayed on the...

Страница 383: ...appears in 2 Note Click Cancel to cancel the scan 10 Adjust the scanned images as required Use the Toolbar to rotate or zoom in out or drag the images to adjust their positions Note Select the Adjust...

Страница 384: ...the top of the screen then click Delete The selected image is deleted allowing you to scan the item again 11 Click Save The combined image is saved Note Refer to Image Stitch Window for details on th...

Страница 385: ...Items printed on white paper hand written documents business cards etc Thin items Thick items Using Auto Scan Whether there are multiple items or not is detected automatically Click Auto in the IJ Sca...

Страница 386: ...5 Select Select Source according to the items to be scanned 6 Select Auto scan for Paper Size then click OK 386...

Страница 387: ...can Dialog Settings Photo Scan Dialog Settings Custom Scan Dialog 7 Click Custom Multiple items are scanned at one time Note Click Cancel to cancel the scan Scanned images are saved in the folder set...

Страница 388: ...an using the scanner driver Using Auto Scan The item type is detected automatically Click Auto in the IJ Scan Utility main screen and scan Easy Scanning with Auto Scan Not Using Auto Scan In the Setti...

Страница 389: ...To scan only the front side of each document select Document ADF Platen or Document ADF Simplex To scan the front side then the back side of each document select Document ADF Manual Duplex 6 Set the c...

Страница 390: ...ding Side When setting is completed click OK The IJ Scan Utility main screen appears Note Refer to the following pages for details on the setting items in the Settings dialog Settings Document Scan Di...

Страница 391: ...inding Side in Document Scan Orientation Settings Place the documents after rotating the output documents 180 degrees When Short edge is Selected for Binding Side in Document Scan Orientation Settings...

Страница 392: ...Scanned images are saved in the folder set for Save in in the corresponding Settings dialog displayed by clicking Settings In each Settings dialog you can also make advanced scan settings 392...

Страница 393: ...heck the scan results before saving when scanned using Auto scan or the operation panel Note The screens for scanning photos are used as examples in the following descriptions 1 Start IJ Scan Utility...

Страница 394: ...Photo Scan Dialog Settings Custom Scan Dialog Settings Scan and Stitch Dialog Settings Driver Dialog 5 Click Photo Scanning starts When scanning is completed the Save Settings dialog appears Note Clic...

Страница 395: ...Note The default save folder is the Pictures folder 7 Click OK Scanned images are saved according to the settings 395...

Страница 396: ...e mail Note The screens for scanning photos are used as examples in the following descriptions 1 Start IJ Scan Utility 2 Click Settings The Settings dialog appears 3 Click Photo Scan 4 Select Attach t...

Страница 397: ...from the pop up menu If None Attach Manually is selected manually attach scanned and saved images to e mail 5 Click OK The IJ Scan Utility main screen appears Note Refer to the following pages for de...

Страница 398: ...to cancel the scan The scanned images are saved according to the settings made in the Settings dialog When the Check scan results checkbox is selected in the Settings dialog the Save Settings dialog...

Страница 399: ...screens for scanning documents are used as examples in the following descriptions 1 Start IJ Scan Utility 2 Click Settings The Settings dialog appears 3 Click Document Scan Note For Resolution only 30...

Страница 400: ...pears in your text editor Text to be displayed is based on Document Language in the Settings General Settings dialog Select the language you want to extract in Document Language and scan You can add t...

Страница 401: ...o cancel the scan Text displayed in your text editor is for guidance only Text in the image of the following types of documents may not be detected correctly Documents containing text with font size o...

Страница 402: ...alog Settings Photo Scan Dialog Settings Custom Scan Dialog Settings Scan and Stitch Dialog Settings Driver Dialog Settings Save to PC Auto Dialog Settings Save to PC Photo Dialog Settings Save to PC...

Страница 403: ...Settings Auto Scan dialog Document Scans items as documents and saves them to a computer Scan save settings and the response after scanning can be specified in the Settings Document Scan dialog Photo...

Страница 404: ...Instructions Opens this guide Settings Displays the Settings dialog in which you can specify the scan save settings and the response after scanning 404...

Страница 405: ...mputer Tab You can specify how to respond when scanning from IJ Scan Utility or My Image Garden Settings Auto Scan Dialog Settings Document Scan Dialog Settings Photo Scan Dialog Settings Custom Scan...

Страница 406: ...he Scanning from the Operation Panel tab does not appear General Settings Tab You can set the product to use file size restriction on e mail attachment language to detect text in images and folder in...

Страница 407: ...gazines newspapers documents and BD DVD CD Important To scan the following types of items specify the item type and size in the Settings Document Scan dialog Settings Photo Scan dialog or Settings Cus...

Страница 408: ...you save a file the date and four digits are appended to the set file name in the _20XX0101_0001 format Note When you select the Save to a subfolder with current date checkbox the date and four digits...

Страница 409: ...n the folder specified in Save in 3 Application Settings Area Open with an application Select this when you want to enhance or correct the scanned images You can specify the application from the pop u...

Страница 410: ...Defaults You can restore the settings in the displayed screen to the default settings 410...

Страница 411: ...ings Area 3 Application Settings Area Important When the Settings dialog is displayed from the Scan screen of My Image Garden the setting items for Application Settings do not appear 1 Scan Options Ar...

Страница 412: ...default settings Resolution Select the resolution of the item to be scanned The higher the resolution value the more detail in your image Resolution Note Only 300 dpi or 400 dpi can be set when Start...

Страница 413: ...longer than usual when you enable Reduce moire Reduce gutter shadow Reduce gutter shadow platen Reduces gutter shadows that appear between pages when scanning open booklets Important This function is...

Страница 414: ...effects italics or hand written text Documents with patterned backgrounds In that case select the Check scan results checkbox and rotate the image in the Save Settings dialog 2 Save Settings Area File...

Страница 415: ...elected in Data Format Create a PDF file that supports keyword search Select this checkbox to convert text in images into text data and create PDF files that support keyword search Important This appe...

Страница 416: ...u can specify the folder from the pop up menu Attach to e mail Select this when you want to send e mails with the scanned images attached You can specify the e mail client you want to start from the p...

Страница 417: ...plication Settings Area Important When the Settings dialog is displayed from My Image Garden the setting items for Application Settings do not appear 1 Scan Options Area Select Source Photo is selecte...

Страница 418: ...the date and four digits are appended to the set file name in the _20XX0101_0001 format Note When you select the Save to a subfolder with current date checkbox the date and four digits are appended t...

Страница 419: ...Open with an application Select this when you want to enhance or correct the scanned images You can specify the application from the pop up menu Send to an application Select this when you want to us...

Страница 420: ...Defaults You can restore the settings in the displayed screen to the default settings 420...

Страница 421: ...cation Settings Area Important When the Settings dialog is displayed from the Scan screen of My Image Garden the setting items for Application Settings do not appear 1 Scan Options Area Select Source...

Страница 422: ...ext in the image into text data after scanning specify Select Source instead of selecting Auto To reduce moire set Select Source to Magazine or select the Reduce moire checkbox in Image Processing Set...

Страница 423: ...ct Source When Select Source is Auto Apply recommended image correction Applies suitable corrections automatically based on the item type Important The color tone may differ from the source image due...

Страница 424: ...portant This function is available only when scanning from the platen Note Click Driver in the IJ Scan Utility main screen and scan to correct gutter shadows when scanning non standard size items or s...

Страница 425: ...s Area File Name Enter the file name of the image to be saved When you save a file the date and four digits are appended to the set file name in the _20XX0101_0001 format Note When you select the Save...

Страница 426: ...rt text in images into text data and create PDF files that support keyword search Important This appears only when PDF PDF Multiple Pages or Auto is selected in Data Format Note PDF files that are sea...

Страница 427: ...l Select this when you want to send e mails with the scanned images attached You can specify the e mail client you want to start from the pop up menu Start OCR Select this when you want to convert tex...

Страница 428: ...Area 2 Save Settings Area 3 Application Settings Area Important When the Settings dialog is displayed from the Scan screen of My Image Garden the setting items for Application Settings do not appear 1...

Страница 429: ...e patterns Printed materials are displayed as a collection of fine dots Moire is a phenomenon where uneven gradation or a stripe pattern appears when such photos or pictures printed with fine dots are...

Страница 430: ...heckbox to convert text in images into text data and create PDF files that support keyword search Important This appears only when PDF or PDF Multiple Pages is selected in Data Format Note PDF files t...

Страница 431: ...on from the pop up menu Send to a folder Select this when you also want to save the scanned images to a folder other than the one specified in Save in You can specify the folder from the pop up menu D...

Страница 432: ...for Application Settings do not appear 1 Save Settings Area File Name Enter the file name of the image to be saved When you save a file the date and four digits are appended to the set file name in t...

Страница 433: ...ormally select this setting High Compresses the file size when saving allowing you to reduce the load on your network server Important This appears only when PDF or PDF Multiple Pages is selected in D...

Страница 434: ...ou to browse or organize images You can specify the application from the pop up menu Send to a folder Select this when you also want to save the scanned images to a folder other than the one specified...

Страница 435: ...ges to a computer after scanning them from the operation panel by automatically detecting the item type 1 Scan Options Area 2 Save Settings Area 3 Application Settings Area 1 Scan Options Area Paper S...

Страница 436: ...d from the pop up menu then click Add in the displayed dialog and specify the destination folder The default save folder is the Pictures folder Data Format Auto is selected The following data formats...

Страница 437: ...You can specify the application from the pop up menu Send to an application Select this when you want to use the scanned images as they are in an application that allows you to browse or organize ima...

Страница 438: ...anel 1 Scan Options Area 2 Save Settings Area 3 Application Settings Area 1 Scan Options Area Paper Size Set from the operation panel Resolution Set from the operation panel Image Processing Settings...

Страница 439: ...directly in the folder specified in Save in 3 Application Settings Area Open with an application Select this when you want to enhance or correct the scanned images You can specify the application fro...

Страница 440: ...saving images to a computer as documents after scanning them from the operation panel 1 Scan Options Area 2 Save Settings Area 3 Application Settings Area 1 Scan Options Area Paper Size Set from the o...

Страница 441: ...es printed with fine dots are scanned Note Scanning takes longer than usual when you enable Reduce moire Reduce gutter shadow platen Reduces gutter shadows that appear between pages when scanning open...

Страница 442: ...ts with patterned backgrounds 2 Save Settings Area File Name Enter the file name of the image to be saved When you save a file the date and four digits are appended to the set file name in the _20XX01...

Страница 443: ...tion Select this when you want to use the scanned images as they are in an application that allows you to browse or organize images You can specify the application from the pop up menu Send to a folde...

Страница 444: ...elect the desired product from the list In addition for network connection select one with Network after the product name Note With network connection Select appears on the right side of the product n...

Страница 445: ...les Displays the folder in which to save images temporarily Click Browse to specify the destination folder Instructions Opens this guide Defaults You can restore the settings in the displayed screen t...

Страница 446: ...ens this guide Scan from Operation Panel Settings The Scan from Operation Panel Settings screen appears You can select up to three scanners and printers in total for scanning from the operation panel...

Страница 447: ...try selecting again The scanner driver is installed Network settings of your scanner or printer is completed after installing the scanner driver Network communication between your scanner or printer a...

Страница 448: ...Buttons 2 Scan Results Area 3 Save Settings Area 1 Preview Operation Buttons Rotate Left 90 Rotate Right 90 Rotates scanned images 90 degrees counter clockwise or clockwise Select the image you want t...

Страница 449: ...by clicking Photo in the IJ Scan Utility main screen The Enable large image scans checkbox is selected in Save Settings of the Settings Driver dialog Start OCR is selected in Application Settings of...

Страница 450: ...s that are searchable in the language selected in Document Language on the General Settings tab of the Settings dialog are created Save to a subfolder with current date Select this checkbox to create...

Страница 451: ...y depending on the select source and view 1 Settings and Operation Buttons Select Output Size B4 B5 x 2 Scans the left and right halves of a B4 size item separately A3 A4 x 2 Scans the left and right...

Страница 452: ...ond item Adjust cropping frames You can adjust the scan area in preview If no area is specified the image of the size selected in Select Output Size will be saved If an area is specified only the imag...

Страница 453: ...l clicking the Preview area reduces the displayed image Rotate Left Rotates the preview image 90 degrees counter clockwise Rotate 180 Rotates the preview image 180 degrees Rotate Right Rotates the pre...

Страница 454: ...rt Scanning Image 1 The image is scanned in the direction specified in Scan Direction and 2 appears next to it After scanning the second item by clicking Start Scanning Image 2 The two scanned images...

Страница 455: ...orrections and Color Adjustments for details on the setting procedures for image correction and color adjustment Refer to General Notes Scanner Driver for the scanner driver Refer to Updating the Scan...

Страница 456: ...mage correction or color adjustment is applied Image Adjustment When Image Adjustment is set the brightness of the specified portion of the image is optimized Images can be adjusted according to the a...

Страница 457: ...effective for some types of photos Note It is recommended that you select None when scanning printed materials Fading Correction Use this function to correct photos that have faded with time or have a...

Страница 458: ...recommended that you normally select this setting High Select this when the effect level is too weak with the medium setting Important Do not place objects that weigh 4 4 lbs 2 0 kg or more on the pla...

Страница 459: ...harp Mask If Unsharp Mask is enabled some moire effects may remain Note Scanning takes longer than usual when you enable Descreen Reduce Show through Use this function to reduce show through in duplex...

Страница 460: ...ter and reconnect it 3 Turn on the machine Do not connect two or more scanners or multifunction printers with scanner function to the same computer simultaneously If multiple scanning devices are conn...

Страница 461: ...Updating the Scanner Driver Obtaining the Latest Scanner Driver Before Installing the Scanner Driver Installing the Scanner Driver 461...

Страница 462: ...lve some problems you have experienced To obtain the scanner driver access our website and download the scanner driver for your model Important Scanner driver can be downloaded for free however Intern...

Страница 463: ...uter You will be required to enter the name and password of the user with administrator privileges If you have multiple user accounts on Mac OS X log in with the first administrator account created Im...

Страница 464: ...software If an authentication screen appears enter the administrator s name and password then click Install Software 4 Complete the installation The scanner driver is installed Set up the network envi...

Страница 465: ...Useful Information on Scanning Adjusting Cropping Frames in the Image Stitch Window Resolution Data Formats 465...

Страница 466: ...you select the Adjust cropping frames checkbox an active cropping frame is automatically specified around the image in the Preview area You can drag the cropping frame to specify the area When you per...

Страница 467: ...hoto Copying Printing Color 300 dpi Creating a postcard Color 300 dpi Saving to a computer Color 300 dpi Using on a website or attaching to e mail Color 150 dpi Black and white photo Saving to a compu...

Страница 468: ...every time they are saved and cannot be returned to their original state JPEG is not available for black and white images TIFF Standard File Extension tif A data format featuring a relatively high co...

Страница 469: ...ing by specifying the paper size in IJ Scan Utility or the scanner driver align an upper corner of the item with the corner at the arrow alignment mark of the platen Photos that have been cut to vario...

Страница 470: ...0 degrees or less are corrected automatically Important Refer to Loading Originals for your model from Home of the Online Manual for details on the portions in which items cannot be scanned Placing Do...

Страница 471: ...471...

Страница 472: ...ding Scanned Data to the Computer Using the Operation Panel of the Machine Basic Setting Items for Scanning Using the Operation Panel of the Machine Network Scan Settings Selecting a Response to Comma...

Страница 473: ...Canon IJ Scan Utility For details on settings of Canon IJ Scan Utility Settings Dialog Follow the procedure below to forward scanned data to the computer 1 Make sure that the machine is turned on 2 P...

Страница 474: ...orwarded in the optimized size resolution and data format Important Load originals properly according to their type otherwise some originals may not be scanned properly For details on how to load the...

Страница 475: ...lect JPEG or TIFF for Data format the machine starts scanning and scanned data is forwarded to the computer When you select PDF or Compact PDF for Data format the confirmation screen asking you if you...

Страница 476: ...In addition you can edit or print the scanned images using the compatible application software to make better use of them Scanning Photos and Documents 476...

Страница 477: ...ype or the destination to save the data The settings of the scan size resolution and data format are retained even if the machine is turned off When you forward the scanned data to the computer you ca...

Страница 478: ...Scan resolution Select the resolution for scanning Ex 478...

Страница 479: ...ection Setting for Scanning with IJ Scan Utility In the IJ Scan Utility main screen select your scanner or printer that is connected to a network 1 Start IJ Scan Utility 2 Select Canon XXX series Netw...

Страница 480: ...screen reappears You can scan from the operation panel Note If the Bonjour service name of your scanner or printer does not appear or cannot be selected check the following click OK to close the scree...

Страница 481: ...n scanning from the operation panel Note The screens for scanning with Auto Scan from the operation panel are used as examples in the following descriptions 1 Start IJ Scan Utility 2 Click Settings Th...

Страница 482: ...Settings Save to PC Auto Dialog Settings Save to PC Photo Dialog Settings Save to PC Document Dialog 4 Set Scan Options 5 Specify the file name and other settings in Save Settings 482...

Страница 483: ...6 Select the application you want to start after scanning in Application Settings 7 Click OK 483...

Страница 484: ...The responses will be executed according to the specified settings when you start scanning from the operation panel 484...

Страница 485: ...Faxing Preparing for Faxing Sending Faxes Using the Operation Panel of the Machine Registering Recipients Receiving Faxes Other Useful Fax Functions 485...

Страница 486: ...t depends upon your telephone line or telephone Setting Up the Machine The machine must be set up depending on your telephone line and use of the faxing function Follow the procedure below to set up t...

Страница 487: ...llel during fax transmission or reception the fax image may be corrupted or a communication error may occur Such services as Caller ID etc may not operate properly on the telephone If you cannot avoid...

Страница 488: ...t the B T adapter to the external device jack Connecting Various Lines This section introduces how to connect various lines These are examples and could not be guaranteed to suit every connecting cond...

Страница 489: ...r is not built in to the modem do not branch the telephone line before the splitter wall side And also do not connect splitters in parallel The machine may not be able to operate properly Note When co...

Страница 490: ...manually in China Setting the Telephone Line Type Manually in China Note Telephone line type will not appear in countries or regions where Rotary pulse is not supported You can print USER S DATA LIST...

Страница 491: ...elect TEL line auto select then press the OK button The current telephone line type is displayed Note If you do not need to change the telephone line type press the FAX button to return to the Fax sta...

Страница 492: ...ernal device jack of this machine For details on how to connect the telephone or the answering machine to the machine Basic Connection Setting the Receive Mode This section describes the procedure to...

Страница 493: ...to the machine depending on the type or settings of the telephone DRPD or Network switch When receiving voice calls with a telephone or answering machine connected to the machine and subscribing to a...

Страница 494: ...TEL priority mode If you want to specify the number of times the external device rings in TEL priority mode select Fax only mode for Receive mode set under FAX menu specify the number of times the ext...

Страница 495: ...detailed information on this service 1 Make sure that the machine is turned on 2 Press the FAX button The Fax standby screen is displayed 3 Press the Menu button The FAX menu screen is displayed 4 Us...

Страница 496: ...e D The registered recipient s name is printed when sending faxes E Page number Note You can print USER S DATA LIST to confirm the sender information you have registered Summary of Reports and Lists W...

Страница 497: ...standby screen Setting Daylight Saving Time Summer Time Some countries adopt the daylight saving time summer time system that shifts the clock time forward at certain periods of the year You can set...

Страница 498: ...move the cursor under the desired position use the Numeric buttons to enter the time in 24 hour format when summer time starts then press the OK button Precede single digits with a zero 8 Set the date...

Страница 499: ...x telephone number 1 Make sure that Unit TEL no registr is selected then press the OK button 2 Use the Numeric buttons to enter the unit fax telephone number 3 Press the OK button Note You can enter t...

Страница 500: ...xes Using the Operation Panel of the Machine Sending Faxes by Entering Fax Telephone Number Basic Resending Faxes Redialing a Busy Number Setting Items for Sending Faxes Sending Faxes Using Useful Fun...

Страница 501: ...ocuments on the platen glass or in the ADF Important When sending a double sided document load the document on the platen glass Double sided documents cannot be automatically scanned and sent from the...

Страница 502: ...the confirmation screen asking you if you load the next document is displayed To send the scanned document press the OK button to start sending it Note To send two or more pages follow the message to...

Страница 503: ...g You can enable or disable automatic redialing If you enable automatic redialing you can specify the maximum number of redial attempts and the length of time the machine waits between redial attempts...

Страница 504: ...olor transmission is available only when the recipient s fax machine supports color faxing Note For manual redialing the machine memorizes up to 10 recent recipients dialed by entering the fax telepho...

Страница 505: ...ss the OK button The button decreases the scan contrast and the button increases the scan contrast By pressing the OK button the LCD returns to the FAX TX settings screen 5 Use the button to select Sc...

Страница 506: ...in the same resolution 200 x 200 dpi The image quality compression rate is determined by which scan resolution is selected except that Extra fine and Photo provide the same image quality 7 Press the O...

Страница 507: ...ions Sending a Fax after Speaking on Telephone Sending a Fax to the Registered Recipient Sending the Same Document to Several Recipients Sequential Broadcasting Preventing Mistransmission of Faxes Usi...

Страница 508: ...ne Number To speak to the recipient before sending a fax you need to connect a telephone to the machine For details on how to connect the telephone to the machine Basic Connection Note For details on...

Страница 509: ...et Note To cancel a fax transmission press the Stop button To cancel a fax transmission while it is in progress press the Stop button then follow the instructions on the LCD If documents remain in the...

Страница 510: ...lephone Number 1 Make sure that the machine is turned on 2 Press the FAX button The Fax standby screen is displayed 3 Load documents on the platen glass or in the ADF 4 Adjust the scan contrast and re...

Страница 511: ...cancel a fax transmission while it is in progress press the Stop button then follow the instructions on the LCD If documents remain in the ADF after the Stop button is pressed while scanning is in pro...

Страница 512: ...by one after speaking on the telephone Sending a Fax after Speaking on Telephone Note If you frequently send documents to the same group of recipients you can group these numbers for group dialing Thi...

Страница 513: ...ients If you want to add the recipient further repeat the same procedure Note When Broadcasting is displayed you can review the numbers you have entered by pressing the button Pressing the Back button...

Страница 514: ...nding Faxes after Dialing Twice Fax Number Re entry Set FAX no re entry to ON following the procedure below 1 Make sure that the machine is turned on 2 Press the Setup button The Setup menu screen is...

Страница 515: ...ct Security control then press the OK button 5 Use the button to select Check RX FAX info then press the OK button 6 Use the button to select ON then press the OK button Important Transmission will be...

Страница 516: ...ntrol under Fax settings is set to Enable Security control For details on the basic sending operations Sending Faxes by Entering Fax Telephone Number 1 Make sure that the machine is turned on 2 Press...

Страница 517: ...for black white transmission Important Color transmission is available only when the recipient s fax machine supports color faxing Note To cancel a fax transmission press the Stop button To cancel a f...

Страница 518: ...Registering Recipients Registering Recipients Using the Operation Panel of the Machine Registering Recipients Using Speed Dial Utility 518...

Страница 519: ...u can send the same document to all the registered recipients in the group Registering Recipients in Group Dial You can register up to 100 recipients in total of individual recipients and group dials...

Страница 520: ...umber then press the OK button Note If you already registered the recipient the fax telephone number is displayed next to the ID number If you already registered the group dial Not available is displa...

Страница 521: ...played 1 Use the Numeric buttons to enter the fax telephone number you want to register 2 Press the OK button The fax telephone number is registered to the machine and the screen to enter the recipien...

Страница 522: ...d name select an unregistered ID number and operate in the same procedure To return to the Fax standby screen press the FAX button You can check the recipient s numbers and names you have registered b...

Страница 523: ...n The screen to select an ID number is displayed 7 Use the button or the Numeric buttons to select an unregistered ID number then press the OK button Note If you already registered the recipient Not a...

Страница 524: ...ID number and name registered to the group dial by using the button 9 Press the OK button after finishing registering the member you want to register to the group dial The screen to enter the group n...

Страница 525: ...he recipient s fax telephone number then press the OK button From call log OUT is selected as the registration method The screen to select the fax telephone number from the outgoing call logs is displ...

Страница 526: ...and Symbols To change a group dial 1 Use the button to select Group dial then press the OK button 2 Use the button or the Numeric buttons to select an ID number of group dial to change then press the...

Страница 527: ...ient s information 1 Use the button to select Recipient then press the OK button 2 Use the button or the Numeric buttons to select an ID number of group dial to delete then press the OK button 3 Use t...

Страница 528: ...t Print reports lists then press the OK button 6 Use the button to select Directory list then press the OK button 7 Use the button to select an item to print then press the OK button If you selected R...

Страница 529: ...asons it is recommended that you backup the registered data on the computer using Speed Dial Utility Starting Up Speed Dial Utility Speed Dial Utility Dialog Saving Registered Information on the Machi...

Страница 530: ...the machine is in operation or when the computer is in sleep or standby mode If your machine is compatible with LAN connection make sure that the machine is connected to the computer with LAN connect...

Страница 531: ...istered information for editing Choose one item from TEL Number Registration User Information Setting and Rejected Number Setting 4 Registered information list Displays the registered information sele...

Страница 532: ...gistered or edited using Speed Dial Utility is neither saved on the computer nor registered on the machine 9 Save to PC Saves information edited using Speed Dial Utility on the computer 10 Register to...

Страница 533: ...ephone number group dial user s name user s fax telephone number or rejected numbers that registered on the machine to the computer 1 Start up Speed Dial Utility 2 Select the machine from the Printer...

Страница 534: ...r Registration from Setting Item List The list of registered fax telephone numbers is displayed 4 Select an unoccupied code from the list then click Edit The Individual or Group Selection dialog is di...

Страница 535: ...e registered information on the computer 1 Click Save to PC 2 Enter the file name on the displayed screen then click Save To register the registered information to the machine 1 Click Register to Prin...

Страница 536: ...s 3 Click TEL Number Registration from Setting Item List The list of registered fax telephone numbers is displayed 4 Select a code to change from the list then click Edit If an individual fax telephon...

Страница 537: ...dited information on the computer 1 Click Save to PC 2 Enter the file name on the displayed screen then click Save To register the edited information to the machine 1 Click Register to Printer 2 Confi...

Страница 538: ...The list of registered fax telephone numbers is displayed 4 Select a code to delete from the list then click Delete The selected fax telephone number is deleted To continue deleting fax telephone num...

Страница 539: ...information is displayed 4 Select an item to change then click Edit The User Information dialog is displayed 5 Enter the new user s name on User Name and new fax telephone number in TEL Number then c...

Страница 540: ...yed To register a rejected number 1 Select an unoccupied code from the list then click Edit 2 Enter the fax telephone number in the Rejected Number dialog then click OK To change a rejected number 1 S...

Страница 541: ...er and rejected numbers saved on the computer to the machine 1 Start up Speed Dial Utility 2 Select the machine from the Printer Name list box then click Display Printer Settings 3 Click Load from PC...

Страница 542: ...ed Dial Utility 1 Select Applications from the Go menu of Finder double click Canon Utilities Speed Dial Utility then drag the Speed Dial Utility icon into the trash Note To reinstall Speed Dial Utili...

Страница 543: ...Receiving Faxes Receiving Faxes Changing the Paper Settings Memory Reception Receiving Faxes Using Useful Functions 543...

Страница 544: ...e Mode 4 Load paper Load the sheets of plain paper 5 Specify the paper settings as necessary Changing the Paper Settings This completes the preparation for receiving fax When a fax is received it is p...

Страница 545: ...ng picked up The number of times to ring the telephone until switching to fax reception can be changed Set the machine to enable you to initiate fax reception from a connected telephone remote recepti...

Страница 546: ...e advanced setting is set to ON you must answer an incoming call by picking up the handset within the time specified in RX start time Otherwise the machine will switch to fax reception When Fax only m...

Страница 547: ...ttern the telephone will continue ringing Pick up the handset and talk on the telephone Note To use this feature you need to subscribe to a compatible service provided by your telephone company For DR...

Страница 548: ...machine s memory and the error message for no paper is displayed on the LCD In this case load paper and press the OK button You can also press the Stop button to close the message and print the stored...

Страница 549: ...indicates the current setting Page size Select the page size from A4 Letter LTR or Legal Note Some of page sizes are not available depending on the country or region of purchase Media type The paper t...

Страница 550: ...ts in Auto print settings under Fax settings Auto print settings An error has occurred on the machine If you select Print for Received documents in Auto print settings under Fax settings a received fa...

Страница 551: ...to resume printing of the fax Note The machine can store up to max 50 pages max 20 documents of faxes in the machine s memory When using ITU T No 1 chart Standard mode If the machine s memory becomes...

Страница 552: ...Receiving Faxes Using Useful Functions Remote Reception Rejecting Fax Reception Using the Caller ID Service to Reject Calls 552...

Страница 553: ...hone to tone dialing For details on how to switch to tone dialing refer to your telephone s instruction manual If you have an answering machine connected to the machine that can carry out remote contr...

Страница 554: ...ect ON then press the OK button 7 Use the button to select the fax rejection condition then press the OK button No sender info Rejects faxes with no caller identification Not in directory Rejects faxe...

Страница 555: ...available depending on the country or region of purchase Direct entry When you select this registration method the screen to register the fax telephone number is displayed Use the Numeric buttons to e...

Страница 556: ...You can register the rejected number in Rejected numbers in TEL no registration under Fax settings 556...

Страница 557: ...ction then press the OK button 6 Use the button to select Subscribed then press the OK button You can now perform settings for Caller rejection 7 Use the button to select whether to reject a phone cal...

Страница 558: ...Other Useful Fax Functions Using the Information Services Transmission Reception of Faxes Using ECM Document Stored in Machine s Memory Summary of Reports and Lists 558...

Страница 559: ...o Enable Security control 1 Make sure that the machine is turned on 2 Press the FAX button The Fax standby screen is displayed 3 Press the Color button or the Black button 4 Use the Numeric buttons to...

Страница 560: ...h the message 7 Press the Stop button to finish using the service Dialing by Using the Telephone Connected to the Machine 1 Make sure that the machine is turned on 2 Press the FAX button The Fax stand...

Страница 561: ...ax Note If the sender s or recipient s fax machine is not compatible with ECM the fax will be sent received without automatic error correction To receive color faxes make sure that ECM RX in Adv commu...

Страница 562: ...der Fax settings You pressed the Stop button to cancel printing of a received fax Important If you unplug the power cord of the machine all faxes stored in the machine s memory are deleted For details...

Страница 563: ...int menu then press the OK button You can select the following print menus Print memory list You can print a list of the documents in the machine s memory MEMORY LIST MEMORY LIST shows the transaction...

Страница 564: ...screen to confirm whether to delete the printed document in the machine s memory is displayed If you select Yes using the button and press the OK button the printed document in the machine s memory is...

Страница 565: ...d in the machine s memory No documents in memory is displayed on the LCD 5 Use the button to select a delete menu then press the OK button You can select the following delete menus Del specified doc Y...

Страница 566: ...K button The specified document will be deleted from machine s memory Note If there is not the specified document in the machine s memory No document is displayed and the machine returns to the previo...

Страница 567: ...and group dial For details on the procedure to print see Printing Report or List USER S DATA LIST Lists the current settings of the machine and the registered sender information For details on the pro...

Страница 568: ...rinted after each fax reception At the time of purchase the machine is set so that RX REPORT is not printed at all You can set the machine to print RX REPORT each time it receives a document or only w...

Страница 569: ...ENT TELEPHONE NUMBER LIST in numerical order If you select Group dial the machine prints GROUP DIAL TELEPHONE NO LIST When you select an item other than Directory list Press the OK button The machine...

Страница 570: ...formation did not match the dialed number This message is displayed when Check RX FAX info in Security control under Fax settings is set to ON For details see Sending Faxes after Checking Information...

Страница 571: ...lete contents in memory then ask the sender to resend the fax See Document Stored in Machine s Memory 046 Reception has been rejected due to the specified fax rejection condition Reception has been re...

Страница 572: ...Cannot Send a Fax Cannot Receive a Fax Cannot Print a Fax List of Support Code for Error Search Each Function Problems with Network Communication Problems while Printing Scanning from Smartphone Table...

Страница 573: ...Problems with Network Communication Cannot Detect a Machine on a Network Problems with the Machine while Using with Network Other Problems with Network 573...

Страница 574: ...Cannot Detect a Machine on a Network Cannot Detect the Machine when Setting Up Network Communication The Machine Cannot Be Detected in the Wireless LAN 574...

Страница 575: ...redetecting the machine Cannot Detect the Machine during Wireless LAN Setup Check 1 Important If the machine cannot be detected while you are setting up the network communication using a USB cable th...

Страница 576: ...he network device it may take some time until ready for use After a while just turning on the machine or the network device click Redetect on the Check Printer Settings screen When the machine is dete...

Страница 577: ...s not displayed The wireless LAN setting of the machine is disabled Enable the wireless LAN setting of the machine After enabling the wireless LAN setting click Back to Top on the Check Printer Settin...

Страница 578: ...mporarily then click Redetect on the Check Printer Settings screen When the machine is detected follow the instructions on the screen to continue to set up the network communication If the machine can...

Страница 579: ...g to access the network appears on the computer set the security software to allow access When the message does not appear on your computer Cancel to set up then set the security software to allow Can...

Страница 580: ...g or DHCP function Make sure that the radio channel of the wireless router and that assigned to the machine are the same For details on how to check the settings of the wireless router refer to the in...

Страница 581: ...een different rooms or floors is generally poor Adjust the location of the machine and the wireless router Make sure that there is no source of radio wave interference near the machine or the wireless...

Страница 582: ...struction manual provided with the wireless router or contact its manufacturer to check the wireless router settings and then modify the machine settings How to Set an Encryption Key Check7 Make sure...

Страница 583: ...grams that switch the network environment check their settings Some programs will enable a firewall by default Check12 When using a router connect the machine and computer to the LAN side same network...

Страница 584: ...e Machine Stopped Working Suddenly Forgot a Wireless Router Name SSID or a Network Key The Administrator Password Set to the Machine Was Forgotten Cannot Use the Machine on Replacing a Wireless Router...

Страница 585: ...s router using IJ Network Tool Check3 Make sure that the machine is not placed far away from the wireless router The wireless router is located indoors within the effective range for wireless communic...

Страница 586: ...segment Check12 When the machine is connected to an AirPort Base Station via a LAN use alphanumeric characters for the name of the network SSID If the problem is not resolved perform setup again acco...

Страница 587: ...ource as possible Check8 Are you trying to connect 6 devices or more You can connect up to 5 devices using the access point mode Cannot Print or Scan from a Computer Connected to the Network Check1 Ma...

Страница 588: ...settings of the wireless router using IJ Network Tool When using WEP The key length key format the key to use one of 1 to 4 and the authentication method must match among the wireless router the mach...

Страница 589: ...the machine and the computer Enter the passphrase configured on the wireless router a sequence of between 8 and 63 alphanumeric characters or a 64 character hexadecimal number Either TKIP basic encry...

Страница 590: ...chine Was Forgotten Initialize the machine settings Select All data then the administrator password returns to the default Reset setting After initializing the machine settings perform setup according...

Страница 591: ...reless router or contact its manufacturer to confirm the wireless router setting Make sure that the computer and the wireless router can communicate with each other under this setting Check2 If you ar...

Страница 592: ...chine cannot communicate with the computer after the encryption type of the machine was switched make sure that encryption types for the computer and the wireless router matches that set to the machin...

Страница 593: ...rooms or floors is generally poor The metal concrete or timber including the metallic material mud wall or insulator may interrupt a wireless communication If the machine cannot communicate with the c...

Страница 594: ...Other Problems with Network The Message Is Displayed on the Computer Screen during Setup Checking Information about the Network How to Restore the Machine s Network Settings to Factory Default 594...

Страница 595: ...et Note An administrator password is already specified for the machine at the time of purchase For details About the Administrator Password For improving security we recommend to change the administra...

Страница 596: ...The machine can still be used so continue the setup procedure to complete it Important If you connect to a network that is not protected with security measures there is a risk of disclosing data such...

Страница 597: ...Tool select Network Information on the View menu Canon IJ Network Tool Menus Checking the IP Address or the MAC Address of the Computer To check the IP address or MAC address assigned to the computer...

Страница 598: ...l 64 time 3 394 ms 64 bytes from XXX XXX XXX XXX icmp_seq 1 ttl 64 time 1 786 ms 64 bytes from XXX XXX XXX XXX icmp_seq 2 ttl 64 time 1 739 ms XXX XXX XXX XXX ping statistics 3 packets transmitted 3 p...

Страница 599: ...twork settings on the machine and printing or scanning operation from a computer over network becomes impossible To use the machine over network perform setup according to the instructions on our webs...

Страница 600: ...Problems while Printing Scanning from Smartphone Tablet Cannot Print Scan from Smartphone Tablet 600...

Страница 601: ...settings set to LAN inactive or Access point mode Select Wireless LAN Check3 Are the network settings of the machine identical with those of the wireless router Make sure that the network settings of...

Страница 602: ...machine in the access point mode check the following Check1 Make sure that the machine is turned on Check2 Is Change LAN in LAN settings under Device settings set to LAN inactive or Wireless LAN Sele...

Страница 603: ...s station is placed nearby the device may cause interference Place the wireless station as far away from the interference source as possible Check9 Are you trying to connect 6 smartphones tablets or m...

Страница 604: ...lems with Printing Printing Does Not Start Paper Jams Print Results Not Satisfactory Ink Is Not Ejected Paper Does Not Feed Properly No Paper Error Occurs Copying Printing Stops Before It Is Completed...

Страница 605: ...nd try printing again If printing starts normally there is a problem with the relay device Consult the reseller of the relay device for details There could also be a problem with the USB cable Replace...

Страница 606: ...me is selected in the Print dialog The machine will not print properly if you are using a printer driver for a different printer Make sure that your machine s name is selected in Printer in the Print...

Страница 607: ...the computer screen The screen differs depending on the OS you are using When a Support Code and a message are displayed on the LCD For details on how to remove the jammed paper refer to List of Suppo...

Страница 608: ...n panel on the machine Setting Items for Copying To print from a computer Confirm by using the printer driver Printing with Easy Setup Check2 Make sure that the appropriate print quality is selected r...

Страница 609: ...void high temperatures high humidity and direct sunlight and store or display indoors at room temperature and normal humidity To avoid direct exposure to air we recommend that you store the paper in a...

Страница 610: ...Cannot Print to End of Job Check Is the space of your computer s hard disk sufficient Delete unnecessary files to free disk space 610...

Страница 611: ...No Printing Results Printing Is Blurred Colors Are Wrong White Streaks No Printing Results Printing Is Blurred Colors Are Wrong 611...

Страница 612: ...ved after performing the Print Head Deep Cleaning turn off the machine and perform another Print Head Deep Cleaning after 24 hours When you turn the machine off do not unplug it from the power supply...

Страница 613: ...irty black streaks appear on the paper as shown below Check7 Check that the original is loaded correctly on the platen glass or in the ADF Loading Originals Check8 Is the original document is loaded w...

Страница 614: ...unplug it from the power supply If the problem is not resolved after performing the Print Head Deep Cleaning twice Ink may have run out Replace the FINE cartridge Check2 When a FINE cartridge runs ou...

Страница 615: ...ory adjust the print head position Aligning the Print Head Note If the problem is not resolved after performing the Print Head Alignment perform Print Head Alignment manually referring to Aligning the...

Страница 616: ...int images with high intensity the paper may absorb too much ink and become wavy causing paper abrasion When printing from your computer You can confirm the intensity using the printer driver Adjustin...

Страница 617: ...re that the paper you are using is suitable for Borderless Printing If the paper you are using is not suitable for Borderless Printing the print quality may be reduced at the top and bottom edges of t...

Страница 618: ...nt result C Printing side We recommend printing paper that has been curled outward one sheet at a time Check4 Adjust the setting to prevent paper abrasion Adjusting the setting to prevent paper abrasi...

Страница 619: ...Options in the pop up menu 3 Drag the Intensity slide bar to set the intensity When copying Setting Items for Copying Check6 Is printing performed beyond the recommended printing area If you are prin...

Страница 620: ...chine from stains set the paper size correctly Check10 Set the time to dry the printed surface longer Doing so gives the printed surface enough time to dry so that paper smudged and scratched are prev...

Страница 621: ...s Print Results Not Satisfactory Check2 Perform the Bottom Plate Cleaning to clean the inside of the machine Cleaning the Inside of the Machine Bottom Plate Cleaning Note When performing borderless pr...

Страница 622: ...ectly according to the paper you loaded Print Results Not Satisfactory Note The direction of the vertical line pattern may vary depending on the image data or the print setting This machine performs a...

Страница 623: ...Pattern to determine whether the ink ejects properly from the print head nozzles Refer to When Printing Becomes Faint or Colors Are Incorrect for the Nozzle Check Pattern printing Print Head Cleaning...

Страница 624: ...it from the power supply If the problem is not resolved after performing the Print Head Deep Cleaning twice Ink may have run out Replace the FINE cartridge Check3 Perform Print Head Alignment Alignin...

Страница 625: ...ther the ink ejects properly from the print head nozzles Refer to When Printing Becomes Faint or Colors Are Incorrect for the Nozzle Check Pattern printing Print Head Cleaning and Print Head Deep Clea...

Страница 626: ...load limit Always load the paper in portrait orientation regardless of the printing orientation When you load the paper load the paper with the print side facing DOWN and slide the paper guides to ali...

Страница 627: ...e the setting is applied from the next time To set by using the operation panel Press the Setup button select Device settings and Output settings in this order and then set Prevent double feed to ON C...

Страница 628: ...e Note If you are printing a document with a large printing area or printing multiple copies of a document printing may pause to allow the ink to dry Check3 Has the machine been printing continuously...

Страница 629: ...Problems with Faxing Problems Sending Faxes Problems Receiving Faxes Cannot Send a Fax Clearly Telephone Problems 629...

Страница 630: ...Problems Sending Faxes Cannot Send a Fax Cannot Perform Sequential Broadcasting by Redialing or Cannot Dial by Entering the Numbers Errors Often Occur When You Send a Fax 630...

Страница 631: ...g the Power Cord Note If the faxes stored in the machine s memory are deleted by a power failure or unplugging the power cord the list of the faxes deleted from the machine s memory MEMORY CLEAR REPOR...

Страница 632: ...Faxing Is Displayed on the Fax Standby Screen Print ACTIVITY REPORT and check for an error Summary of Reports and Lists Check9 Is the document loaded properly Remove the document then reload it on the...

Страница 633: ...eady dialed a number by entering the fax telephone numbers You can dial one recipient by selecting from the redial history or by entering the fax telephone numbers as the recipient of sequential broad...

Страница 634: ...e condition or the connection If the telephone line or connection is poor reducing the transmission start speed may correct the error Reduce the transmission start speed on TX start speed in Adv commu...

Страница 635: ...Faxes Cannot Receive a Fax Cannot Print a Fax Machine Does Not Switch Automatically between Voice and Fax Calls Quality of Received Fax is Poor Cannot Receive a Color Fax Errors Often Occur When You...

Страница 636: ...tails on how to unplug the power cord refer to Notice for Unplugging the Power Cord Note If the faxes stored in the machine s memory are deleted by a power failure or unplugging the power cord the lis...

Страница 637: ...a received fax even if the ink has run out Set Print when no ink in Auto print settings under Fax settings to Print However part or all of the fax may not be printed since the ink has run out Also th...

Страница 638: ...ce and fax calls Set the receive mode to TEL priority mode DRPD 1 or Network switch 2 If the receive mode is TEL priority mode and an answering machine is connected to the machine check whether a prop...

Страница 639: ...d ask the sender to check whether the scanning area of the fax machine is dirty Check4 Is ECM transmission reception enabled although the line connection is poor or is the sender s fax machine compati...

Страница 640: ...RX in Adv communication in Adv FAX settings under Fax settings the machine cannot receive color faxes The machine will disconnect the telephone line or receive color faxes in black white according to...

Страница 641: ...poor reducing the reception start speed may correct the error Reduce the reception start speed on RX start speed in Adv communication in Adv FAX settings under Fax settings Adv FAX settings Check2 Is...

Страница 642: ...or the scan contrast setting suitable for the document On the LCD select an image quality setting and a scan contrast setting that are suitable for the document Setting Items for Sending Faxes Check4...

Страница 643: ...Telephone Problems Cannot Dial Telephone Disconnects During a Call 643...

Страница 644: ...y Check that the telephone line cable is connected correctly Basic Connection Check2 Is the telephone line type of the machine or the external device set correctly Check the telephone line type settin...

Страница 645: ...device such as an external telephone an answering machine or a computer modem connected correctly Check that the telephone line cable and the telephone or a peripheral device such as an external telep...

Страница 646: ...Problems with Scanning Problems with Scanning Scan Results Not Satisfactory 646...

Страница 647: ...r Message Appears and the Scanner Driver Screen Does Not Appear Cannot Scan Multiple Items at One Time Cannot Scan Properly with Auto Scan Slow Scanning Speed There is not enough memory Message Is Dis...

Страница 648: ...ner or printer is turned on Check 2 Connect the USB cable to a different USB port on the computer Check 3 If the USB cable is connected to a USB hub remove it from the USB hub and connect it to a USB...

Страница 649: ...anner or printer on the application s menu Note The operation may differ depending on the application Check 3 Make sure that the application supports the ICA Image Capture Architecture driver You cann...

Страница 650: ...hub remove it from the USB hub and connect it to a USB port on the computer Check 5 Make sure that the scanner driver is installed If not installed install the scanner driver from the web page Check...

Страница 651: ...k 1 Make sure that the items are placed correctly Placing Items When Scanning from a Computer Check 2 Check if you can properly scan one item Some applications do not support multiple image scanning I...

Страница 652: ...Make sure that the items are placed correctly Placing Items When Scanning from a Computer Check 2 Multiple item scanning may not be supported Some applications do not support multiple image scanning I...

Страница 653: ...olution Check 2 Set Fading Correction Grain Correction etc to None Refer to Image Corrections and Color Adjustments for details Check 3 In IJ Scan Utility deselect the Correct slanted text document De...

Страница 654: ...There is not enough memory Message Is Displayed Check 1 Exit other applications and try again Check 2 Reduce the resolution or output size and scan again Resolution 654...

Страница 655: ...essage may appear if there is not enough hard disk space to scan and save when the image size is too large such as when scanning a large item at high resolution Check 3 In Folder to Save Temporary Fil...

Страница 656: ...format is not supported by the application scan the image again and select a popular data format such as JPEG when saving it Refer to the application s manual for details If you have any questions co...

Страница 657: ...Image Is Surrounded by Extra White Areas Cannot Scan at the Correct Size Position or Size of the Image Cannot be Detected Correctly When Scanning from the Operation Panel Item Is Placed Correctly but...

Страница 658: ...s Document Scan Dialog Settings Custom Scan Dialog Settings Scan and Stitch Dialog Click Driver in the IJ Scan Utility main screen then set one of the following settings Select Magazine for Image Adju...

Страница 659: ...hite Areas Check Specify the scan area Manually specify the scan area when there are white margins or unwanted areas along the edges of the scanned images in the Image Stitch window Adjusting Cropping...

Страница 660: ...Cannot Scan at the Correct Size Check Make sure that the items are placed correctly Placing Items When Scanning from a Computer 660...

Страница 661: ...scanned If you cannot scan properly by automatically detecting the item type specify the item type and size When Scanning from the Operation Panel Refer to Setting Items for Scanning Using the Operat...

Страница 662: ...the Scanned Image Is Slanted Check When Document or Magazine is selected for Select Source deselect the Correct slanted text document checkbox and scan the item again Settings Document Scan Dialog Set...

Страница 663: ...tion Refer to the application s manual for details If you have any questions contact the manufacturer of the application Check 2 Click Driver in the IJ Scan Utility main screen then change the resolut...

Страница 664: ...ns Off Unintentionally Cannot Connect to Computer with a USB Cable Properly Cannot Communicate with the Machine with USB Connection LCD Cannot Be Seen At All An Unintended Language Is Displayed on the...

Страница 665: ...is securely plugged into the power cord connector of the machine then turn it back on Check3 Unplug the machine from the power supply then plug the machine back in and turn the machine back on after...

Страница 666: ...ecified if the setting to turn the unit off automatically is enabled If you do not want the machine to turn off automatically open Canon IJ Printer Utility select Power Settings in the pop up menu the...

Страница 667: ...Does the USB port on your computer support Hi Speed USB connection Does the USB cable or the USB hub support Hi Speed USB connection Be sure to use a certified Hi Speed USB cable We recommend that th...

Страница 668: ...achine is turned on Check2 Make sure that the USB cable is connected properly See Connecting the Machine to the Computer Using a USB Cable to connect the USB cable properly Check3 Do not start up IJ N...

Страница 669: ...he POWER lamp is off The machine is not powered on Connect the power cord and press the ON button If the POWER lamp is lit The LCD may be in the screen saver mode Press a button other than the ON butt...

Страница 670: ...5 seconds 2 Press the button twice then press the OK button 3 Press the button twice then press the OK button 4 Press the button repeatedly to display the rightmost menu 5 Press the button 3 times th...

Страница 671: ...Support Code for Error Check3 Has the paper output cover been left open for 10 minutes or longer If the paper output cover is left open for more than 10 minutes the FINE cartridge holder moves to the...

Страница 672: ...Problems with Installation Downloading Cannot Install the MP Drivers Uninstalling IJ Network Tool 672...

Страница 673: ...Cannot Install the MP Drivers Download the driver from the support page of our website then reinstall it 673...

Страница 674: ...rom the computer However you cannot change the network settings over network 1 Select Applications from the Go menu of Finder double click Canon Utilities IJ Network Tool drag the Canon IJ Network Too...

Страница 675: ...About Errors Messages Displayed If an Error Occurs A Message for Faxing Is Displayed on the Fax Standby Screen A Message Is Displayed 675...

Страница 676: ...mber is displayed on the computer screen or the LCD When a Support Code and a message are displayed on the computer screen The screen differs depending on the OS you are using When a Support Code and...

Страница 677: ...ith a modular plug may not be plugged in properly Make sure that the cable is plugged in properly and resend the fax after a while If you still cannot send the fax select OFF for Dial tone detect in A...

Страница 678: ...dialing again after waiting for a moment Resending Faxes Redialing a Busy Number The fax telephone number dialed is incorrect Check the fax telephone number and dial again The recipient s fax machine...

Страница 679: ...x settings For details see Rejecting Fax Reception Waiting for report If the machine receives a fax under one of the following conditions the machine will not be able to print the reports When the pro...

Страница 680: ...in the paper size setting Load the same size of paper as that specified in the paper size setting then press the OK button Data error Press OK A power failure has occurred or the power cord has been...

Страница 681: ...the on screen instructions The printer usage information will be sent via the Internet If you have followed the on screen instructions the information will be sent automatically from the second time o...

Страница 682: ...nfirmation screen every time the printer usage information is sent or to resume surveying follow the procedure below 1 Select Applications from the Go menu of Finder and double click the Canon Utiliti...

Страница 683: ...ly Unplug the power cord from the outlet and contact the seller or the service center Never attempt to repair or disassemble the machine yourself Attempts by customers to repair or take apart the mach...

Страница 684: ...port Code Appears on the LCD and the Computer Screen 1000 to 1ZZZ 1003 1200 1203 1250 1300 1303 1401 1403 1485 1682 1684 1686 1688 168A 1702 1703 1704 1705 1712 1713 1714 1715 1871 1890 2000 to 2ZZZ 2...

Страница 685: ...A000 to ZZZZ B201 B202 B203 B204 About the support code for paper jam you can also refer to List of Support Code for Error When Paper Is Jammed 685...

Страница 686: ...ou can see the jammed paper at the paper output slot 1300 If you cannot see the jammed paper at the paper output slot 1303 If the paper tears and you cannot remove it from the paper output slot or fro...

Страница 687: ...ly Hold the paper with your hands then pull the paper out slowly not to tear it Note If you cannot pull the paper out turn the machine off and turn it back on The paper may be ejected automatically If...

Страница 688: ...able paper for printing and are loading it correctly We recommend you use paper other than A5 sized one to print documents with photos or graphics otherwise the printout may curl and cause paper exit...

Страница 689: ...rning the machine off If you unplug the power cord all the faxes stored in the machine s memory are deleted Note If you need to turn off the machine to remove jammed paper during printing press the St...

Страница 690: ...ake back the machine in original position then remove the paper from inside the machine Paper Is Jammed inside the Machine 6 Close the transport unit Note After you close the transport unit take back...

Страница 691: ...stored in the machine s memory are deleted If the original remains in the ADF by pressing the Stop button while the machine is scanning the document If you press the Stop button during scanning then t...

Страница 692: ...n the media type or your environment such as when the temperature and humidity are either too high or too low In this case reduce the number of document pages to approximately half of the loading capa...

Страница 693: ...ine or if the document jam error continues after removing the document contact the service center Note The document may not feed properly depending on the media type or your environment such as when t...

Страница 694: ...eceiving all the faxes Do not unplug the power cord when turning the machine off If you unplug the power cord all the faxes stored in the machine s memory are deleted Note If you need to turn off the...

Страница 695: ...to remove the paper When you move the FINE cartridge holder hold the FINE cartridge holder and slide it slowly to the right edge or the left edge 4 Hold the jammed paper with your hands If the paper...

Страница 696: ...t jobs in the queue are canceled Reprint if necessary Note When reloading the paper make sure that you are using suitable paper for printing and are loading it correctly If the message about paper jam...

Страница 697: ...In Other Cases Make sure of the following Check1 Are there any foreign objects around the paper output slot Check2 Is the paper curled Load the paper after correcting its curl 697...

Страница 698: ...ntil the leading edge touches the far end of the cassette After loading the paper push the cassette so that the mark on the cassette aligns with the front panel as illustrated below When the cassette...

Страница 699: ...1200 Cause The paper output cover is open Action Close the paper output cover and wait for a while Do not close it while you are replacing a FINE cartridge 699...

Страница 700: ...utput cover Press the machine s OK button to dismiss the error The machine ejects one blank sheet of paper and resumes printing from the next paper The machine will not reprint the page that was print...

Страница 701: ...1250 Cause The paper output tray is closed Action Open the paper output tray to resume printing 701...

Страница 702: ...1401 Cause The FINE cartridge is not installed Action Install the FINE cartridge If the error is not resolved the FINE cartridge may be damaged Contact the service center 702...

Страница 703: ...1403 Cause The FINE cartridge cannot be recognized Action Replace the FINE cartridge If the error is not resolved the FINE cartridge may be damaged Contact the service center 703...

Страница 704: ...artridge is not installed Action Printing cannot be executed because the ink cartridge is not compatible with this machine Install the appropriate ink cartridge If you want to cancel printing press th...

Страница 705: ...1682 Cause The FINE cartridge cannot be recognized Action Replace the FINE cartridge If the error is not resolved the FINE cartridge may be damaged Contact the service center 705...

Страница 706: ...nized Action Printing cannot be executed because the ink cartridge may not be installed properly or may not be compatible with this machine Install the appropriate ink cartridge If you want to cancel...

Страница 707: ...caused by continuation of printing under the ink out condition Note If the function for detecting the remaining ink level is disabled is displayed on the LCD Since the information contained in the fa...

Страница 708: ...ality is not satisfactory if printing is continued under the ink out condition Note If the function for detecting the remaining ink level is disabled is displayed on the LCD Since the information cont...

Страница 709: ...er output cover then remove the FINE cartridges Make sure that the FINE cartridge compatible with the machine is installed Then install the FINE cartridges again Push up the FINE cartridge until it cl...

Страница 710: ...1702 Cause The ink absorber is almost full Action Press the machine s OK button to continue printing Contact the service center 710...

Страница 711: ...1703 Cause The ink absorber is almost full Action Press the machine s OK button to continue printing Contact the service center 711...

Страница 712: ...1704 Cause The ink absorber is almost full Action Press the machine s OK button to continue printing Contact the service center 712...

Страница 713: ...1705 Cause The ink absorber is almost full Action Press the machine s OK button to continue printing Contact the service center 713...

Страница 714: ...1712 Cause The ink absorber is almost full Action Press the machine s OK button to continue printing Contact the service center 714...

Страница 715: ...1713 Cause The ink absorber is almost full Action Press the machine s OK button to continue printing Contact the service center 715...

Страница 716: ...1714 Cause The ink absorber is almost full Action Press the machine s OK button to continue printing Contact the service center 716...

Страница 717: ...1715 Cause The ink absorber is almost full Action Press the machine s OK button to continue printing Contact the service center 717...

Страница 718: ...cassette is inserted properly you hear an electric sound once Open the paper output tray then press the machine s OK button Note The cassette paper information registration screen is displayed after...

Страница 719: ...ction Open the paper output cover then confirm that the protective material or the tape does not remain attached to the FINE cartridge holder If you find the protective material or the tape remains at...

Страница 720: ...ils on the cassette paper information registering to the machine Paper setting for Printing Windows Paper setting for Printing Mac Paper setting for Printing Smartphone and so on If the paper settings...

Страница 721: ...the LCD Paper Settings on the Printer Driver and the Printer Media Type Windows Paper Settings on the Printer Driver and the Printer Media Type Mac Paper Settings on the Printer Driver and the Printe...

Страница 722: ...The machine starts printing or copying even though the paper settings for printing or copying and the cassette paper information registered to the machine are different 722...

Страница 723: ...r settings of the cassette is not complete Action If the following screen is displayed the paper settings of the cassette is not complete Press the machine s OK button to terminate the paper settings...

Страница 724: ...ccurred while scanning and the document is remained in the ADF Action Take the corresponding actions below When you copy press the OK button to dismiss the error and try to copy again When the documen...

Страница 725: ...2802 Cause No document in the ADF Action Press the OK button to resolve the error then operate again after loading documents 725...

Страница 726: ...he received fax or the unsent fax are stored in the machine s memory Turn the machine off after making sure that it has completed sending or receiving all the faxes Do not unplug the power cord when t...

Страница 727: ...n the media type or your environment such as when the temperature and humidity are either too high or too low In this case reduce the number of document pages to approximately half of the loading capa...

Страница 728: ...ine or if the document jam error continues after removing the document contact the service center Note The document may not feed properly depending on the media type or your environment such as when t...

Страница 729: ...aten glass Make sure the platen glass and the print head alignment sheet are not dirty Make sure the type and size of loaded paper is suitable for Automatic Print Head Alignment For Automatic Print He...

Страница 730: ...int head alignment sheet on the platen glass Load the print head alignment sheet with the printed side facing down and align the mark on the upper left corner of the sheet with the alignment mark 2 Cl...

Страница 731: ...ata cannot be printed Action When you print the contents on CREATIVE PARK PREMIUM confirm the message on the computer screen make sure that genuine Canon FINE cartridges are all installed properly the...

Страница 732: ...4103 Cause Cannot perform printing with the current print settings Action Press the machine s Stop button to cancel printing Then change the print settings and print again 732...

Страница 733: ...unplug the power cord of the machine from the power supply Plug the machine back in and turn the machine back on If the problem is not resolved contact the service center Important If you unplug the p...

Страница 734: ...unplug the power cord of the machine from the power supply Plug the machine back in and turn the machine back on If the problem is not resolved contact the service center Important If you unplug the p...

Страница 735: ...unplug the power cord of the machine from the power supply Plug the machine back in and turn the machine back on If the problem is not resolved contact the service center Important If you unplug the p...

Страница 736: ...that is preventing the FINE cartridge holder from moving If any remove the materials Confirm that the FINE cartridges are installed properly Push up the FINE cartridge until it clicks into place Afte...

Страница 737: ...unplug the power cord of the machine from the power supply Plug the machine back in and turn the machine back on If the problem is not resolved contact the service center Important If you unplug the p...

Страница 738: ...unplug the power cord of the machine from the power supply Plug the machine back in and turn the machine back on If the problem is not resolved contact the service center Important If you unplug the p...

Страница 739: ...5B02 Cause Printer error has occurred Action Contact the service center 739...

Страница 740: ...5B03 Cause Printer error has occurred Action Contact the service center 740...

Страница 741: ...5B04 Cause Printer error has occurred Action Contact the service center 741...

Страница 742: ...5B05 Cause Printer error has occurred Action Contact the service center 742...

Страница 743: ...5B12 Cause Printer error has occurred Action Contact the service center 743...

Страница 744: ...5B13 Cause Printer error has occurred Action Contact the service center 744...

Страница 745: ...5B14 Cause Printer error has occurred Action Contact the service center 745...

Страница 746: ...5B15 Cause Printer error has occurred Action Contact the service center 746...

Страница 747: ...unplug the power cord of the machine from the power supply Plug the machine back in and turn the machine back on If the problem is not resolved contact the service center Important If you unplug the p...

Страница 748: ...unplug the power cord of the machine from the power supply Plug the machine back in and turn the machine back on If the problem is not resolved contact the service center Important If you unplug the p...

Страница 749: ...unplug the power cord of the machine from the power supply Plug the machine back in and turn the machine back on If the problem is not resolved contact the service center Important If you unplug the p...

Страница 750: ...unplug the power cord of the machine from the power supply Plug the machine back in and turn the machine back on If the problem is not resolved contact the service center Important If you unplug the p...

Страница 751: ...unplug the power cord of the machine from the power supply Plug the machine back in and turn the machine back on If the problem is not resolved contact the service center Important If you unplug the p...

Страница 752: ...unplug the power cord of the machine from the power supply Plug the machine back in and turn the machine back on If the problem is not resolved contact the service center Important If you unplug the p...

Страница 753: ...unplug the power cord of the machine from the power supply Plug the machine back in and turn the machine back on If the problem is not resolved contact the service center Important If you unplug the p...

Страница 754: ...unplug the power cord of the machine from the power supply Plug the machine back in and turn the machine back on If the problem is not resolved contact the service center Important If you unplug the p...

Страница 755: ...unplug the power cord of the machine from the power supply Plug the machine back in and turn the machine back on If the problem is not resolved contact the service center Important If you unplug the p...

Страница 756: ...unplug the power cord of the machine from the power supply Plug the machine back in and turn the machine back on If the problem is not resolved contact the service center Important If you unplug the p...

Страница 757: ...unplug the power cord of the machine from the power supply Plug the machine back in and turn the machine back on If the problem is not resolved contact the service center Important If you unplug the p...

Страница 758: ...unplug the power cord of the machine from the power supply Plug the machine back in and turn the machine back on If the problem is not resolved contact the service center Important If you unplug the p...

Страница 759: ...unplug the power cord of the machine from the power supply Plug the machine back in and turn the machine back on If the problem is not resolved contact the service center Important If you unplug the p...

Страница 760: ...unplug the power cord of the machine from the power supply Plug the machine back in and turn the machine back on If the problem is not resolved contact the service center Important If you unplug the p...

Страница 761: ...unplug the power cord of the machine from the power supply Plug the machine back in and turn the machine back on If the problem is not resolved contact the service center Important If you unplug the p...

Страница 762: ...unplug the power cord of the machine from the power supply Plug the machine back in and turn the machine back on If the problem is not resolved contact the service center Important If you unplug the p...

Страница 763: ...unplug the power cord of the machine from the power supply Plug the machine back in and turn the machine back on If the problem is not resolved contact the service center Important If you unplug the p...

Страница 764: ...unplug the power cord of the machine from the power supply Plug the machine back in and turn the machine back on If the problem is not resolved contact the service center Important If you unplug the p...

Страница 765: ...unplug the power cord of the machine from the power supply Plug the machine back in and turn the machine back on If the problem is not resolved contact the service center Important If you unplug the p...

Страница 766: ...unplug the power cord of the machine from the power supply Plug the machine back in and turn the machine back on If the problem is not resolved contact the service center Important If you unplug the p...

Страница 767: ...unplug the power cord of the machine from the power supply Plug the machine back in and turn the machine back on If the problem is not resolved contact the service center Important If you unplug the p...

Страница 768: ...unplug the power cord of the machine from the power supply Plug the machine back in and turn the machine back on If the problem is not resolved contact the service center Important If you unplug the p...

Страница 769: ...unplug the power cord of the machine from the power supply Plug the machine back in and turn the machine back on If the problem is not resolved contact the service center Important If you unplug the p...

Страница 770: ...unplug the power cord of the machine from the power supply Plug the machine back in and turn the machine back on If the problem is not resolved contact the service center Important If you unplug the p...

Страница 771: ...unplug the power cord of the machine from the power supply Plug the machine back in and turn the machine back on If the problem is not resolved contact the service center Important If you unplug the p...

Страница 772: ...unplug the power cord of the machine from the power supply Plug the machine back in and turn the machine back on If the problem is not resolved contact the service center Important If you unplug the p...

Страница 773: ...e service center has occurred Action Turn off the machine and unplug the power cord of the machine from the power supply Contact the service center Important If you unplug the power cord all the faxes...

Страница 774: ...e service center has occurred Action Turn off the machine and unplug the power cord of the machine from the power supply Contact the service center Important If you unplug the power cord all the faxes...

Страница 775: ...e service center has occurred Action Turn off the machine and unplug the power cord of the machine from the power supply Contact the service center Important If you unplug the power cord all the faxes...

Страница 776: ...e service center has occurred Action Turn off the machine and unplug the power cord of the machine from the power supply Contact the service center Important If you unplug the power cord all the faxes...

Отзывы: